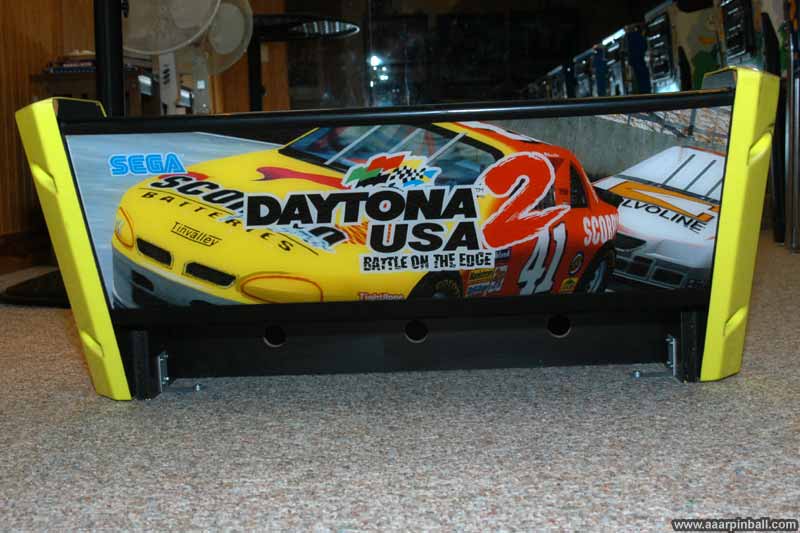
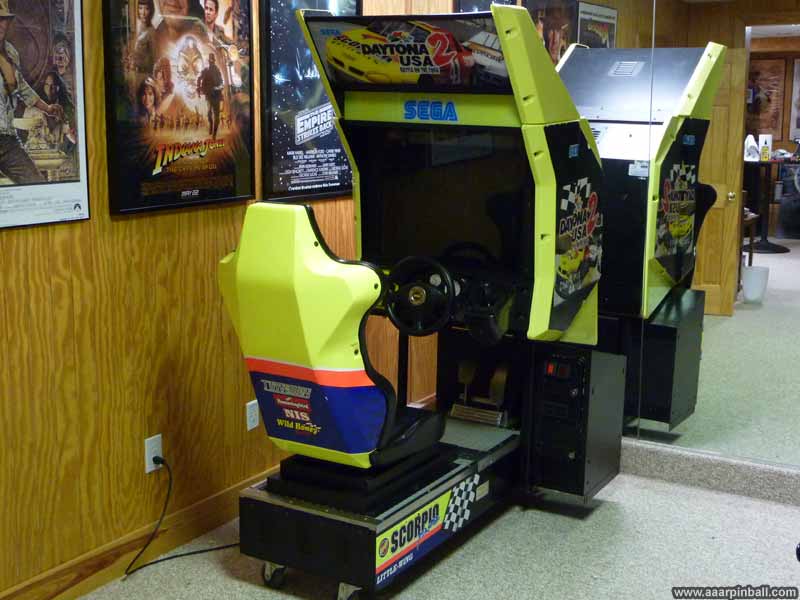
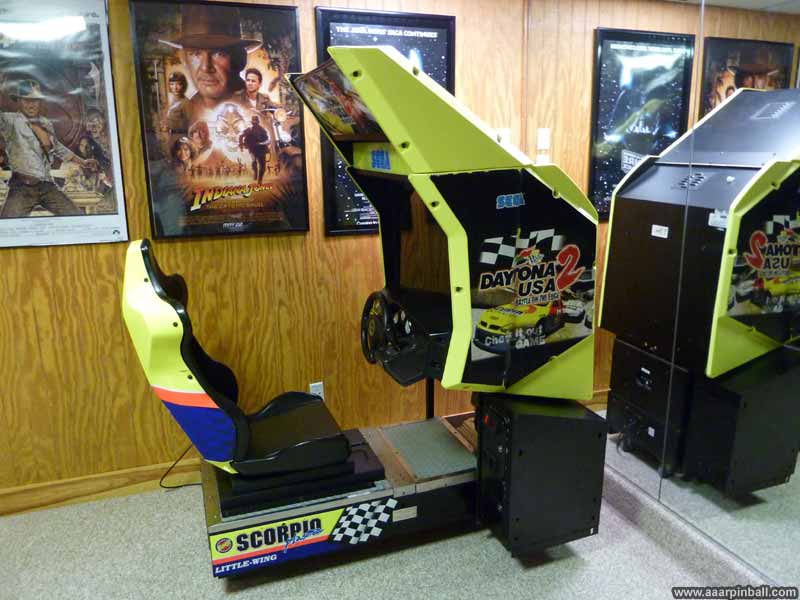
Sega Daytona USA 2 Battle on the Edge / Power Edition Video Arcade
Repairs, Restorations, Tweaks and Insights
Introduction
When I originally got the Daytona 2 it had the traditional Battle on the Edge roms. Sega released Power Edition roms about a year after Daytona 2 was released. I'm happy to say that I've acquired a set of the Power Edition roms and swapped them with the Battle on the Edge ones.
Daytona USA 2 Battle on the Edge and Power Edition Videos
Want to see a couple of videos from Daytona USA 2 BOTE? Click here to see Daytona USA 2 Videos.
Upgrading to the Daytona 2 Power Edition
The Sega Power Edition upgrade kit includes 41 roms (EPROMs/masked ROMs) and a security board. The BOTE security board must be swapped as well as the 41 roms. To upgrade from D2BOTE to D2PE, you need to access the boards in the cage. The cage is the name of the metal container that holds the board stack. Model 3 games, of which Daytona 2 is one, have several PCB boards. They stack on top of each other and create the board stack. A picture of the cage is shown below..
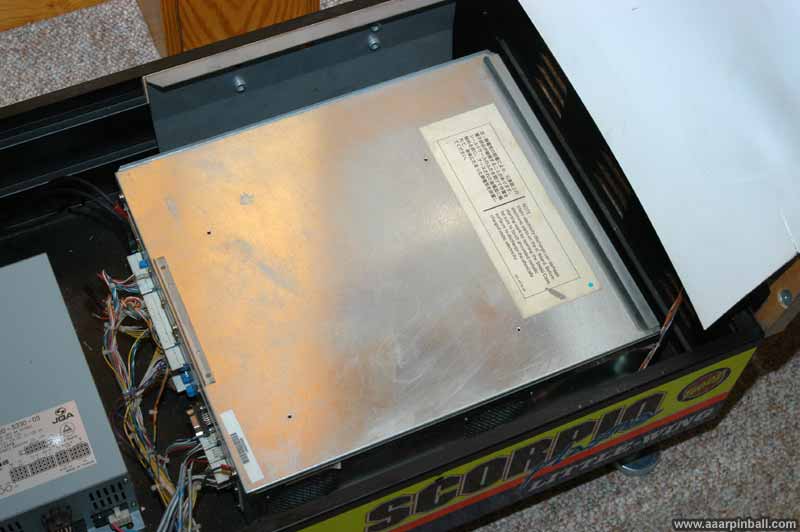
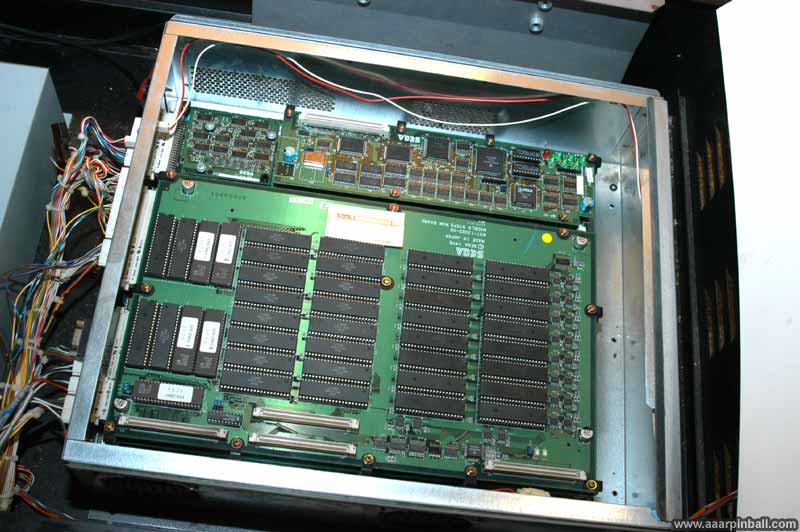
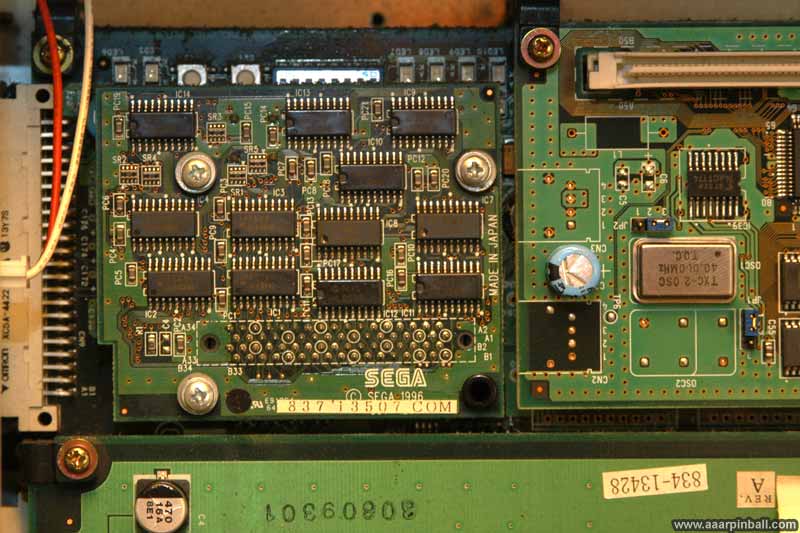
The image below shows the top of the board stack. The cover of the cage has been removed. Three PCBs are visible. The small one in the upper left is the BOTE security board. The large one on the bottom is the ROM PCB. The third, top middle to right, is the network PCB.
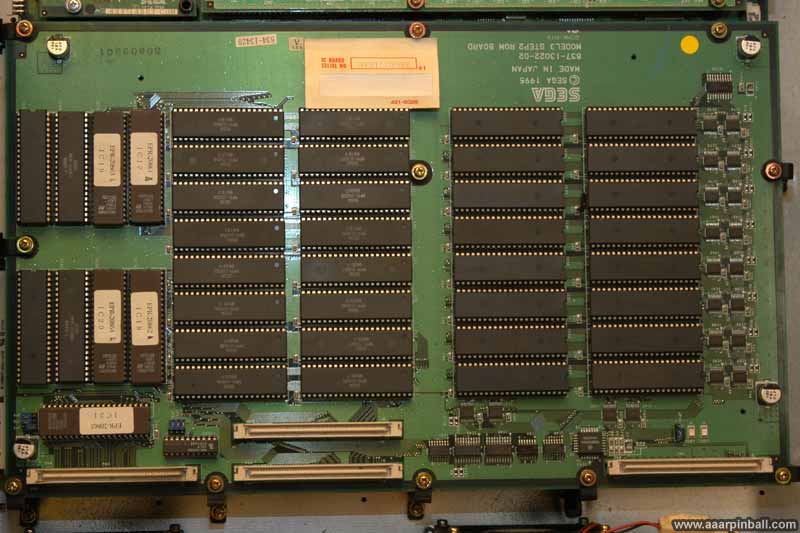
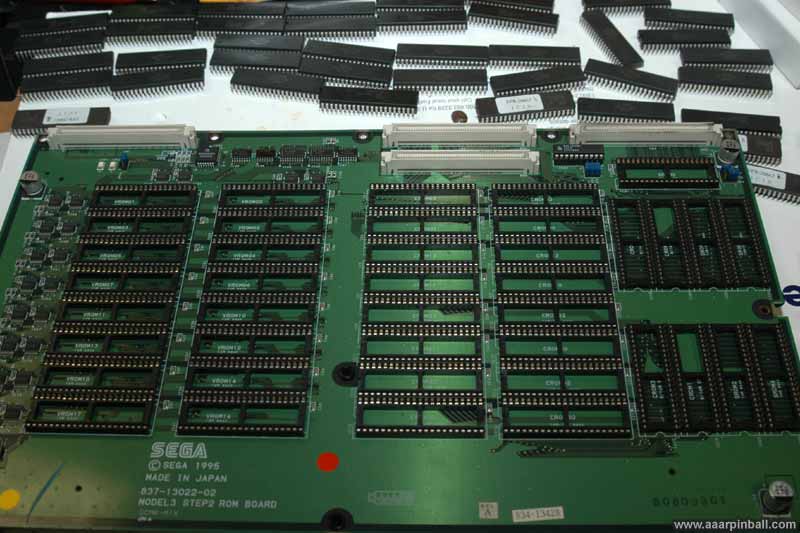
A close up of the ROM PCB is shown below.
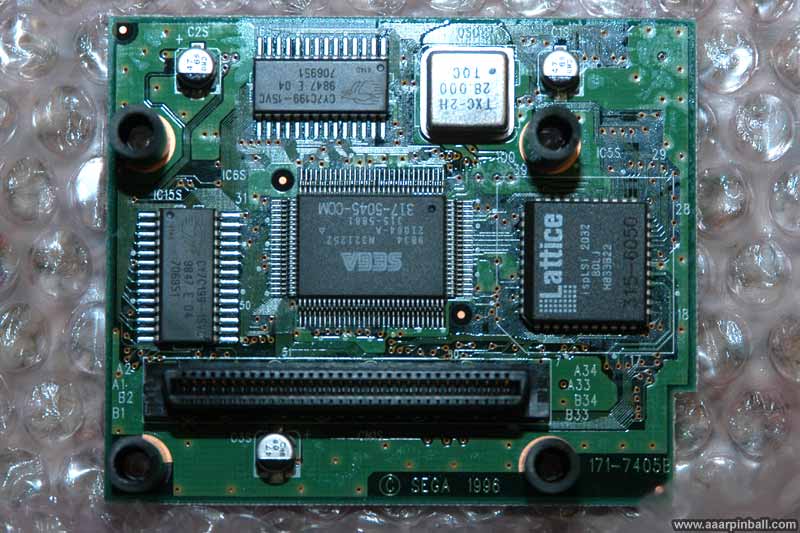
A close up of the BOTE security board is shown below. You can see the leftmost part of the network PCB on the right.
Below is the bottom of the D2PE security board. While it looks almost identical to the D2BOTE security board, this isn't obvious because I was inconsistent with my pictures. The D2BOTE security board's picture shows its top while the picture of the D2PE security board shows its bottom. Sorry for the inconsistency.
After removing the 41 roms from the rom PCB, it looks pretty barren. This is shown below. You can see the original D2BOTE roms at the top of the picture.
Some thoughts regarding the installation process:
-
I forgot how painful it is to pull 41 roms and insert 41 new ones.
-
I had a little problem with the D2PE security board. When I unscrewed the D2BoTE security board, I found out those screws were held in place with nuts. The nuts just fell down onto the board underneath the security board. I didn't want to turn D2 on with some metal nuts sitting on the video or CPU board, so I needed to unscrew the cage and tilt/shake until they rolled out. It would have been a huge pain to try and secure the new security board using the screws and getting the nuts to hold the screws in place, so I didn't. The D2PE security board is currently held in place with the (pretty large) PCB connector. I will probably need to take the whole board stack out if I ever decide to address this.
First Power Edition boot...
After swapping all 41 roms and double checking everything look good, I powered Daytona 2 on. It booted! Yeah! I had not botched any of the roms.
There was a short few seconds that scared me. It didn't pass the self test. I quickly realized, however, it was complaining it couldn't find a second D2. I went into the setup menu and configured it for a single system (and also set it for free play). It booted just fine with this change.
Not surprisingly, all my previous high scores were lost. It wouldn't be right, I suppose, to compare scores from D2BOTE with D2PE.
Daytona 2 Power Edition (D2PE) thoughts
-
I like it! Definitely an improvement in all ways (with one minor exception)
-
My only gripe: they should have kept the original beginner track AND included the new NASCAR track. ROM size issue, I suppose.
-
I _do_ like the new NASCAR track. I find the realistic track/backgrounds really makes the race seem more competitive, fast and tense.
-
My favorite feature is the new challenge track. It has great variety and is a blast to play.
-
Is it me or does the hornet car handle like crap? It has been a LONG time since I played the original Daytona... perhaps it handles the same. I found myself crashing into all the walls. But I only tried it a couple of times.
-
Sound effects are definitely modified... engine sounds seem much more realistic
-
The cars seem to have more realistic movement. While I cannot do a side by side comparison, I believe you can see and feel the suspension much more with D2PE over D2BoTE.
-
The additional chatter from the pit is nice and mostly helpful. I was expecting a bit more variation, however.
In summary, overall the D2PE just feels better and is more enjoyable. Definitely a good upgrade..
Taking Daytona 2 Apart
Daytona is a big and heavy game. The manual states it is about 560 pounds. I wanted to get this game into my basement, which requires navigating a 90 degree turn, a 29" doorway and a set of stairs. It was possible! It required a lot of work. Here is what I did
-
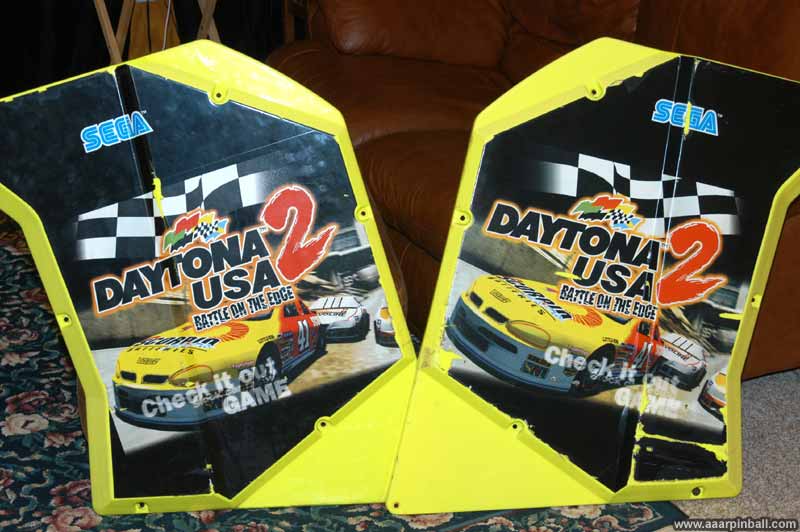
Removed side art
-
Removed topper
-
Removed coin door
-
Removed chair
-
Removed control panel (steering wheel, etc.)
-
Removed monitor cabinet from base
-
Removed monitor from monitor cabinet
Removing the side art was easily. There are 6 or so screws that hold each in place.
The topper was also pretty easy to remove, but a lot heavier than the side art. The topper is attached by 3 screws in the back and 2 bolts in the front.
After removing the side art and the topper, I opened up the back of the machine and labeled every connector. I've learned from my pinball work that using a sharpie and writing a unique number of each connector makes the reassembly part painless.

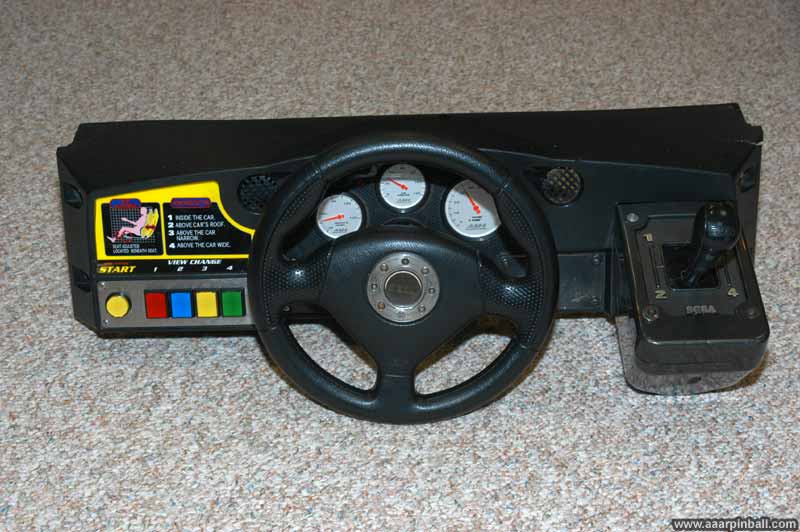
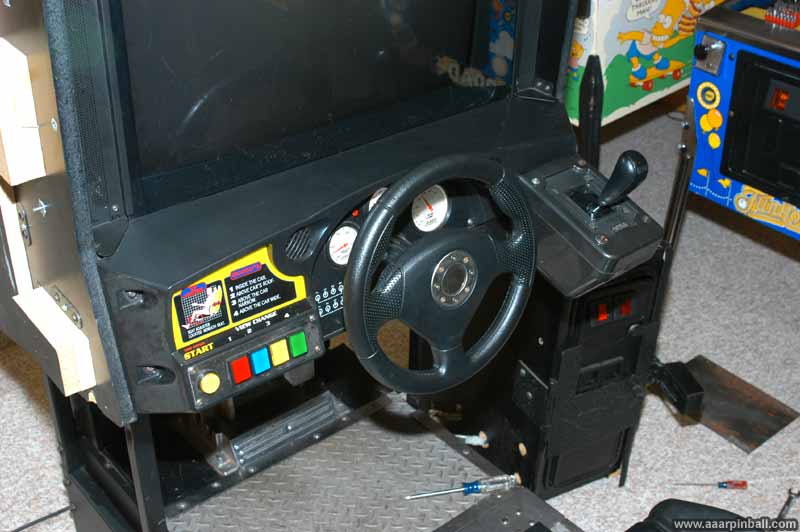
Below are some pictures of the control panel.
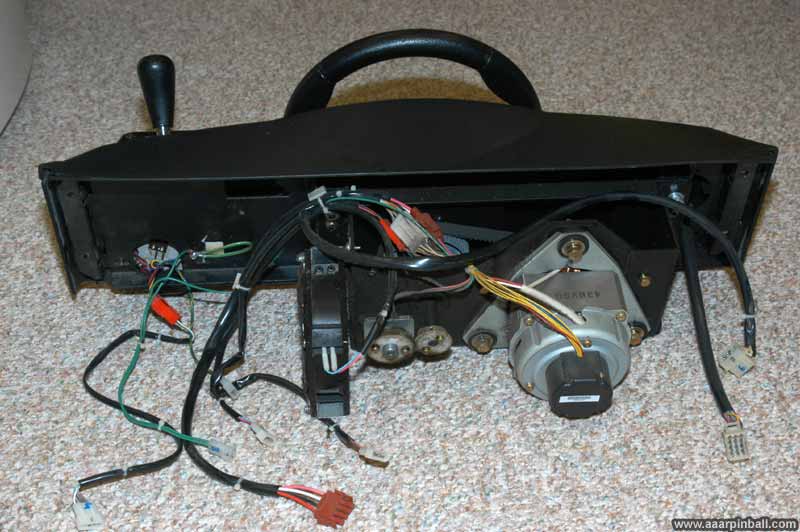
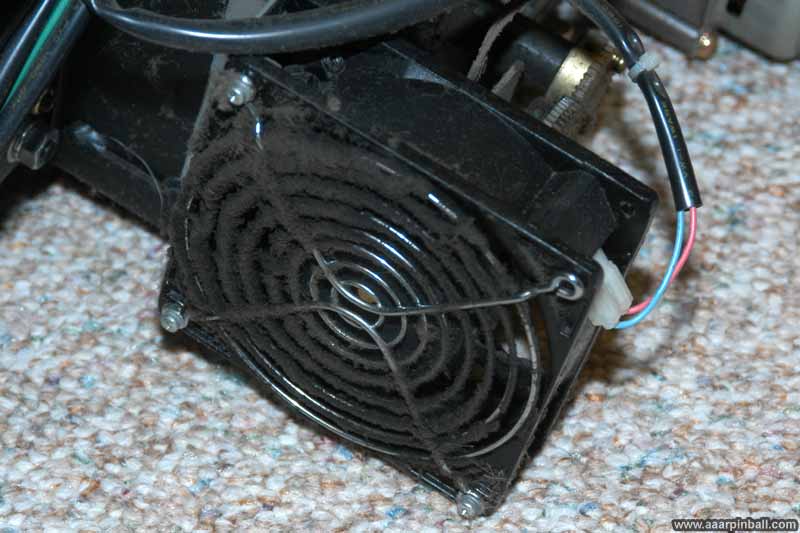
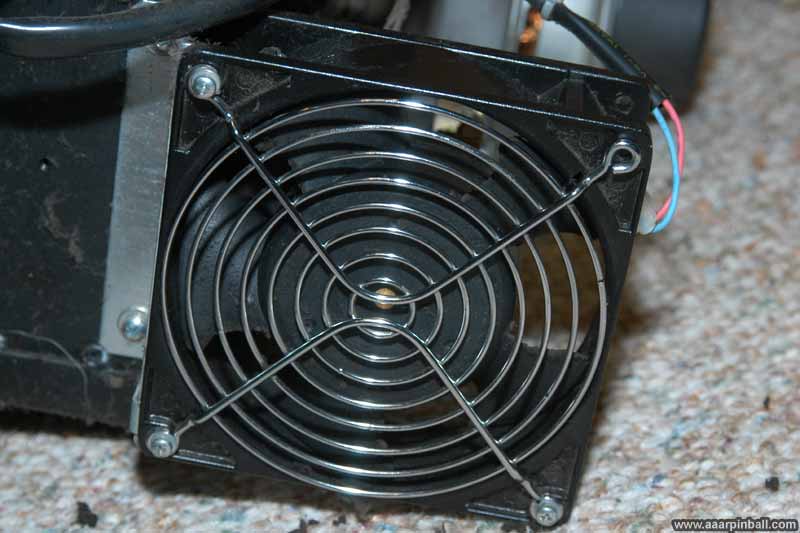
While my goal was to get this game into the basement and not to shop it, I did notice the fan on the back of the control panel was nasty. I cleared it. Before and after pictures are below.
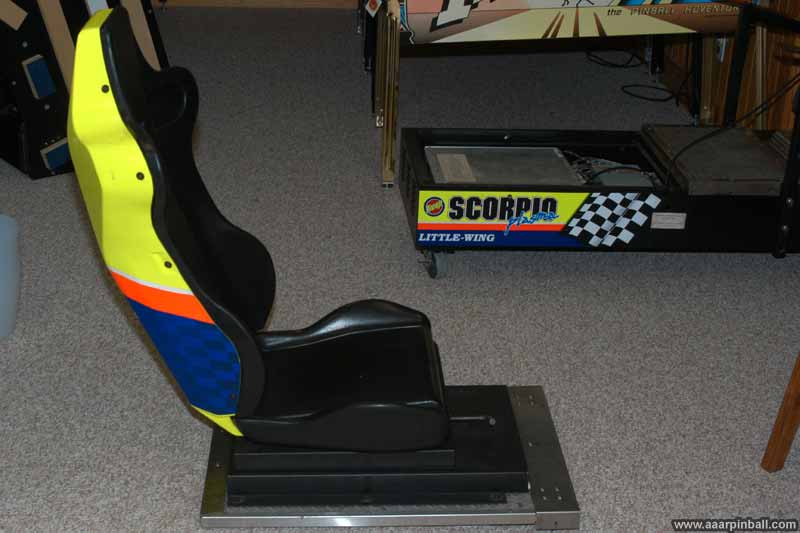
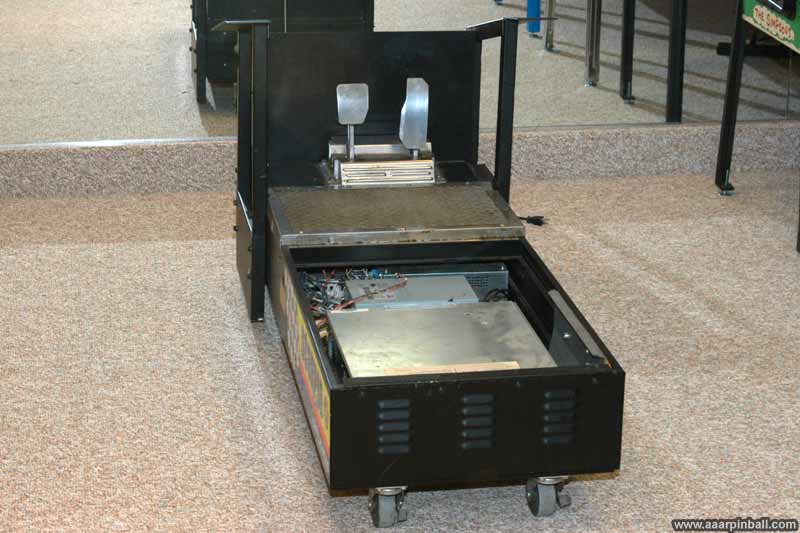
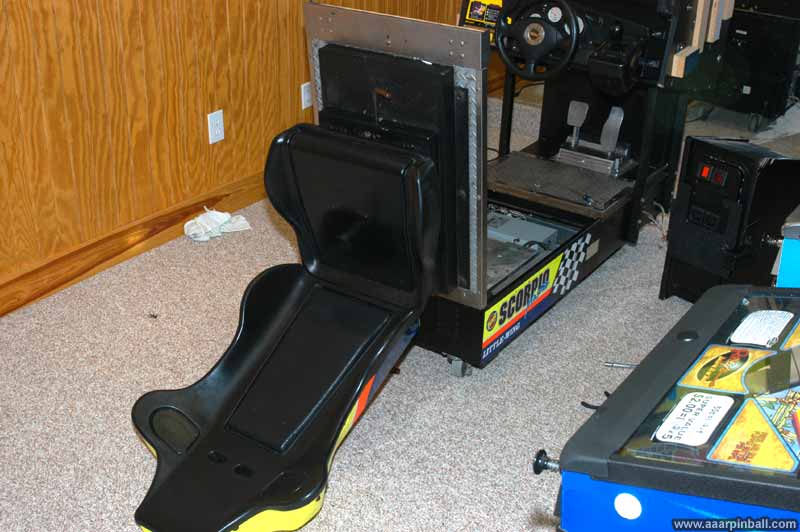
The chair is easy to remove from the base. It is attached to a hinge using 4 bolts. Here is a picture of the chair disconnected from the base.
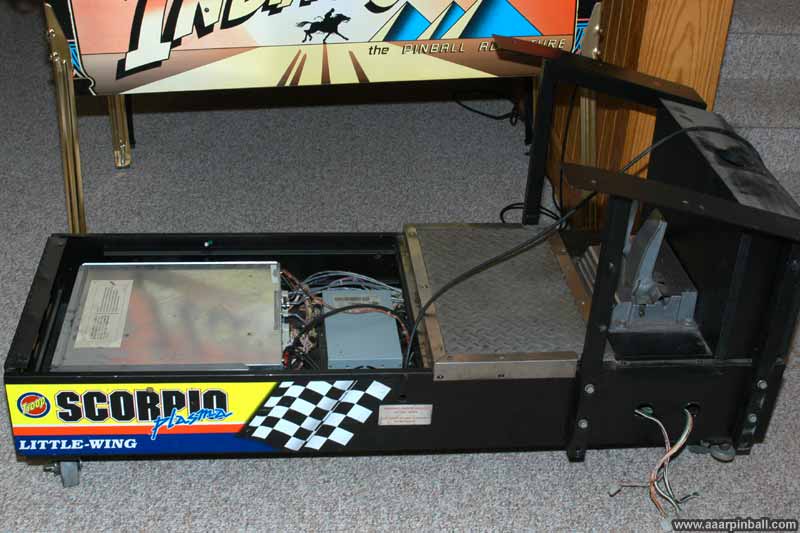
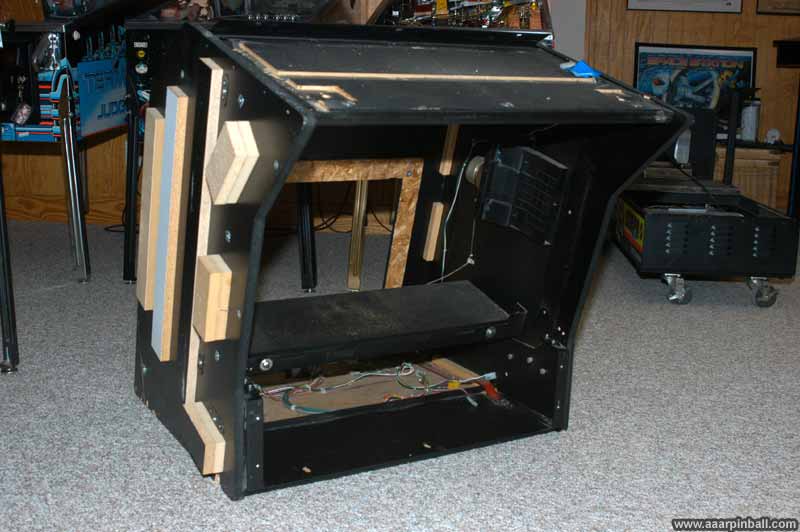
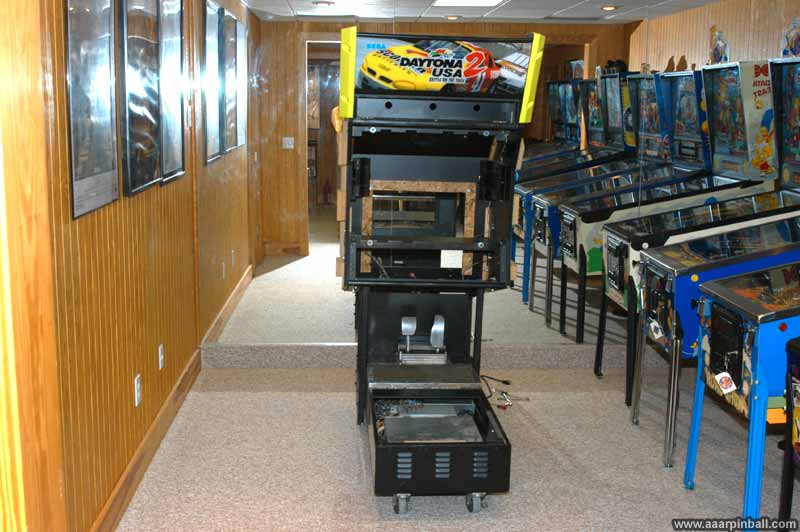
Taking the monitor cabinet off the base required removing 6 bolts. There are three on the left of the monitor cabinet and three on the right of the monitor cabinet. Luckily, when these bolts were removed, the monitor cabinet immediately want to slide off the base. With help from another person, we moved the monitor cabinet off the base and onto a pair of strong saw horses. Below is a picture of the base with the chair and monitor cabinet removed.
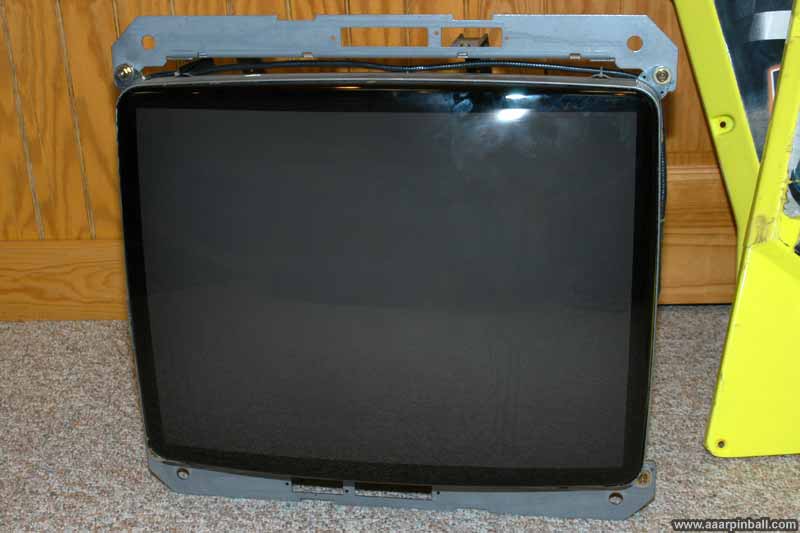
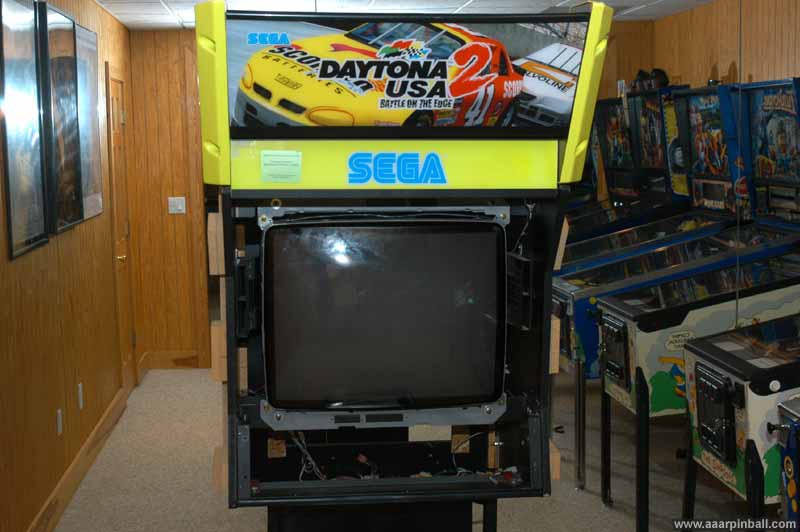
The monitor cabinet is still very heavy and couldn't be moved to my basement while the monitor was still inside. The monitor itself makes up a good portion of the monitor cabinet's weight. I removed the monitor. While removing the monitor itself was surprisingly easy, you also need to remove the metal frame that supports the smoked glass as well as the speaker grills. I found this to be a real pain. Several of the screws are behind the metal frame and cannot easily be reached. I ended up purchasing one of those flexible drill extenders.
One note about removing the monitor. There are two sets of four bolts. The inner set allows you to remove the monitor from the frame. You don't want to do this. You want to remove the outer set. This allows you to pull the monitor and the frame out. Just make sure you disconnected the couple of cables that connect to the monitor.
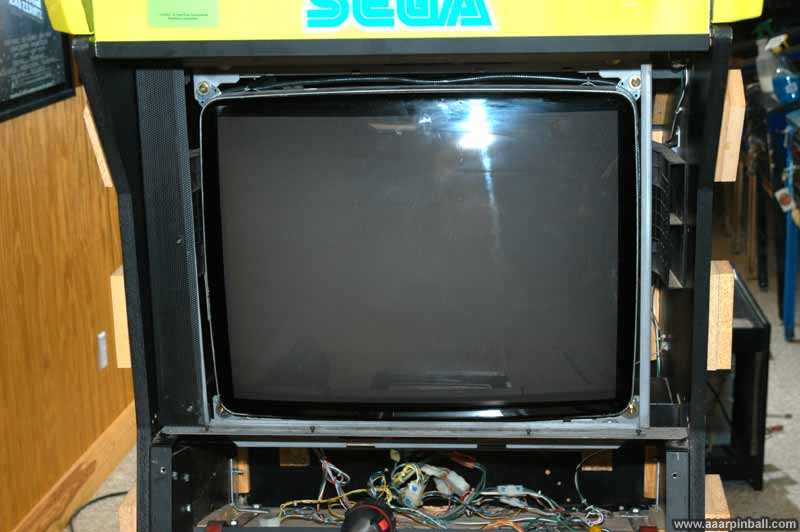
Below is a picture of the monitor as well as the annoying metal frame that supports the glass. You can see that the speaker grill on the right has been removed.
Below is a picture of the monitor cabinet after the monitor has been removed.
And below are a couple of pictures of the monitor with its frame.

All these parts were carried down to the basement individually. As you might have noticed, some of the pictures used above were taken after the parts had already been moved to the basement.
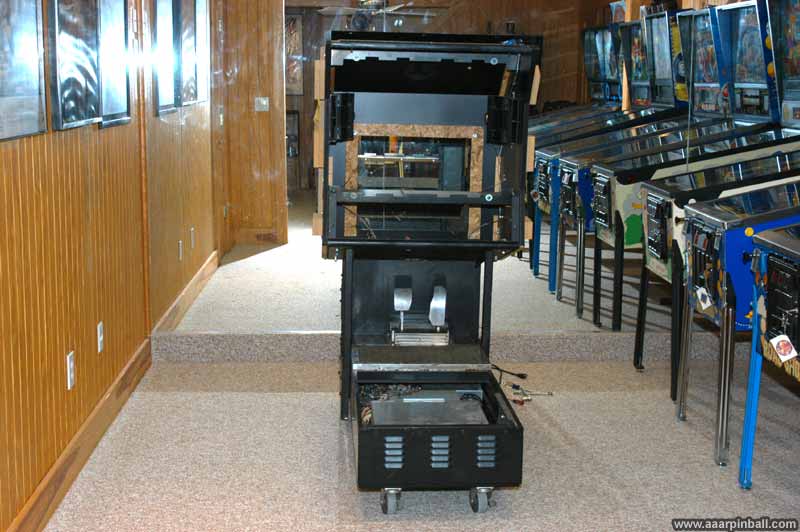
Now let's start putting it back together. We start with the base (no monitor cabinet, no seat).
I attached the empty monitor cabinet to the base.
Then I attached the topper to the empty monitor cabinet.
The next step was to put the monitor back into the monitor cabinet.
I then added the frame that supports the smoked glass as well as the speaker grills.
I put the control panel back on. One note about these. There are two pieces that are shaped like triangles with curved edges. These go on the top left and top right of the control panel. They don't directly attach to the control panel, rather they attach to the monitor cabinet. I found it much easier to attach these two triangle-like pieces after installing the control panel. Below is a picture of the installed control panel.
Following the control panel, I reattached the chair.
And now... All assembled!
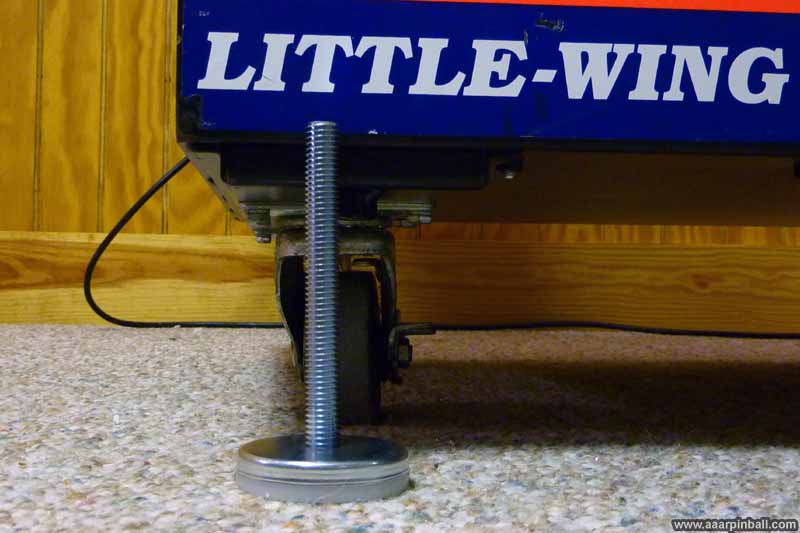
Leg Levelers
I had a difficult time finding the appropriate size leg levelers for Sega's Daytona USA 2. It seems most people have not needed to worry about replacing them and don't know the size. That's pretty reasonable given they are difficult to remove.
I did find references indicating that the correct leg level was 1/2"-13 and 3" tall. This, however, could not be right (or so I thought). A 3" tall leg leveler wouldn't cause my Daytona cabinet to be raised off the ground since the wheels themselves are taller. I ended up purchasing 1/2"-13 5" tall leg levelers instead and they worked great.. See the image below.
I did figure out why most people think Daytona 2 uses 1/2"-13 3" tall levelers. Because it is correct! The reason I had such a hard time figuring out the correct leg leveler size is that someone put larger than expected casters on my Daytona! I only figured this out when a fellow Daytona 2 owner told me my Daytona looked like it was on lifts. :)
It's pretty difficult to install the leg levelers, since the machine is very heave. I used a small jack to lift up the machine.
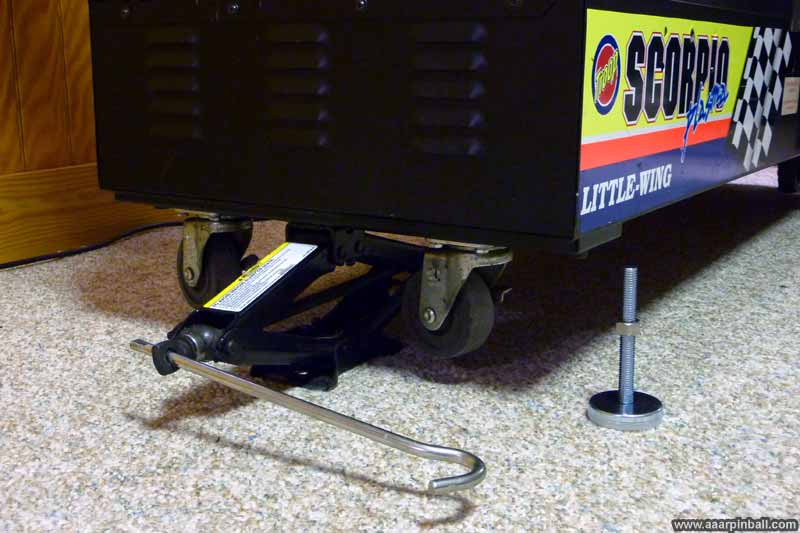
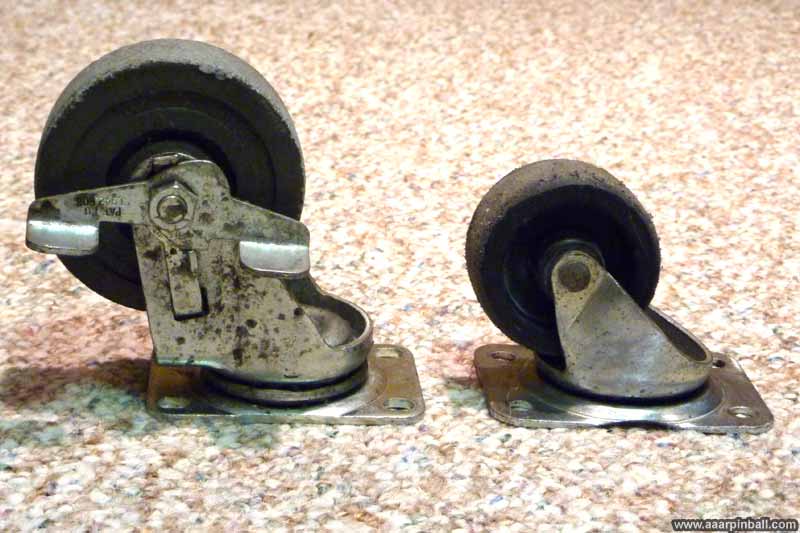
I was able to locate a used set of the correct Daytona casters. The image below shows the caster that came with my Daytona (left) as well as the correct caster (right). Big difference! Also, all four correct casters have swivel bases while only two of my "incorrect" casters supported swiveling.
Replacing the casters on Daytona 2 is very easy. There are four small bolts that hold the caster's base to the cabinet bottom. Since the leg levelers were adjusted to raise the casters slightly off the ground (when I had the original casters that were too tall), I was able to replace the casters without needing a jack. I'm also happy to report that the leg levelers I got (the 5" tall ones) work just fine. There is enough space in the cabinet that the extra length can be screwed in so it behaves like the 3 1/2" ones.
Cool Framed Daytona 2 Flyer Mosaic
Original 9/10/2011
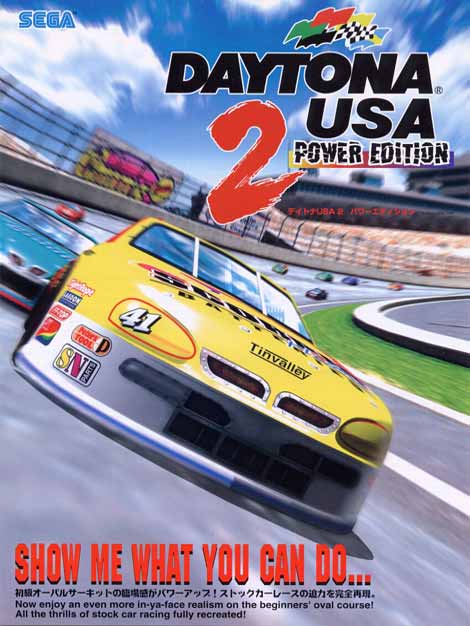
Jon (aka "OldTymeToys") on the KLOV forums makes 18" by 24" mosaics out of arcade game flyers. The individual mosaic tiles that make up the larger image are themselves arcade flyers! Below is the one I purchased for Daytona 2 Power Edition. Very cool! I just need to hang it on the wall.

The sample of the mosaic that was provided to me is shown below as well as the original arcade flyer.