Jersey Jack Dialed In! Pinball
Repairs, Restorations, Tweaks and Insights

Introduction
September 2, 2019
Dialed In! is incredibly fun. I keep going back for another game. It’s a delight to play. I smile when I’m playing.
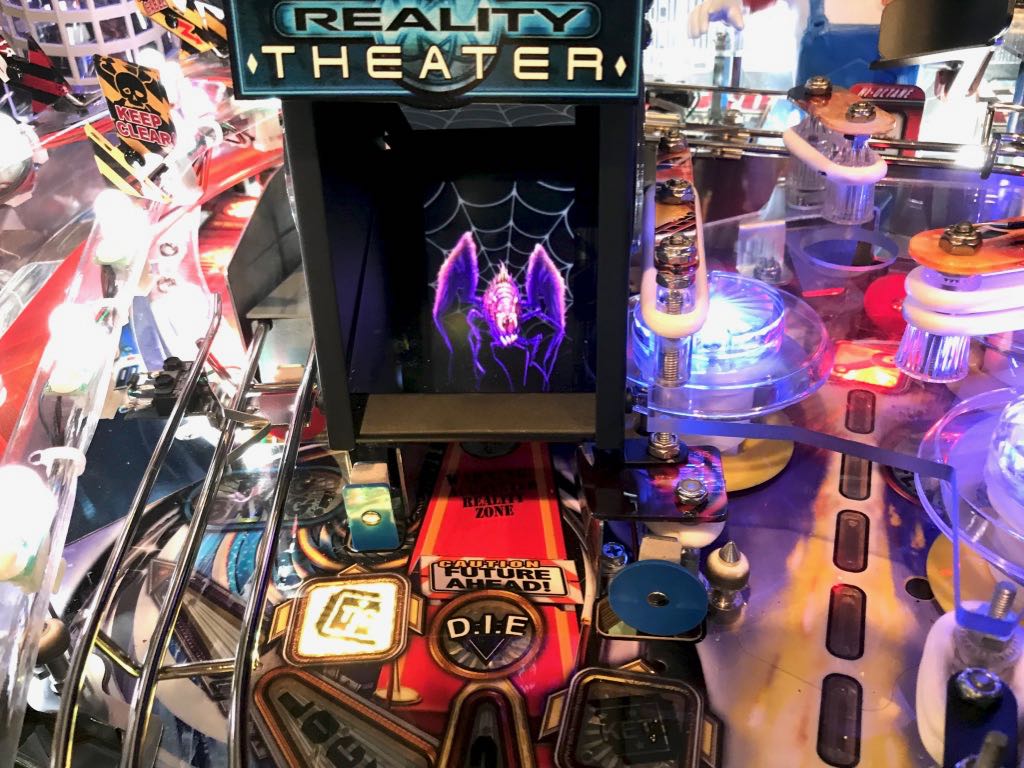
The “toys” are stellar --- even setting a new bar. Quantum Theater deserves a specific callout. I used to have a Pin2K Revenge from Mars. The Quantum Theater is like a Pin2K in a box. A screen is “magically” displayed over the playfield, just like Pin2K. It’s integrated perfectly into the game, providing functionality like: destroying a spider, virtual spinners, hurry up target, virtual drop targets. Yes, virtual drop targets. There is a magnet under the Quantum Theater so Dialed In! can display a virtual drop target and stop the ball when it is hit!
There a real camera. Physical ball locks. Drones with spinning propellers. This game has magnets galore under the playfield that really impact the ball during certain modes.
Dialed In! is a Lawlor game. I have several so when I say that Lawlor games don’t always have tons of flow, I know first-hand. Dialed In! is all about flow. The ball smoothly zips around the orbits, the two ramps, and there are various diverters and trap doors which cause the shots to always feel unique.
And… Dialed In! has a subway. I enjoy it when the ball disappears under the playfield and pops up somewhere else. Subways are sadly missing from many modern games, IMHO. Music is super catchy, sound effects are impressive. While I like the computer assistant MANDI, if I could change one thing… I would make a couple of her callouts be more energetic (such as jackpot). Lighting and artwork are first rate. Game is built like a tank. Did you know the 27” LCD display is mounted on an articulating arm?
Removing Pop Bumper Building "mod"
May 22, 2022
Note: I removed this mod back on October 16, 2021 but didn't write anything about it until now.
When I purchased Dialed In! LE, it came with a few "mods". One of the mods was a so called "Pop Bumper Building" that is placed in the back left of the playfield. After having Dialed In! for about 2 years, I decided the "Pop Bumper Building" mod needed to go.
There were two reasons. The first is that his mod blocked the LED lights in the back left of the playfield. One difference between the standard version of Dialed In! and the limited edition is the inclusion of color changing RGB LED lighting on the ramps. This would not be an issue for the standard edition, but certainly is for the limited edition. The second reason is that it obstructed view of the pinball when it went around the hair pin corner. Not being able to see the pinball can be a great thing, such as in WhiteWater, when it's a part of the game's design. That's not the case here, however, and I enjoy watching the ball move around the playfield.
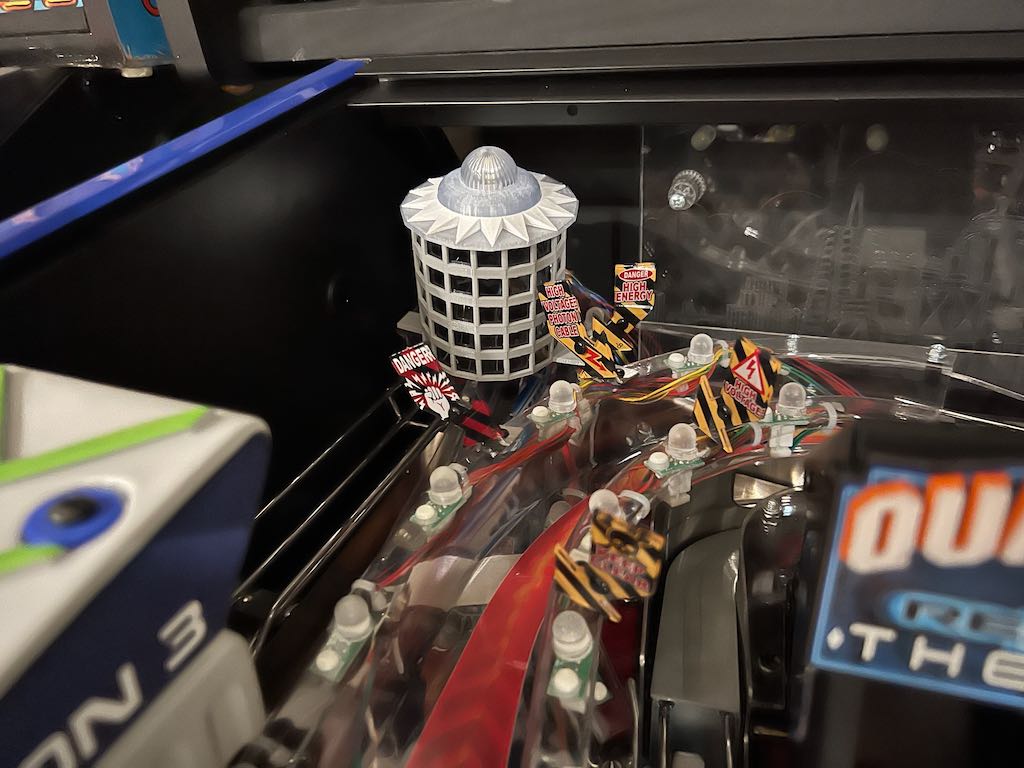
Here is a picture of Dialed In! with the "Pop Bumper Building" installed.
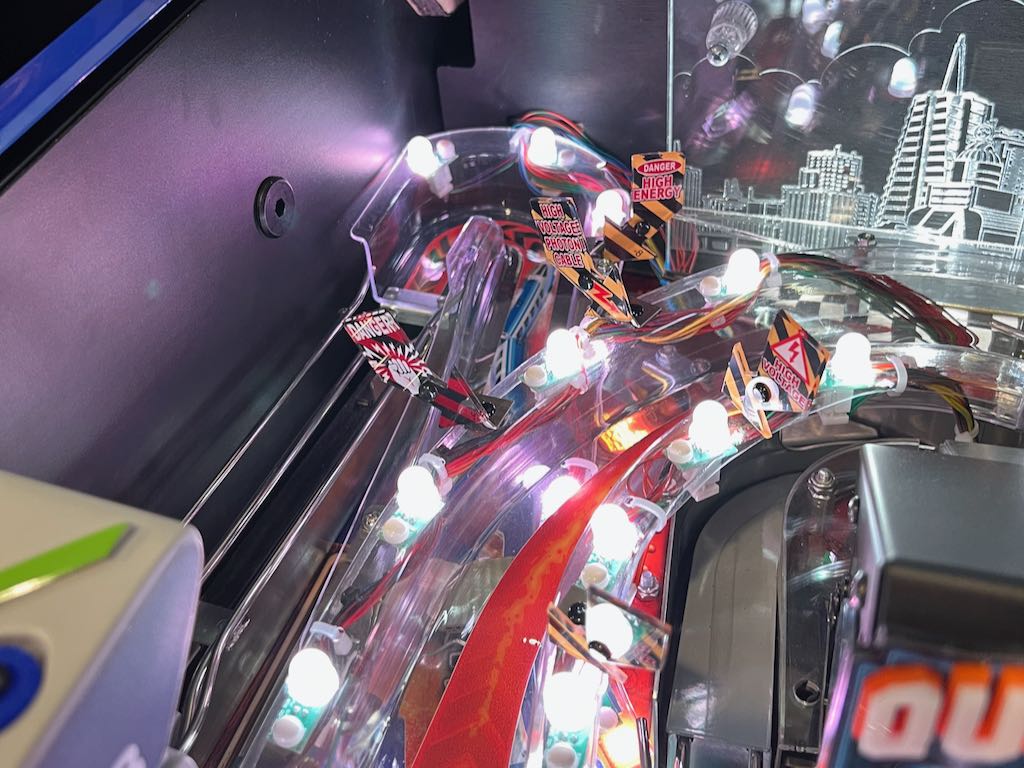
Here is a picture with the mod removed, showing the limited edition in it's original state.
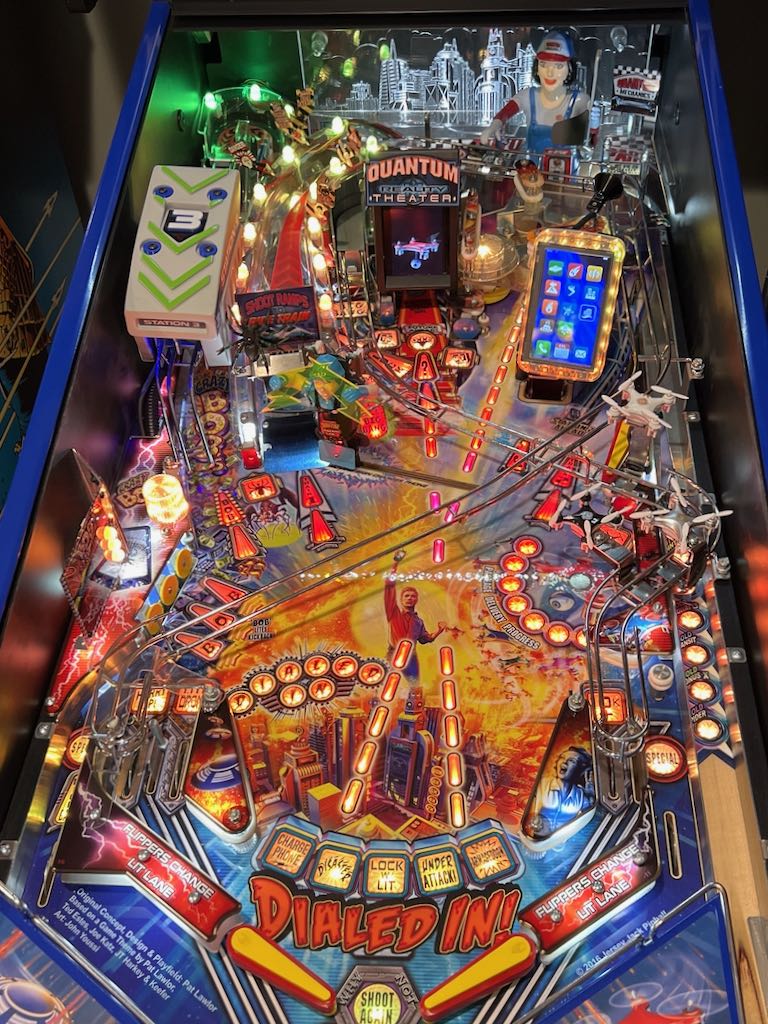
I definitely prefer Dialed In! LE without this modification but feel it could be a good option for the standard edition. Below is a picture of the entire playfield without this mod.
Drone Repair
February 16, 2021
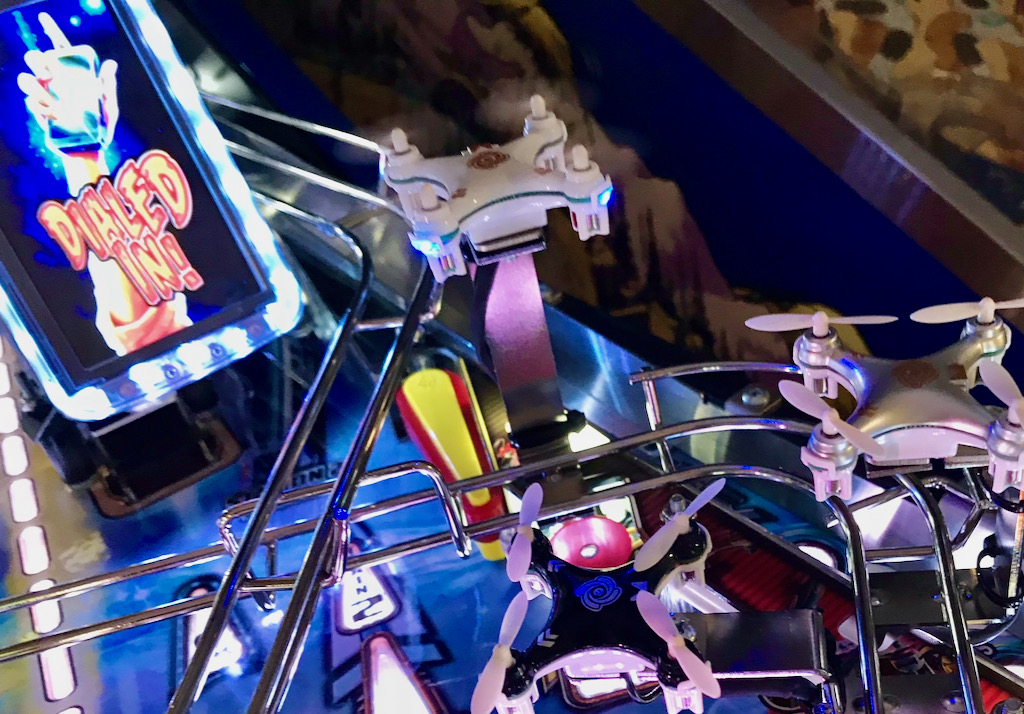
Dialed In has 3 drones each of which has 4 spinning propellers. While the drones have no gameplay impact, they are fun to see.
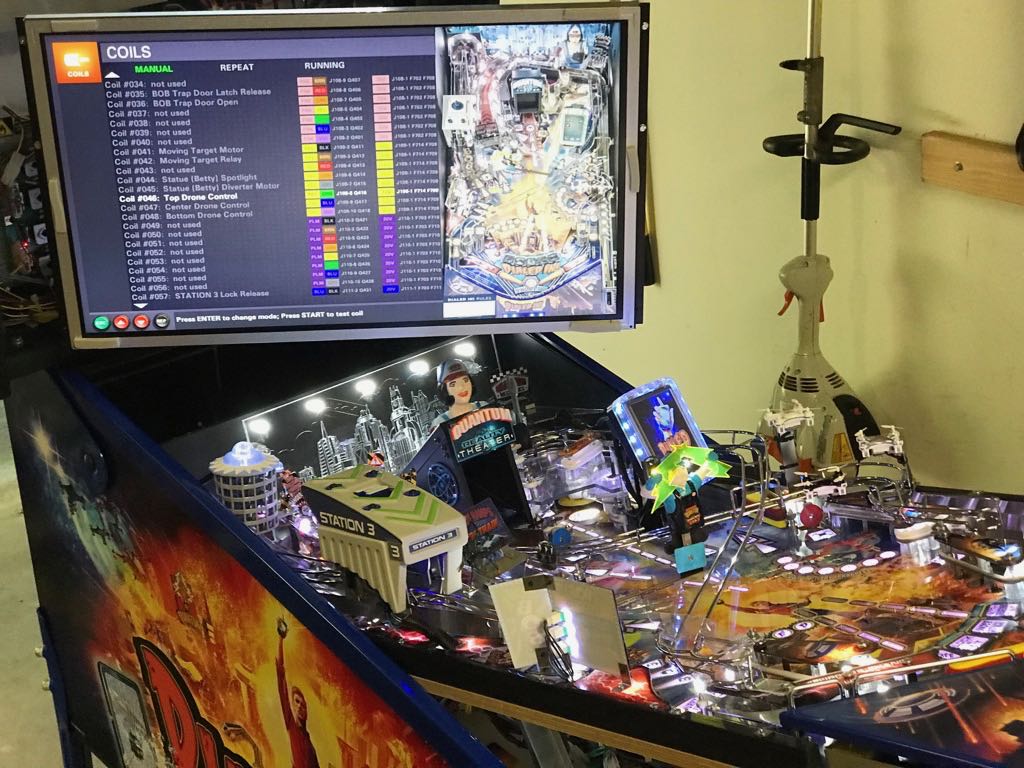
Dialed In's drones are known to stop working. If one of the motors develops a problem, none of the other drone motors will spin. In many cases the broken motor can be identified by activating the drone in test mode (under the coil tests) and manually spinning the propellers. If the propellers do not spin by themselves, but manually spinning one causes the other 3 to begin spinning, then the broken motor has likely been identified and is the one that was manually spun.
I had 2 drones with this problem. Using the method above, I identified the 2 motors that were bad and began the process to replace the motors.
The drones are connected to a stand using a single philips top screw. While the screw must be removed to release the drone, there are other steps required to remove the drone from the playfield.
- The 2 wires running to the drone are tightly connected to the support and require some careful movement to release
- The wiring is zip tied to keep it away from ball movement. These zip ties need to be cut.
- The drone's wiring must be disconnected below the playfield and pulled through a hole out the top
The bottom left drone's wiring is routed below the playfield going through the hole used by the Drone stand-up target. This is a rather tight space and getting the connector end though the opening is difficult. Because of this, I decided to remove the stand-up target, making the opening much larger. It's easy and only requires removing 2 nuts.
The image below shows a drone with the screw removed followed by the larger opening created by removing the Drone stand-up target.
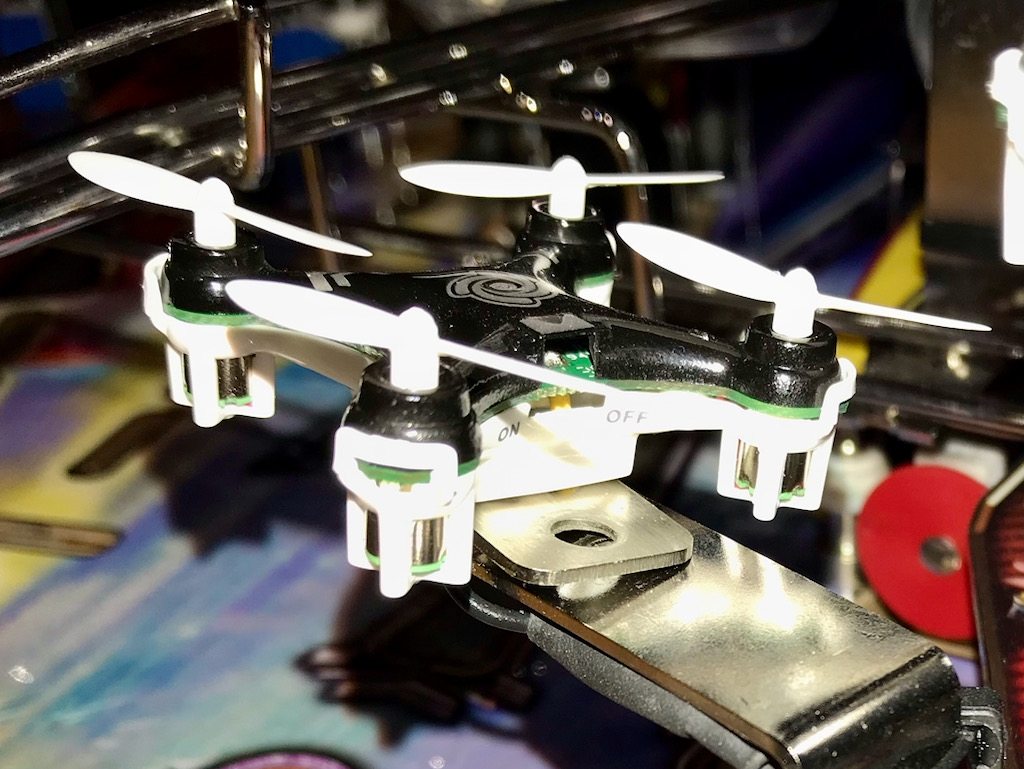

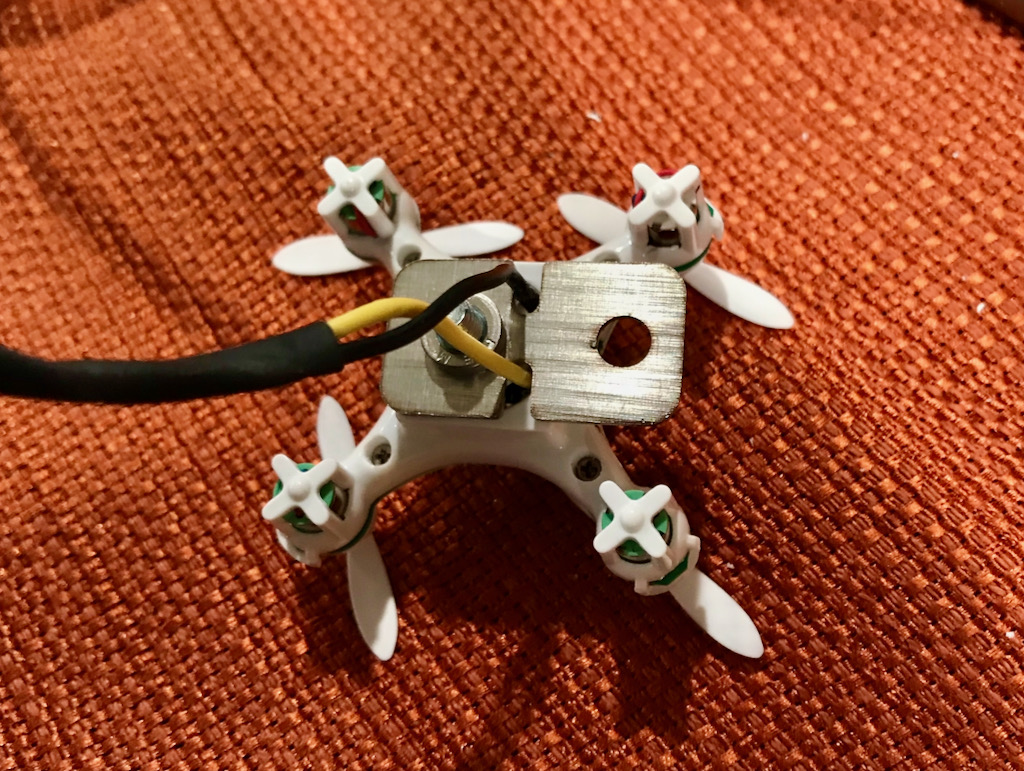
At this point I was able to fully remove the drone from the playfield. Below is a picture of one of the drones I removed, showing the drone's underside. This picture shows 4 small screws that hold the drone together. These need to be removed to access the motor.
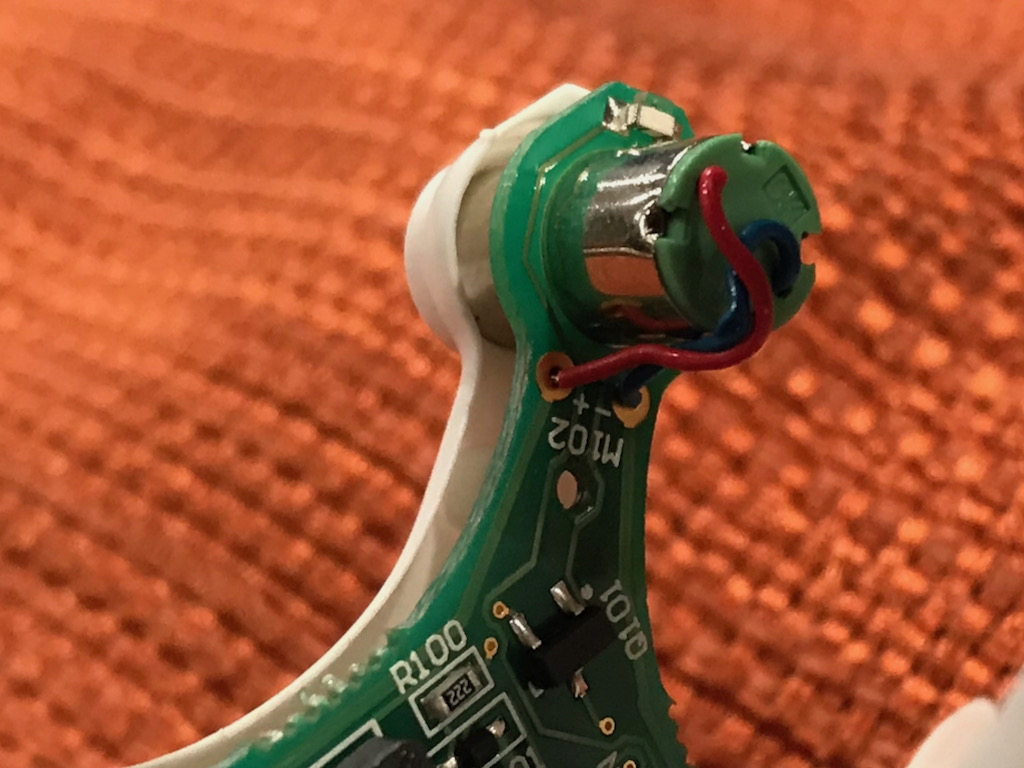
The drones are composed of 3 layers: the top plastic, the middle PCB and the bottom plastic. With the 4 screws removed, these 3 layers can be separated by gently pulling on the release tabs near each propeller. At this point I was able to expose the problematic motor. It has 2 wires that connect to the PCB board. This is shown in the image below. (Yes, I realize that I'm now showing the white drone while I was previously showing the black drone)
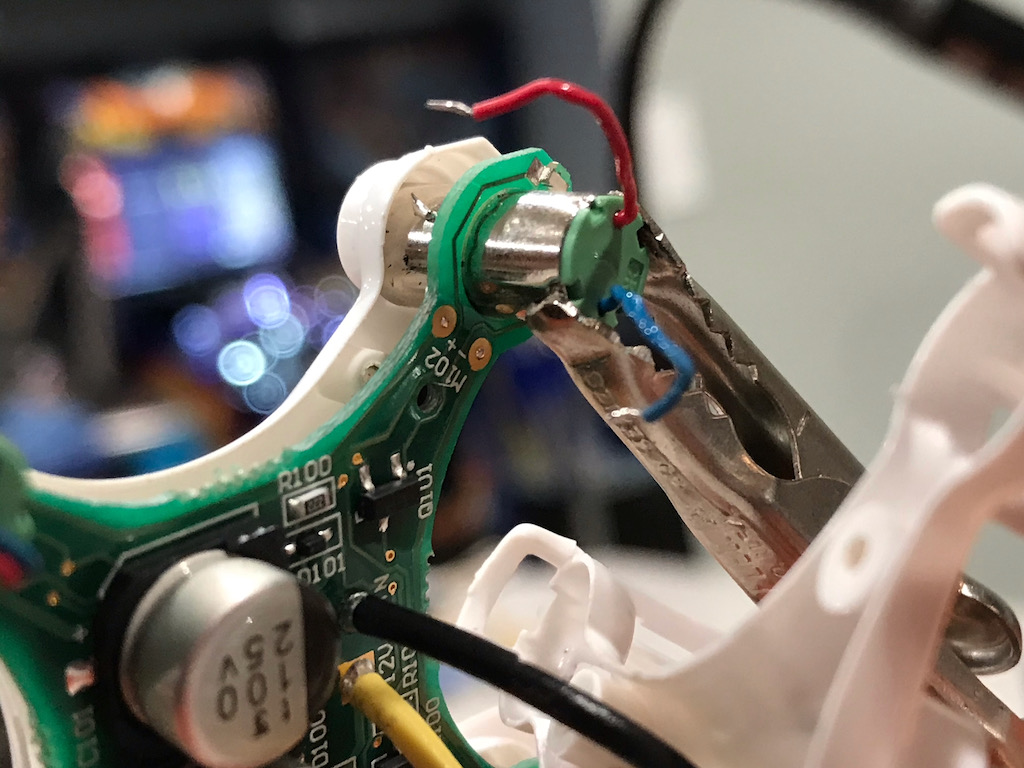
With the motor exposed, I desoldered the wires. While pulling the motor out of the enclosure is easy, I first needed to pull of the propeller. The picture below shows the wires removed from the PCB.
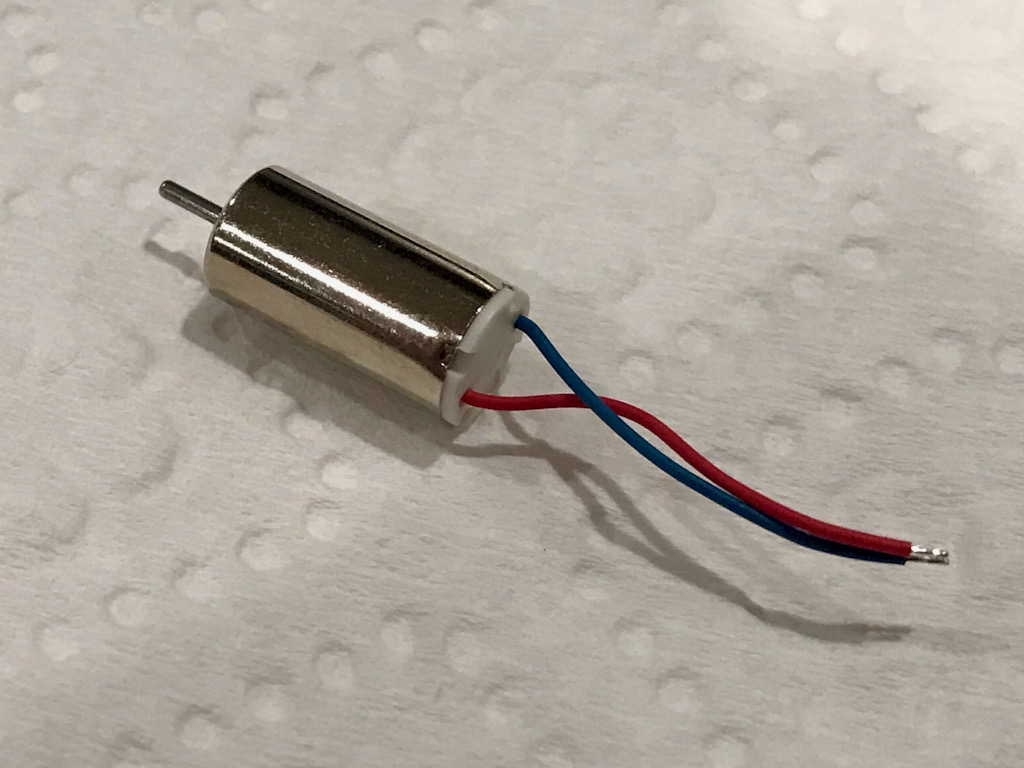
A picture of the new motor that will be installed is shown below. The new motor had longer wires than the original, but it didn't cause any serious issue. I decided it wasn't worth trying to trim the wire down and risk pulling it out from where it connects to the motor.
I soldered the motor wires to the PCB, arranged them so they wouldn't stick out of the case, snapped the top and bottom pieces back together, screwed in the 4 screws, and finally attached the propeller. I then ran the wire back into the playfield, attached the stand-up I had removed, zip tied the cable and screwed the drone back in place.
After replacing one motor on each of the drones, the two drones worked perfectly! In the image below you can see the white drone's propellers spinning.
Poor Performing Pop Bumpers
February 7, 2020
The Pop Bumpers on my Dialed In were initially not very responsive. The ball would hit one, make a bounce and then typically fall out. Initially I thought this was just the way Jersey Jack Pinball pop bumpers behaved. Because the Acid Rain mode requires getting lots of pops it was extremely difficult to complete.
After owning Dialed In for 4 or so months, I looked into this behavior to see if it could be improved. I quickly learned that Jersey Jack Pinball pop pumpers are just like Bally/Williams pop bumpers. Bally/Williams pops are very good, so I then assumed that the leaf switch for each pop needed to be adjusted. I opened up the playfield and looked closely at the pops. Then problem was immediately visible!
The issue was with the rightmost pop bumper (when viewed from the top of the playfield). The pop bumper skirt (aka ring) on the top of the playfield has two shafts (aka rods) that extend down into the bottom playfield. The nut that holds one of the shafts onto the yoke parts (a steel piece and a bakelite piece) was missing. The shaft was abnormally angled and pushed up against the side of the playfield hole. Overall, this resulted in poor pop bumper function. Below is a picture. Look at the bottom center and toward the left.

I was able to line up the two yoke parts and insert the shaft through. With the addition of a nut, the mechanism was repaired.
The improvement in pop bumper action was significant. While before I would only get 1 or 2 bumps max, now I typically get at least 4 or 5. Acid Rain mode is now playable!
Spring Steel Broke off Bob's Trap Door
February 7, 2020
Bob's trap door on Dialed In is a cool feature but it is completely obscured by the train station. If you are familiar with Fun House, you are familiar with the trap door. During certain gameplay modes, the trap door will pop open. Then, as a ball comes toward the trap door, it will fall into the subway below the playfield. When the trap door is closed, there is a little notch between the playfield wood and the trap door. In order for the ball to roll over this smoothly, a piece of spring steel is attached to the trap door and extends over the area.
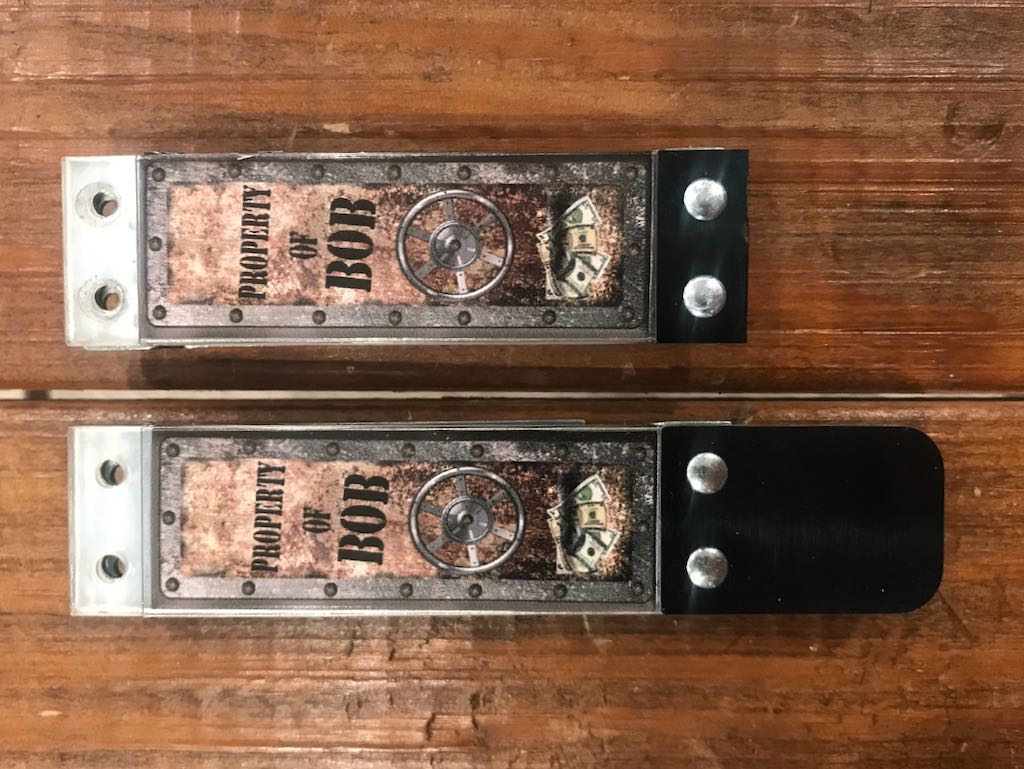
Since acquiring Dialed In, I had never been able to make a ball go completely around the left orbit and come out on the right side. It always fumbled around a bit. When I looked into this problem, I found that the spring steel piece had broken off. The first picture below shows the trap door, in the open position, with no spring steel. The second picture shows the broken trap door piece and a new replacement trap door piece next to each other. This clearly highlights the missing spring steel.
After doing some research, I quickly learned that broken spring steel on the trap door is a common problem. It is caused by the trap door opening and the spring steel hitting the metal wire form ramp right above it. I could see a slight indentation on the wire form where it was repeatedly hit by the spring steel. I tried to take a picture of this, sadly it didn't turn out well. You'll need to trust me that there was a small divot.
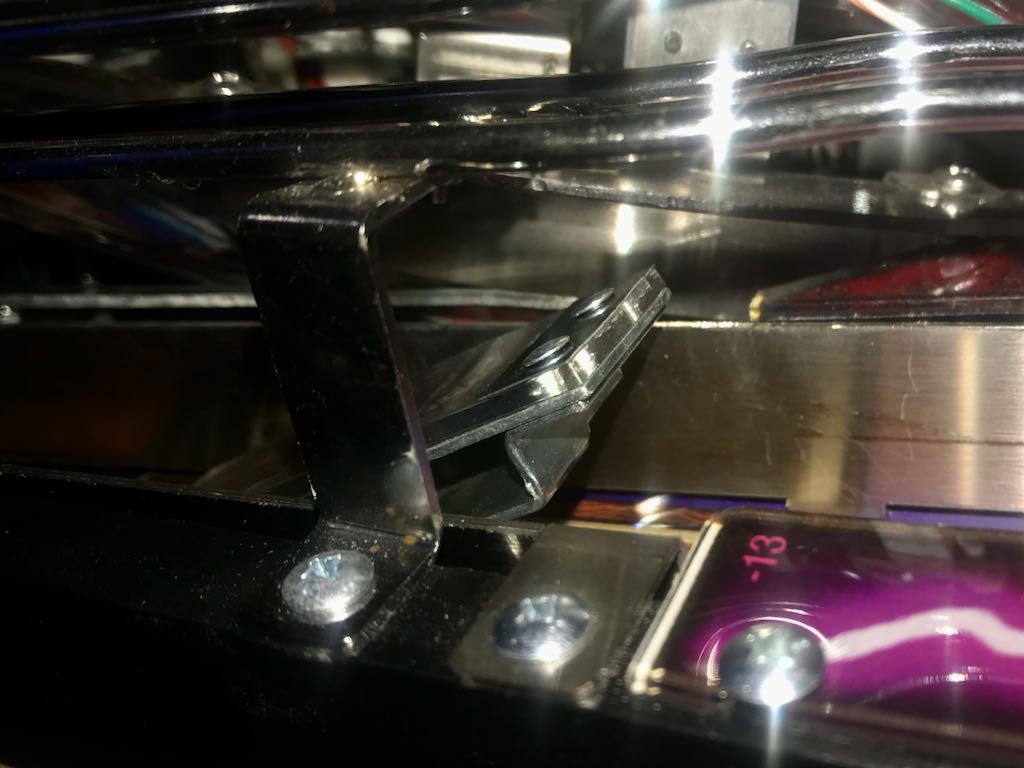
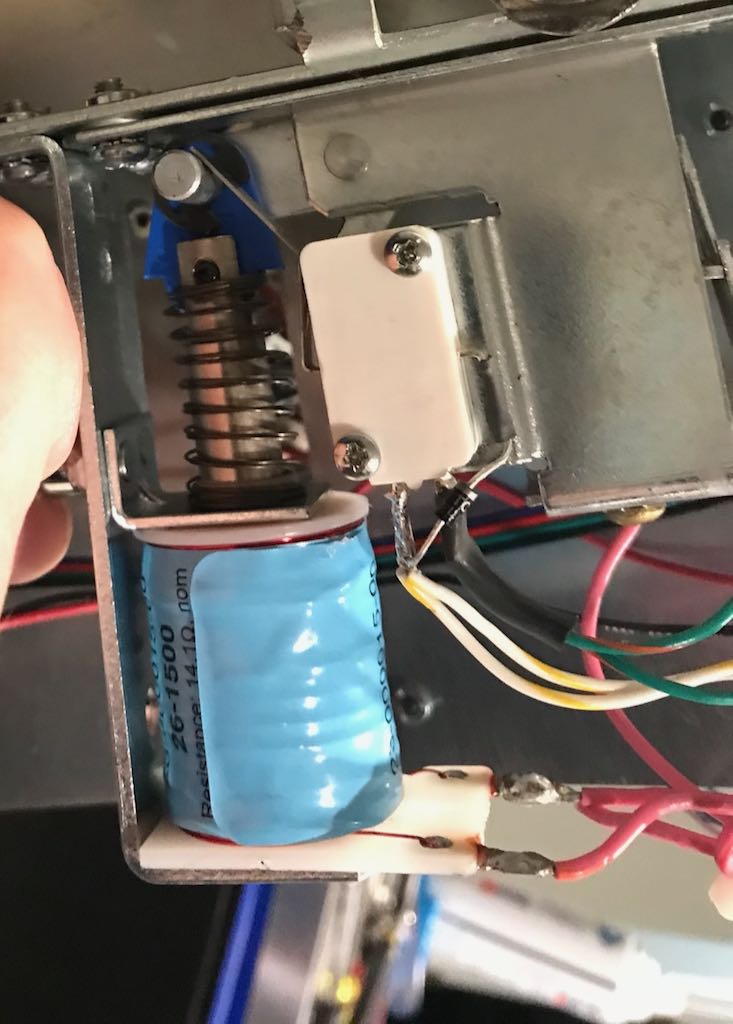
The fact that the trap door spring steel hits the wire form appears to be a rather big "miss" from Jersey Jack Pinball. It's no wonder so many trap doors fail. It is not clear, however, if Jersey Jack Pinball made a in-production modification to address this problem or not. The root of the problem appears to be that the coil stop on the "slingshot coil bracket" (the trap door mechanism seems to share a part with the sling shot mechanism) is too short, allowing the trap door plunger to extend too far into the solenoid, thus raising the trap door just a bit too far. Similarly, the coil stop might be the correct height but the plunger might be too short. Below is a picture of the mechanism.
There is a rather straightforward fix, but only time will tell it's longevity. I placed 2 #8 washers into the coil tubing (which surrounds the plunger). This limits the movement of the plunger just enough so that the trap door spring steel does not hit the wireform.
Ball Through Troubles
November 9, 2019
While playing Dialed In, I ran into a situation where it was time to plunge the ball but the pin wouldn't place one into the shooter lane. I shook the game and banged on the cabinet a bit to see if I could dislodge whatever might be holding up the ball. It was to no avail.
I ended up going into the switch history diagnostics and found the culprit. All switches on the trough PCBs were activating and deactivating quickly over and over. By quickly I mean several times a second. The cause was tracked down to the larger 4-pin molex connectors that supplier 5V to the emitter and receiver trough boards. Side note: my 5V measured just over 4.8V DC.
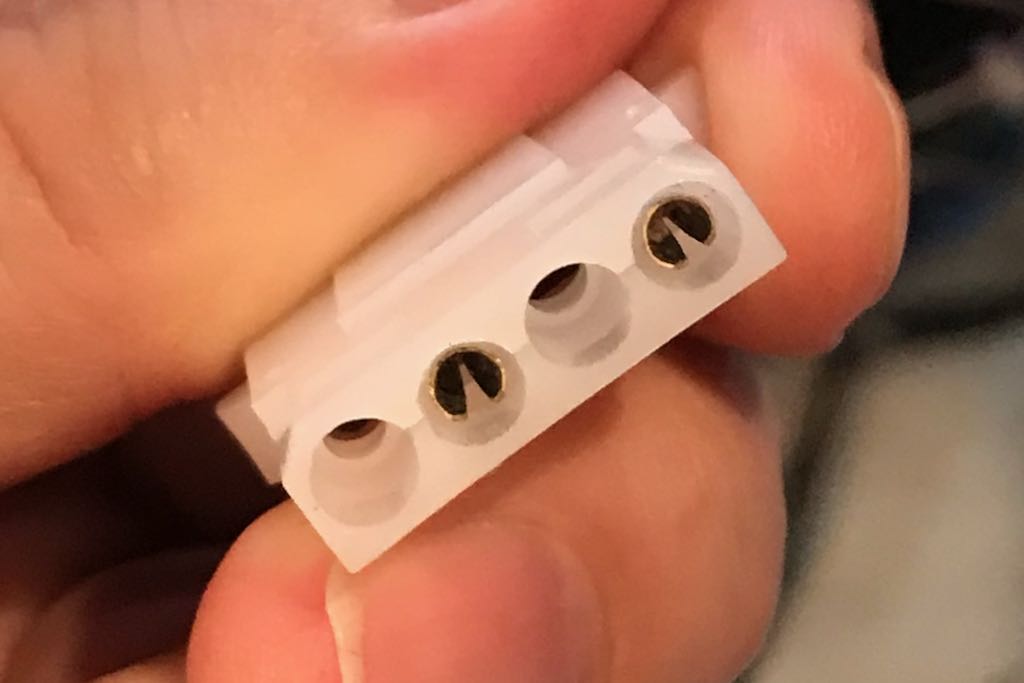
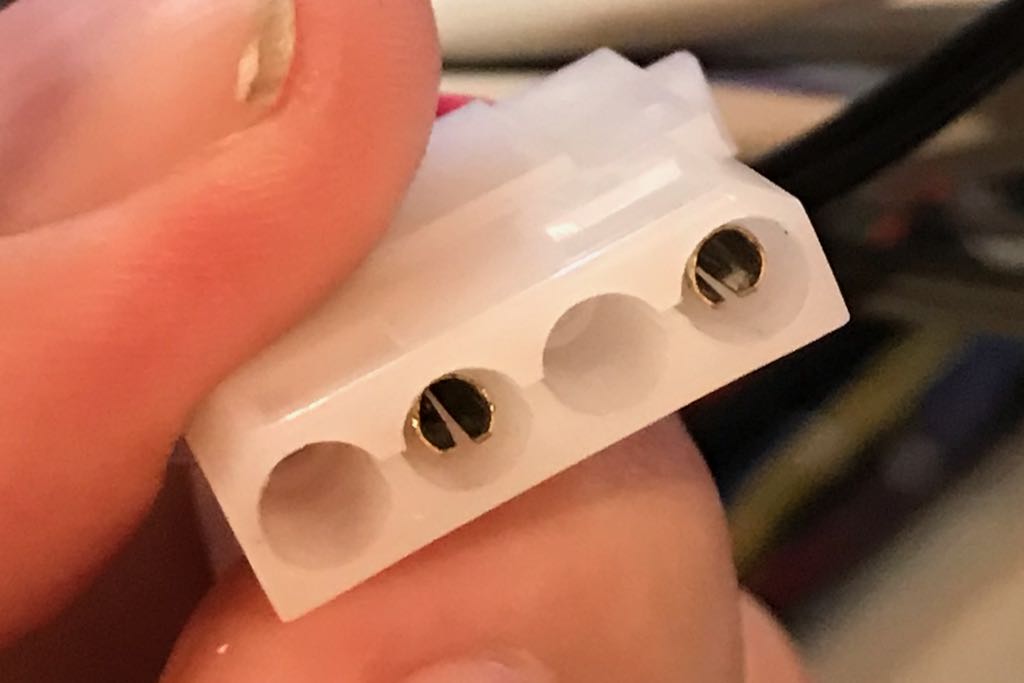
Digging deeper into the molex problem, I found the actual issue was with the female pins. The pins seem to be wider than expected / normal and not allowing for a solid connection. I could slightly wiggle the connectors and the trough with immediately start misbehaving. Using a very narrow set of needle nose pliers, I was able to tighten up the pins (reduce the diameter). Before and after pictures are below. Notice the upside down "V" on each pin and how it is wider in the first picture than in the second. Problem solved.
Dim insert lights on playfield
September 6, 2019
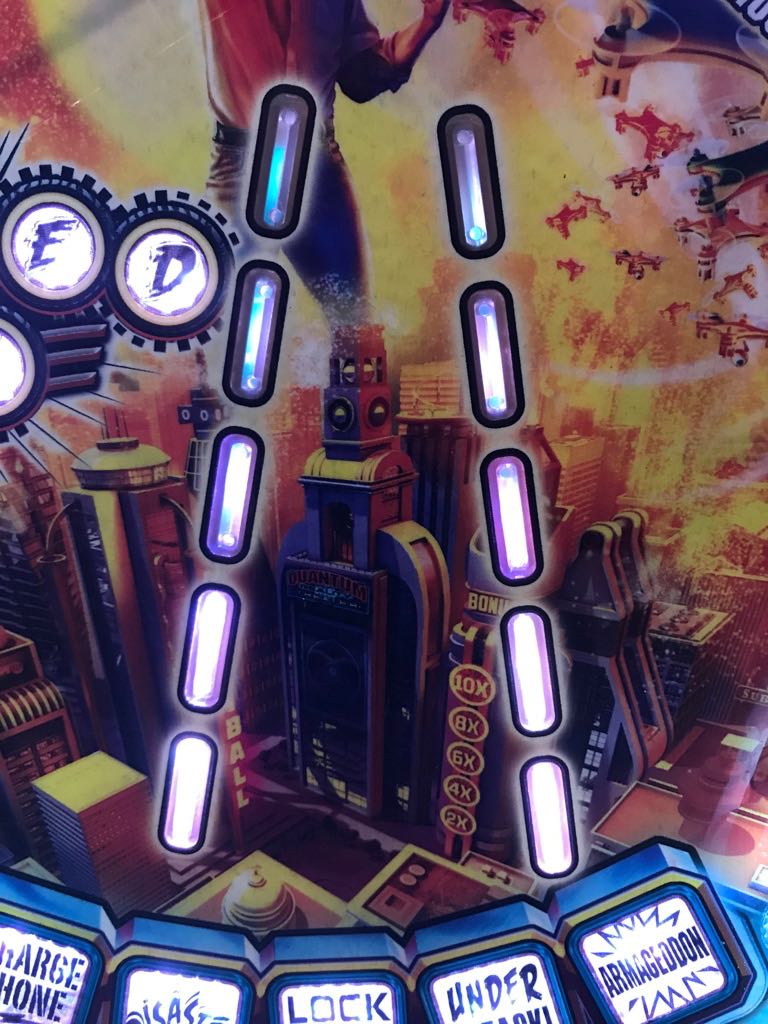
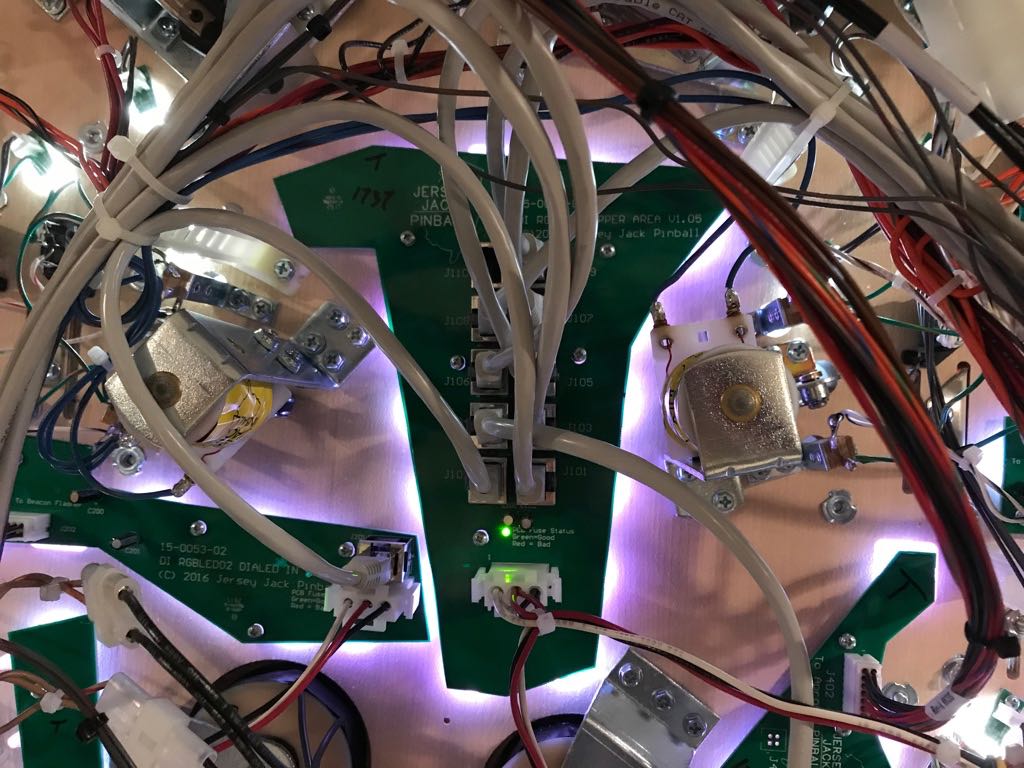
Every light on Dialed In! supports full RGB colors. This is one of the reasons that the insert lighting is impressive. I noticed, however, that top half of the "laser" lights in the middle of the playfield were not as bright as the others. These top lights changed color and brightness, but were never as bright as the others. Its a little hard to see, but is shown in the picture below. Notice how the 2 inserts to the right of the "D" are not as bright (as well as the 2 inserts to their right).
These inserts are illuminated by a PCB below the playfield. With the playfield opened, I could see that the LEDs for these top inserts were pointed at the wood rather the the insert. Clearly the PCB had been mounted slightly offset. The bottom was lighted up correctly but the top had missed the mark. Shown below is the "DI Flipper Area RGB LED Board, D1 15-000053-01" PCB.
This PCB is held in place by 5 small screws. I loosened the bottom screw (where bottom means it is closest to the ball trough) and unscrewed the remaining 4 screws. Since the bottom screw was still attached, I was able to change the angle of the board without worrying about it completely losing alignment. After rotating it to the left a couple of degrees, the inserts looked perfect. I carefully screwed the PCB into the new location (creating new screw holes in the bottom of the playfield). The resulting bright inserts are shown below.

I don't know if anyone would have noticed it, but it's a big improvement IMHO.
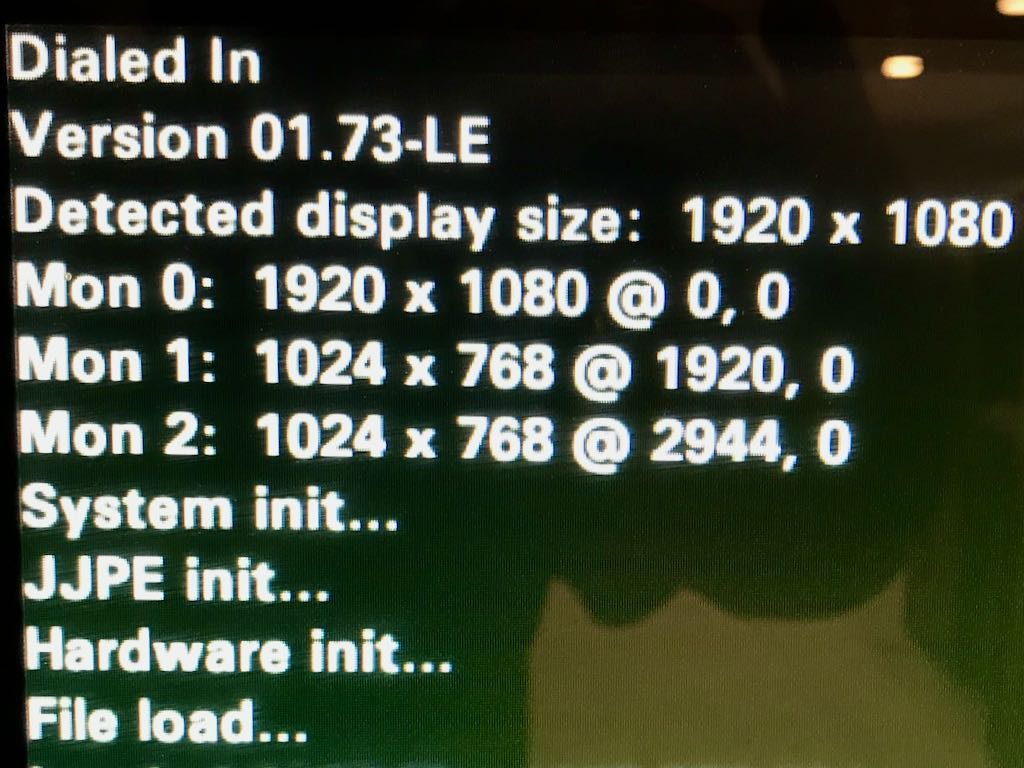
Upgrade to Firmware 1.73
October 11, 2019
Ever since Dialed In! firmware version 1.60, some people experienced synchronization issues with the Facetime-like video calls displayed on the smartphone. The face animation and the speech might not be synchronized. This caused a good number of poeple to stay at firmware version 1.57. Jersey Jack Pinball has resolved the issue with firmware 1.73!
The release notes state:
- Display performance enhancements
- QED and Betty now start moving at beginning of ball search instead of at end
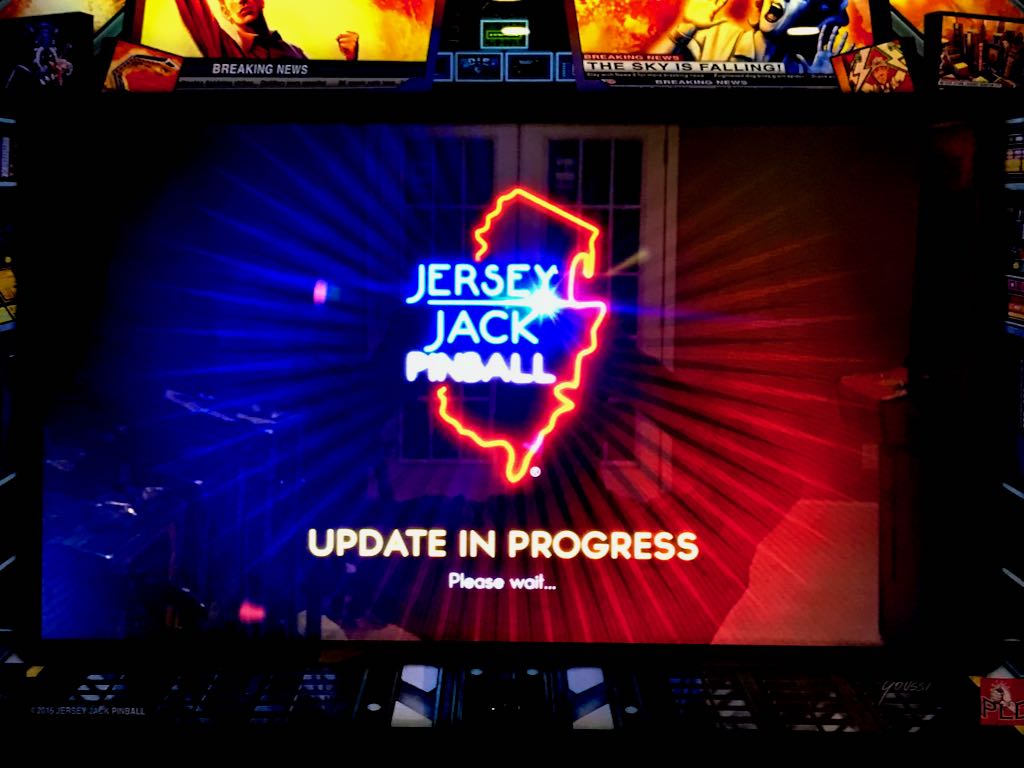
Upgrading to 1.73 was simple for me because I was already running 1.71 and could do a delta upgrade. A couple pictures of the process are shown below.

Upgrade to Firmware 1.71
September 6, 2019
While Jersey Jack Pinball machine are very impressive, the firmware upgrade isn't for the faint of heart. Anyone who is computer savvy can handle it, I expect, but it could be a little much for the pinball owner that just wants to press start and hit the flippers.
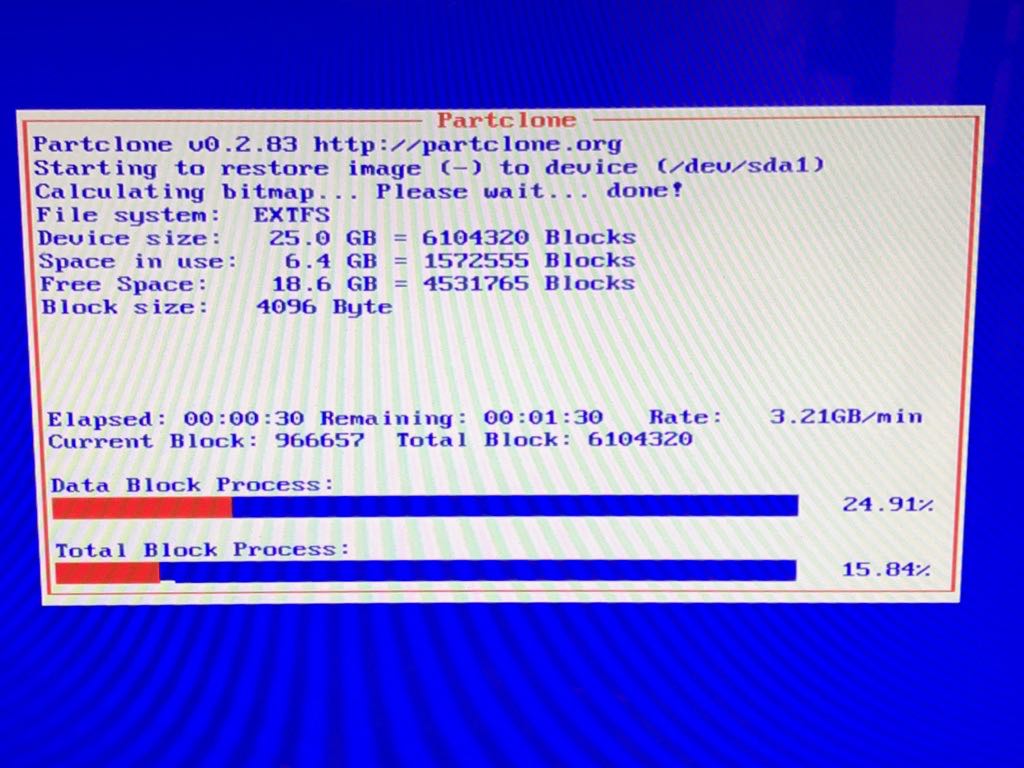
Jersey Jack documents the process well so I'll only summarize it. There are both full and delta upgrades. Since my Dialed In! was running 1.57, in order to upgrade to 1.71 I first needed to do a full upgrade to 1.61 and then do a delta upgrade to 1.71. Both steps involve downloading the proper code from Jersey Jack's web site. For a delta upgrade you simply place the code into a folder on a USB stick and then use the diagnostic menus to select "upgrade". However, the full upgrade requires downloading a separate program (UNETBOOTIN) in order to create the image for the USB drive. This process has a warning that, more or less, says that if you do it wrong "there is a good chance you will overwrite your PC hard drive with game code". This is your actual PC, not the pinball machine. So follow the directions!
For the full update, the USB drive is inserted into the game while it is powered off. When the game is powered on, it effectively boots from the USB drive. There is a convenient USB connector just inside the coin door (which is normally used for the bluetooth dongle).
Regardless of the complexity, it worked like a charm and only took 15 minutes from start of downloading to finish.
During the firmware upgrade you can see that Jersey Jack Pinballs are very much PC's at heart running Linux. Here is an image of the process.
Note that full upgrades cause all settings to be lost. There is functionality to backup settings to a USB drive and restore them later, which can be used if you don't want to go with the default settings.
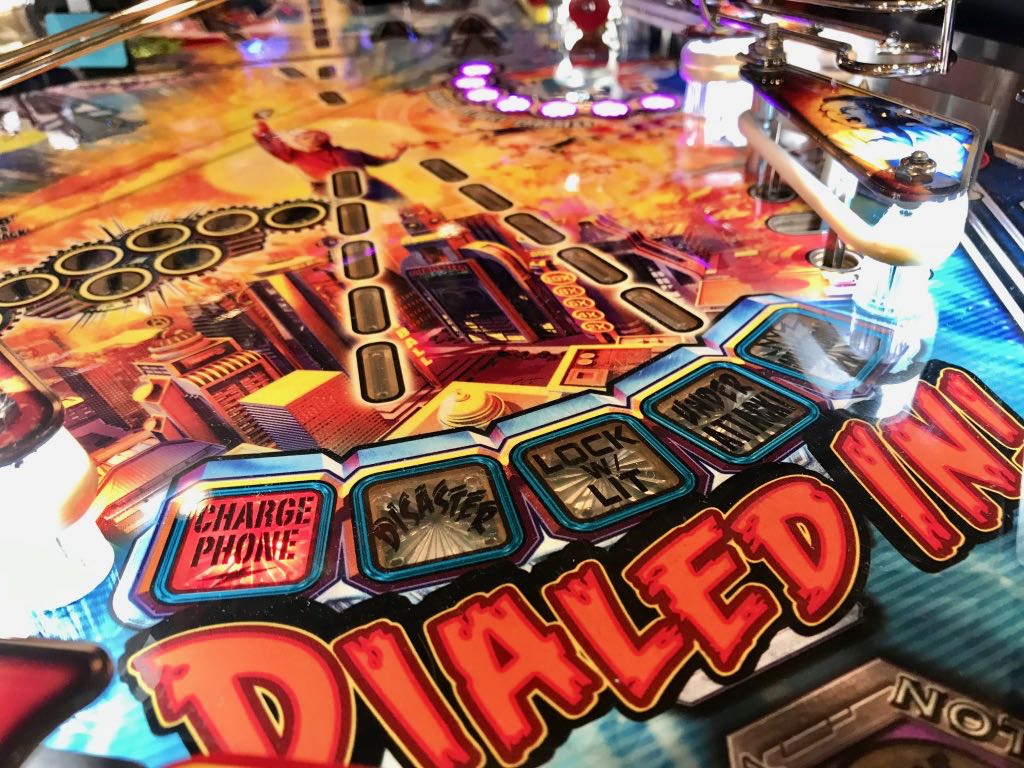
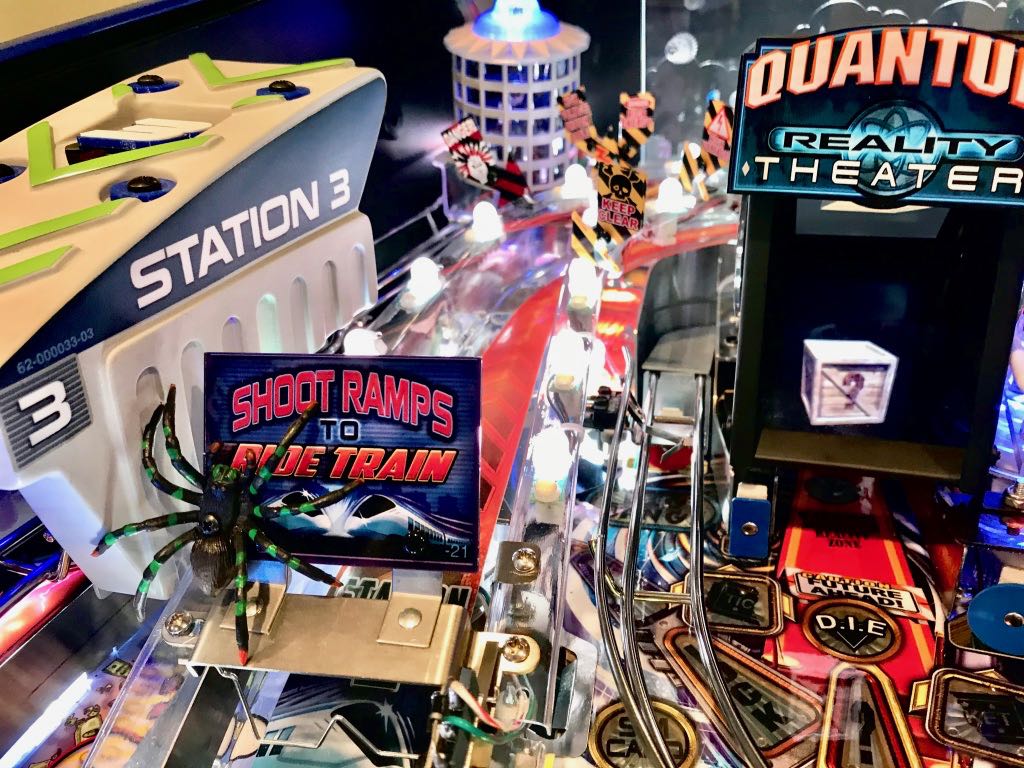
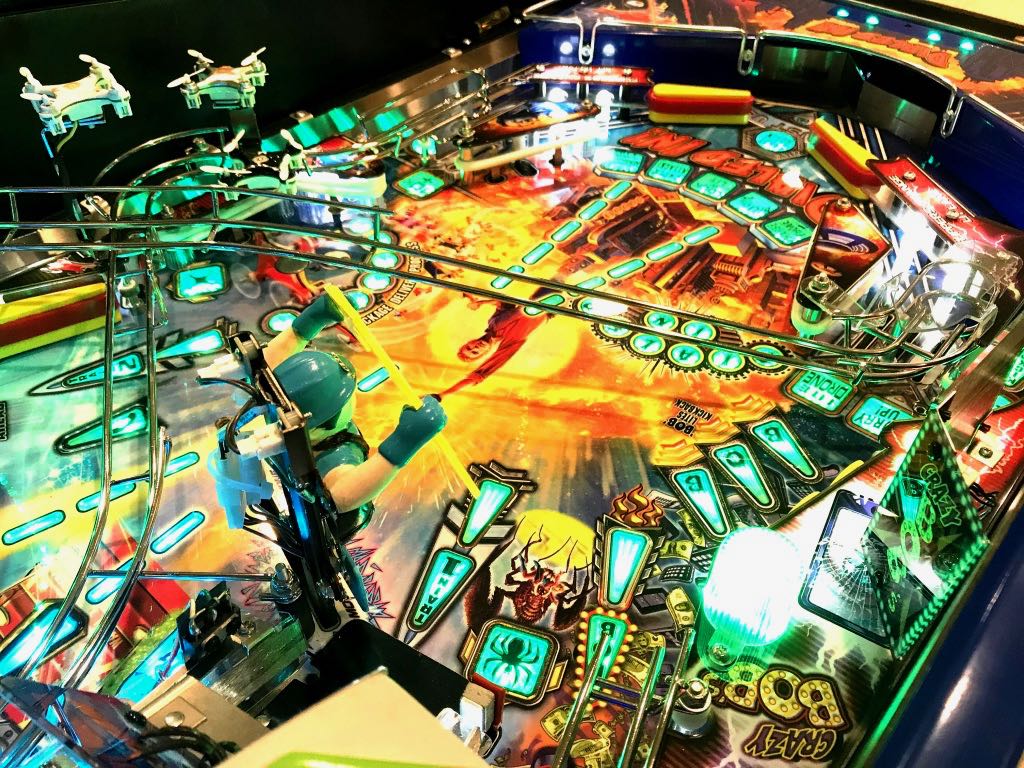
Playfield
September 20, 2019
Here are some pictures of the Dialed In! playfield.
Cabinet, Backglass and Apron
September 6, 2019
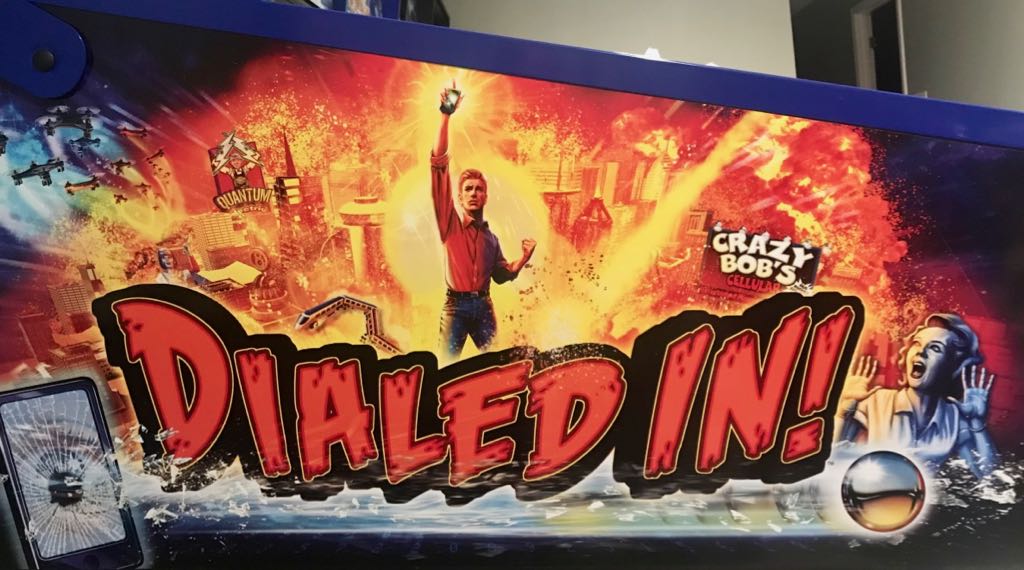
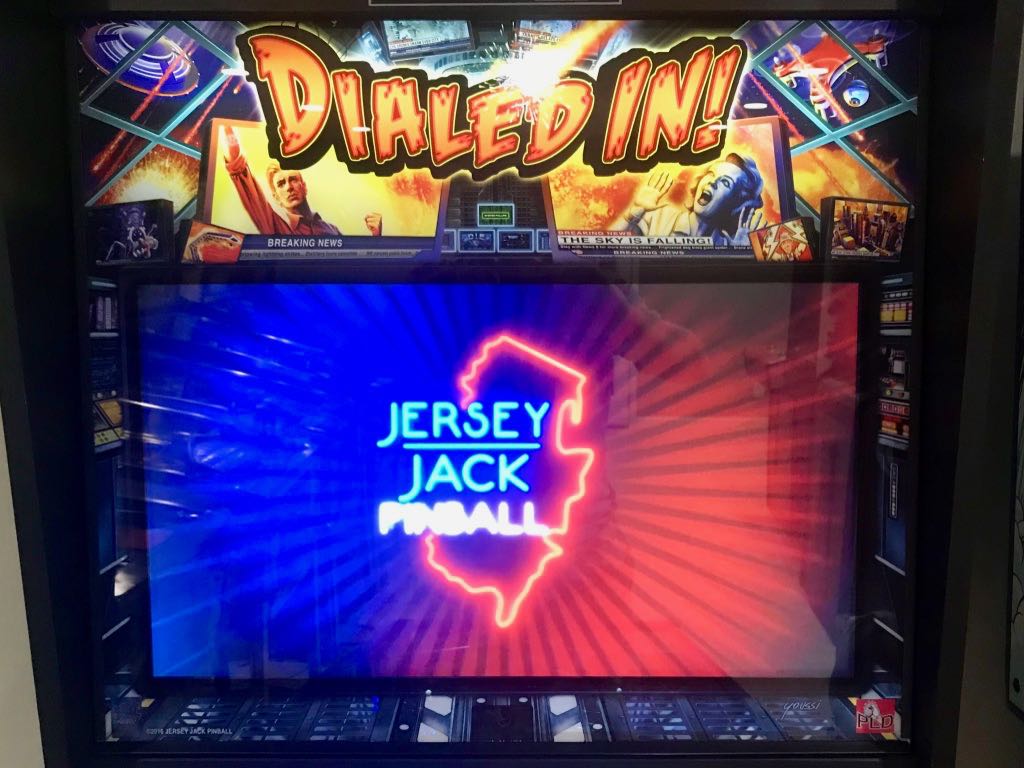
Here is a picture of the side cabinet artwork and the "backglass". I'm not sure what the appropriate word to use for Jersey Jack Pins to replace backglass because they really have a small translite and then a 27" display!
Followed by a picture of the Dialed In! apron.
.jpg)
Inside the Cabinet and Backbox
September 6, 2019
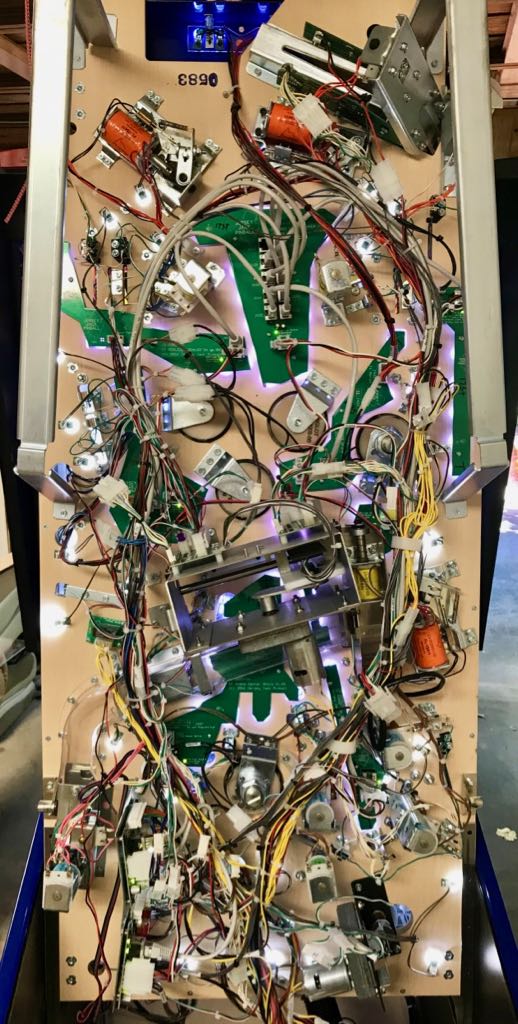
Let's start with a picture of the bottom of the playfield. No surprise, this game is loaded. (Yes, this picture was taken from inside my garage shortly after I brought home Dialed In!).
Now let's move to the backbox. The 27" display is mounted to a very sturdy articulating arm. I was very impressed to find this.
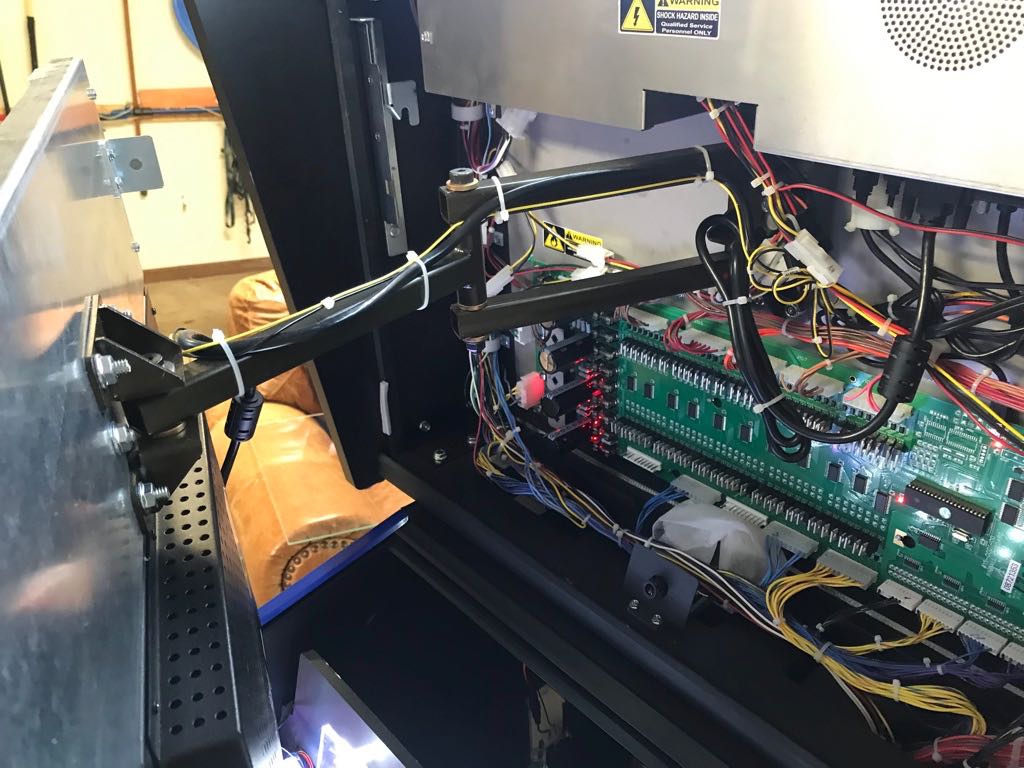
Because the display is so nicely mounted on the articulating arm, you can pull it out and then angle it while you are doing repairs. This is shown below (along with my Sthil weed whacker photo-bombing the picture!)
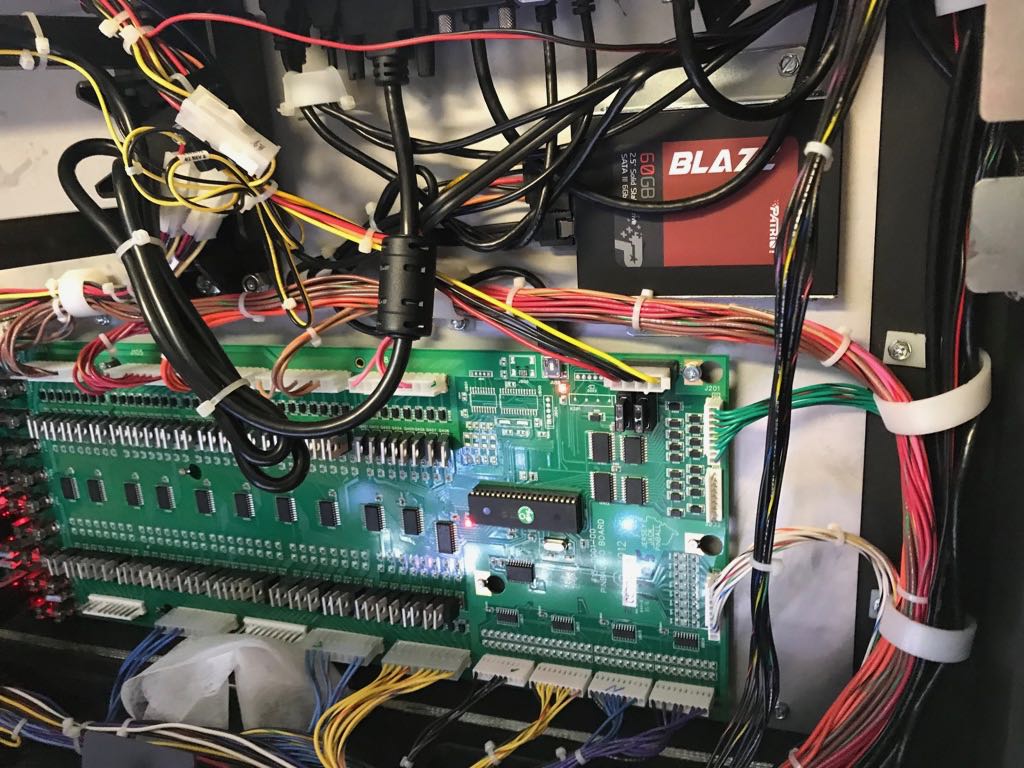
As mentioned previously, the core of Jersey Jack's pinball system is basically a PC. It certainly has lots of custom hardware to emit RGB lighting and control solenoids, but the main processing takes place on a PC running Ubuntu. You can see in the picture below that a 60GB solid state drive is used for storage! Below the SDD is one of the custom boards.