Williams Getaway: High Speed 2 Pinball
Repairs, Restorations, Tweaks and Insights
![]()
Introduction
The Getaway: High Speed II was an unexpected purchase. When I went to purchase a non-working Terminator 2, this pinball machine was sitting right next to it. My wife really enjoyed the game (and had played Getaway previously to finding it here). It was in good shape, the seller stated it was "100% working", and the price was reasonable.
I did find a couple of things wrong with it when I brought it home. Luckily, none of these were a big deal. Also, as seems to be the case with many newly acquired pinball machines, several items broke shortly after bringing it home and playing it for a while.
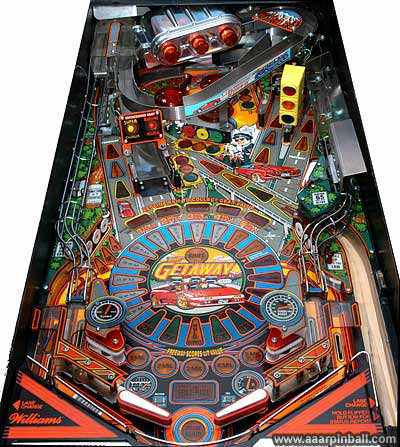
The picture to the left shows how well my Getaway cleaned up. I took apart about 50% or so of the playfield, replaced star posts and rubbers, and gave it a thorough cleaning. I also purchased new legs, as well as new playfield glass.
Gear Shift / Plunger stopped working
Not being able to launch the ball is a pretty significant problem when it comes to pinball. I was able to track this problem down to a small board called the "High Current Driver Board Assembly". A picture of this board is below.
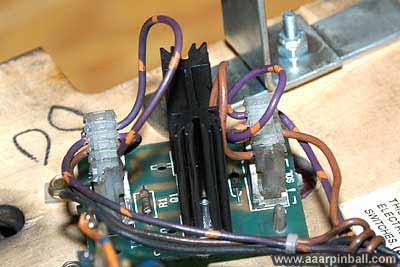
I found that pressing on the transistor in the middle of the board caused the plunger to work. After this discovery, I resoldered the transistor to the PCB. Problem solved.
Supercharger stopped working
I was quite unhappy when this happened! It happened within the first couple hours of play. I'm happy to report it was the result of a blown fuse. After a trip to a local Radio Shack (do you know that Home Depot does not sell the correct slow-blow fuses?), I replaced F103 (3 amp slow blow), and it was working again.

Although I never proved this, I suspect the fuse blew around the time that the supercharger diverter broke (see above problem). I think the loose wire may have shorted something and caused the fuse to blow. The fuse has not blown again after countless plays.
Spring steel on Up/Down ramp had broken off one of the rivets
Depending on the moon phase and the time of day, this may or may not have been a problem. Often times the single rivet would hold the spring steel in the right place, but other times the spring steel would rotate and face the wrong direction. When facing the wrong direction, the pinball would never make it up the ramp.
I looked into purchasing a replacement Up/Down ramp as well as just the spring steel. I found an Up/Down ramp for $100+ dollars, which was much more than I wanted to pay. While I did not find a specific replacement for the spring steel, I suspect someday I might be able to go down that path. If only I had the ability to insert rivets...
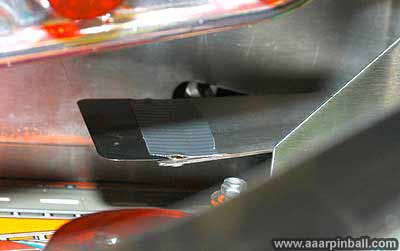
In the meantime, I did something that some people may not approve. I used a nicely-cut piece of Duct Tape to hold the spring steel in place. This does appear to have easily and inexpensively solved the problem. You can see the solution below.
Rivets on diverter gate for supercharger replaced with machine screws
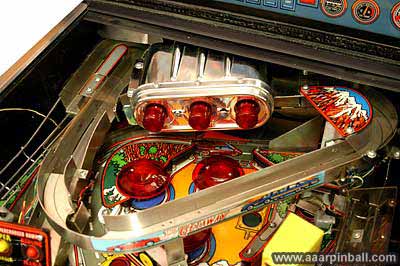
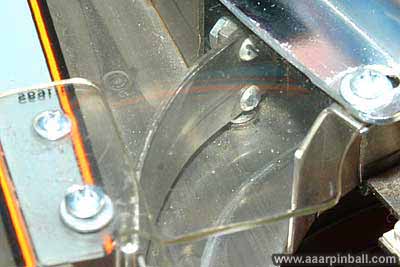
The supercharger is one of the classic pinball machine toys. When activated, a diverter gate opens. Hitting the pinball up the supercharger ramp causes the pinball to enter the supercharger. Inside the chrome-like container with the three lights are three magnets that pull the pinball through and make it go around (and around) the loop very quickly.
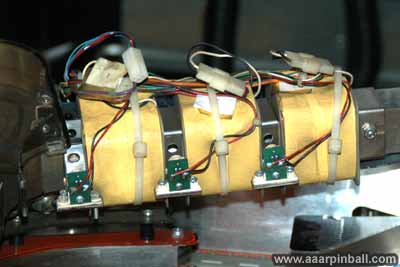
The image below shows the magnets inside the supercharger.
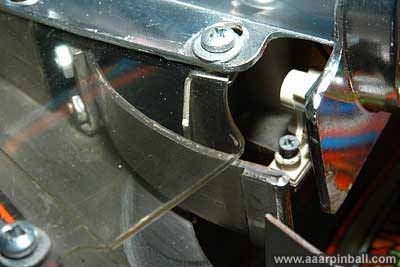
Most supercharger diverter gates have a common problem. Over time the rivets break, and the diverter is no longer connected to the shaft. A previous owner of my Getaway solved this by using small machine screws in place of rivets. While the supercharger operates this way, the pinball actually hits the machine screw heads when it zips around the supercharger loop. You can hear a little "whack" each time it goes around. Actually, there are two whacks. The first is by design because the ball actually jumps from the bottom left of the loop back onto the loop (since the entryway to the supercharger is below it). The second "whack" is the pinball hitting the head of the machine screw.
This second "whack" does slow down the ball by what I estimate to be 2x. However, the supercharger is way-cool even with this issue. The photo below shows the nuts used on the back of the machine screws, and below that you can see the heads of the machine screws.
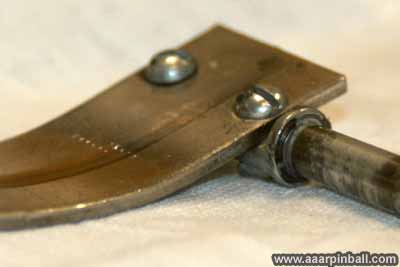
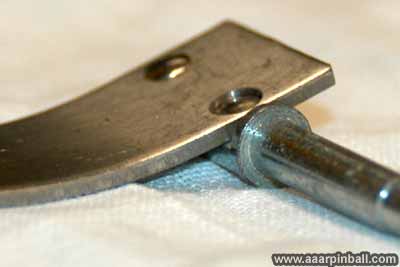
I purchased a NOS (new old stock) diverter and installed it. The following pictures show the original diverter and the NOS diverter. The second picture clearly shows the original rivet was recessed into the metal structure while the first picture shows the protruding machine screw.
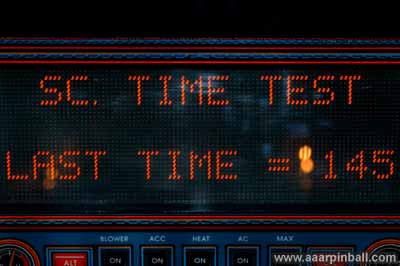
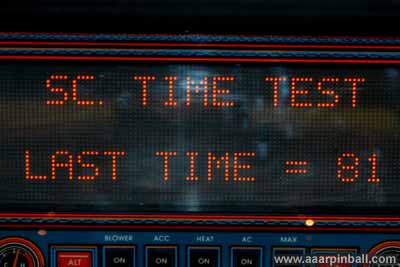
Prior to this fix, the diagnostics showed a supercharge test time of about 145 (what unit is this?). After installing the new diverter, I'm getting a supercharge test time of about 90 to 95. This number varies somewhat, as can be seen in the second picture below (where I happened to catch it when the value was 81!). The first picture shows the original test time with the machine screw diverter.
Supercharger diverter stopped working
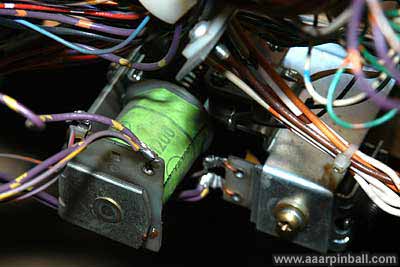
Shortly after bringing Getaway home, the supercharger diverter stopped working. This turned out to be a simple "wire to the coil" problem. I guess that the machine had not been used in a while, and the play it was now receiving caused one of the coil wires to break off. Below is the coil that needed to have a wire reattached with solder.
Upper right flipper stopped working
As with the previous item, the problem turned out to be that a wire broke loose from the flipper coil. This was easily fixed by soldering the wire back.
Multiball locking rod would stay down too long and release multiple balls
I was not initially sure if this was by design or a problem. After posting to rec.games.pinball, I was assured that pinballs should be released individually and not all at the same time. I referred to this behavior as a "pinball train" when I raised the question on rec.games.pinball
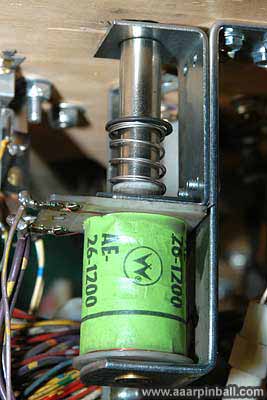
It turned out that the spring that pushes the lock rod up after the coil pulls it down was not strong enough to quickly and consistently perform its job. I replaced the spring with a new spring, but that only mildly improved the situation. Finally, I installed another spring (so there were now two), and the lock mechanism works perfectly. See the picture below.
Now when multiball is activated, a single pinball is released. The next pinball is not released until the first pinball reaches the right flipper.
Playfield has some damage
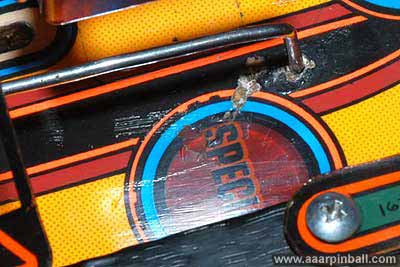
I have not attempted to fix the damage to the playfield. Luckily it does not affect game play. Also, while the damage is pretty apparent if you know where to look, most people will not notice. Below are some scrapes on the playfield that appear to have occurred when the wire divider came loose.
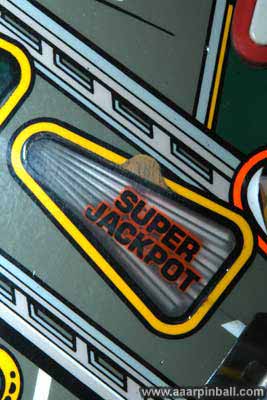
The image below shows that a small chip in the playfield has developed just above the "Super Jackpot" light.
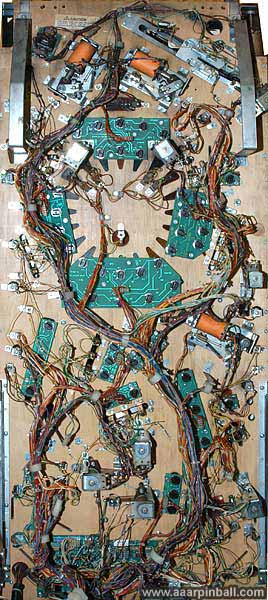
Want to see below the playfield? Here it is.