Data East Star Wars Pinball
Repairs, Restorations, Tweaks and Insights
What's cool about Star Wars?
To state the obvious, it's Star Wars! It's classic Star Wars, not the newer stuff (or at least the not so hot Episode I). That's a big factor, assuming you like Star Wars. For me, Star Wars was one of the coolest movies I saw as a kid, so the theme is definitely a positive.
Some interesting aspects of Star Wars are listed below.
-
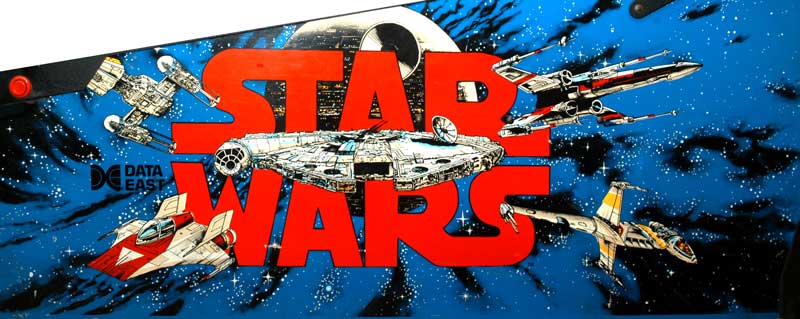
Nice cabinet and translite
-
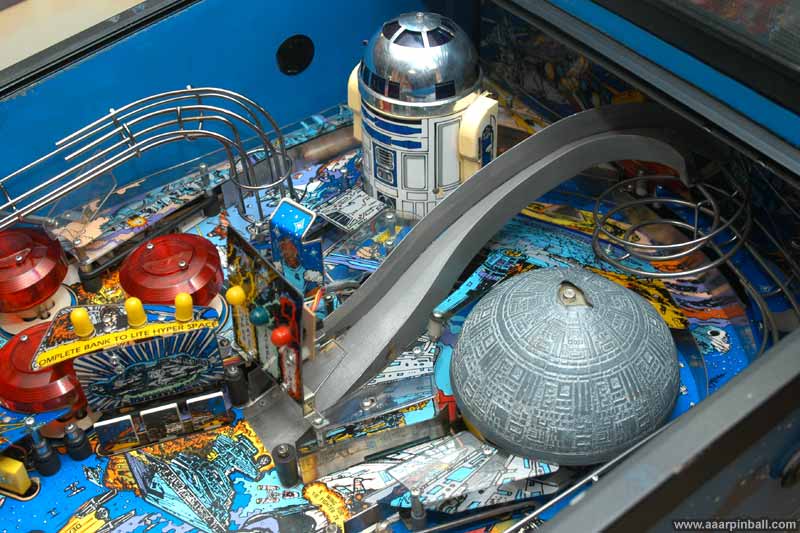
Bouncing R2D2 with moving head (and sound effects)
-
Spinning Death Star with target and opens and closes
-
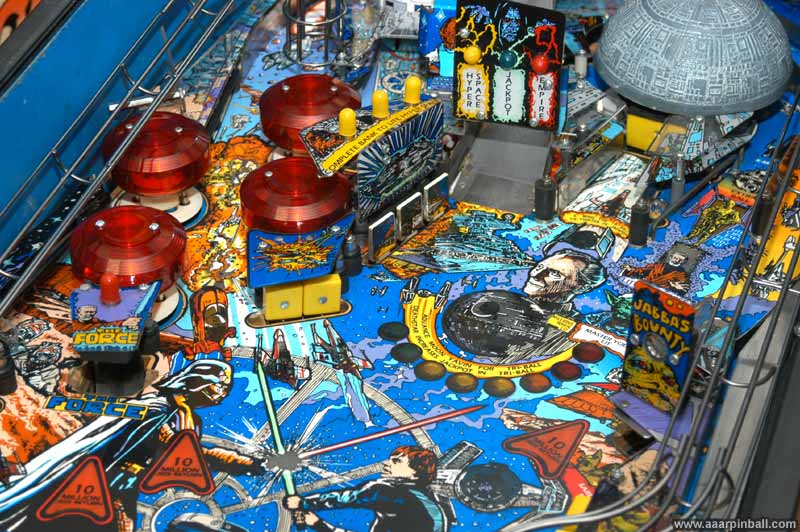
Four "extra tall" pop bumpers
-
Very good dot animation
-
(Mostly) very good sound samples of the movies
-
Three drop targets
-
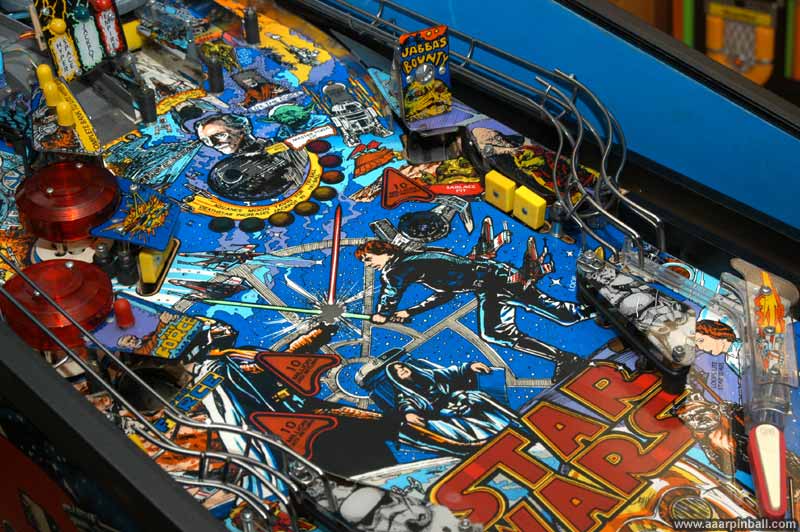
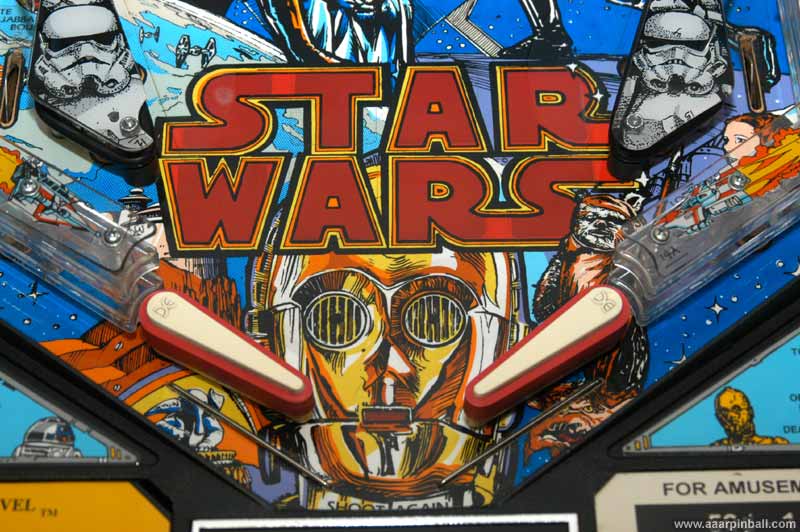
Eye catching playfield art
Initial Condition and Problems
Star Wars was the first pinball machine I purchased where I didn't play the seller's machine. The seller was very nice, turned it on and showed it had potential to work well. There were problems. For example, the ball wouldn't launch. Because the price was right, I didn't spend any time attempting to determine the significance of the problems. I had a strong belief it would clean up well.
After bringing Star Wars home, I did an inventory of its operational state. Below is a list of some of the problems I identified.
-
Lots of GI didn't work
-
Ball launcher didn't fire
-
Left scoop kicker didn't work
-
Knocker was disassembled in cabinet
-
R2D2 didn't move his head
-
Top bumper didn't work
-
Playfield "triangle" slide (bottom side of playfield) was missing on right
-
Ball would get stuck if hit into death star
-
Bottom left x-window target didn't activate
-
Bottom bumper was difficult to activate
The sections that follow discuss these problem areas as well as others.
R2D2
R2D2 jumped up and down just fine. However, R2's head didn't rotate. I was not familiar with the mechanism used to rotate R2's head so I started looking into the problem by removing R2's head. The image below shows the basic mechanism.
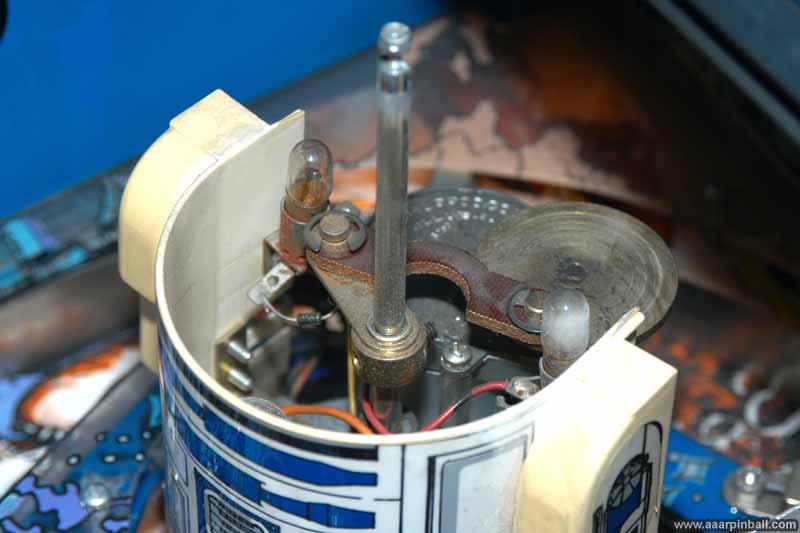
After a little more investigation I determined that the motor was turning but the disc attached to the gearbox was not. Also, I could spin the disc by hand. It appears to not be connected to any gears. I wondered whether the gears in the gearbox were worn. The image below shows the top of the gearbox.
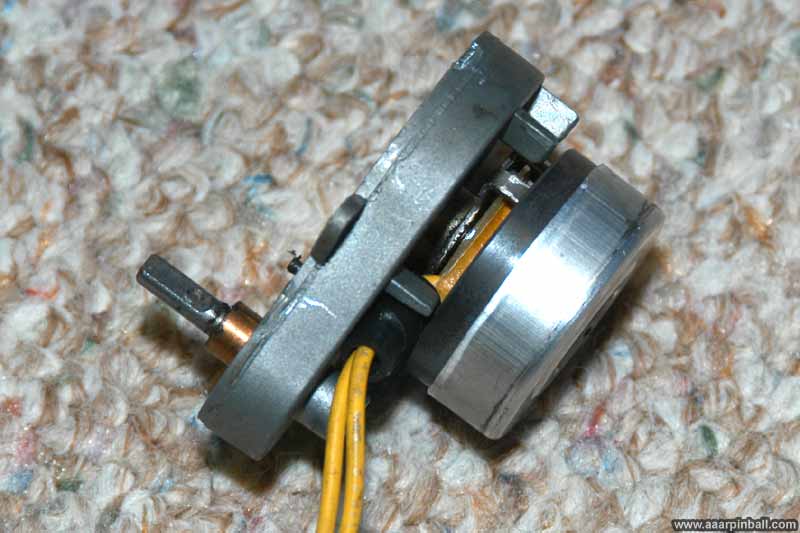
This following image shows the motor and gearbox from the side.
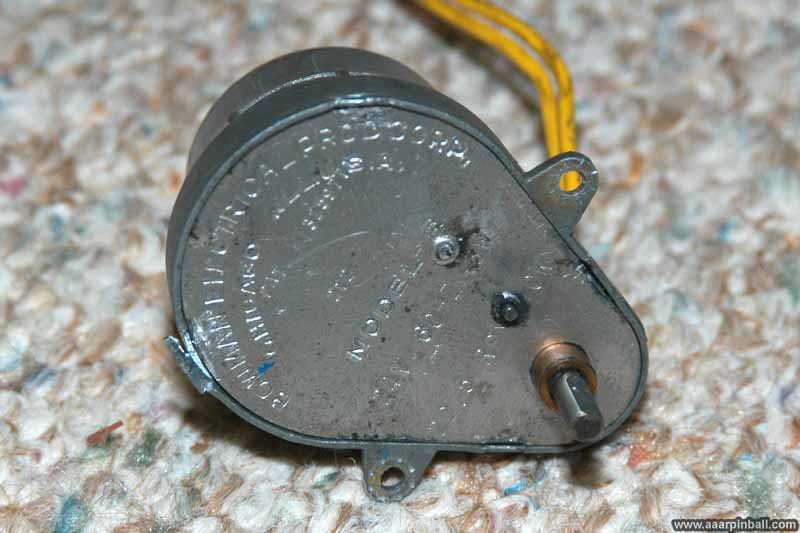
Since I did not have anything to lose, I decided to open up the gearbox. I used pliers and bent back the metal that was holding the case top in place. It appears the metal was simply bent over the top in a few locations. Once I got it opened, I found that it contained only a small number of gears. Since the gearbox was a few inches in width, I expected there would be some "larger" gears to fill the space. But, as can be seen in the image below, the gears are pretty small and only use a fraction of the space available.
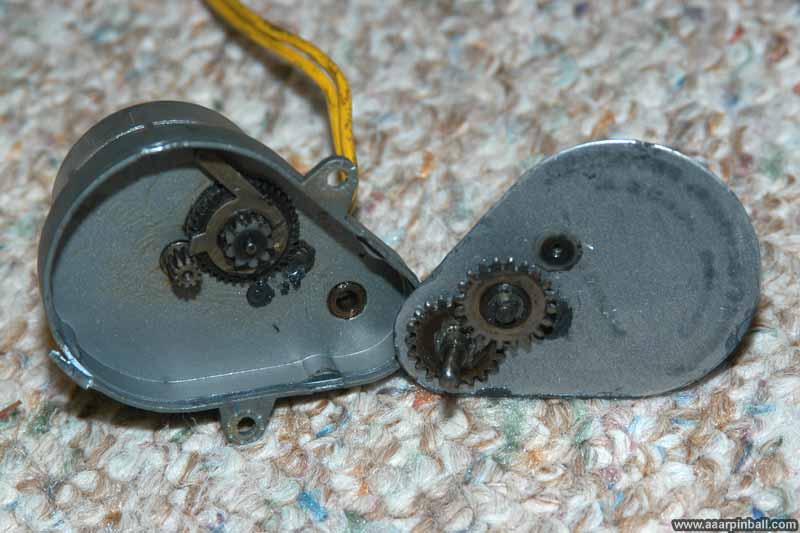
I was happy to determine that the gears inside the gearbox were in fine shape. For some unknown reason, one of them had ended up in the wrong place. When I opened the gearbox, one gear pretty much fell out. After looking at the mechanism for a short amount of time, I was able to determine where the gear should be placed. I put everything back together and R2's head now happily moves back and forth.
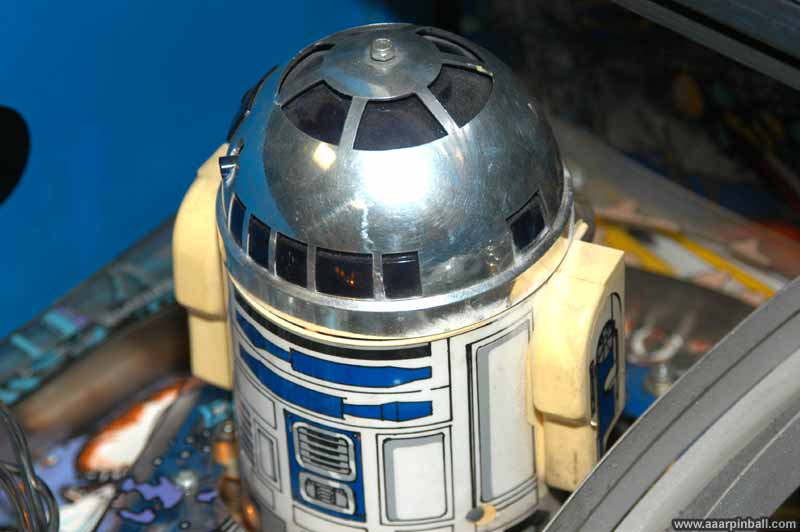
Below is a picture of R2 with his head attached.
R2D2 and Death Star movement was inconsistent
I learned from rec.games.pinball that R2 and the Death Star should have movement shortly after the pinball is launched until the ball drains. I found that R2 and the Death Star would typically start moving at this time, but would stop movement during game play. This typically occurred when a pop bumper was hit. Later, often when another pop pumper was hit, R2 and the Death Star would start moving again.
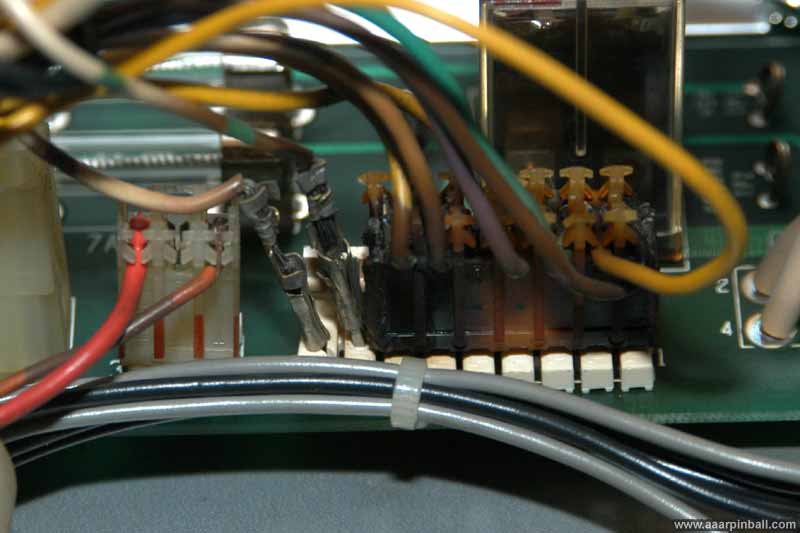
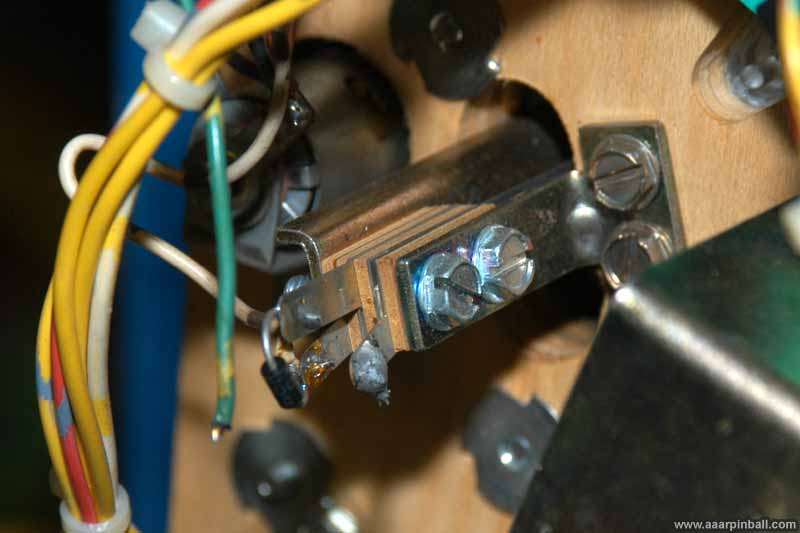
The problem was traced to a relay with two cracked solder connections. The relay is shown below. This relay controls whether 30VAC is provided to both R2 and the Death Star. The second image below shows one of the cracked solder connections. Notice the black ring around the bottom center solder joint.
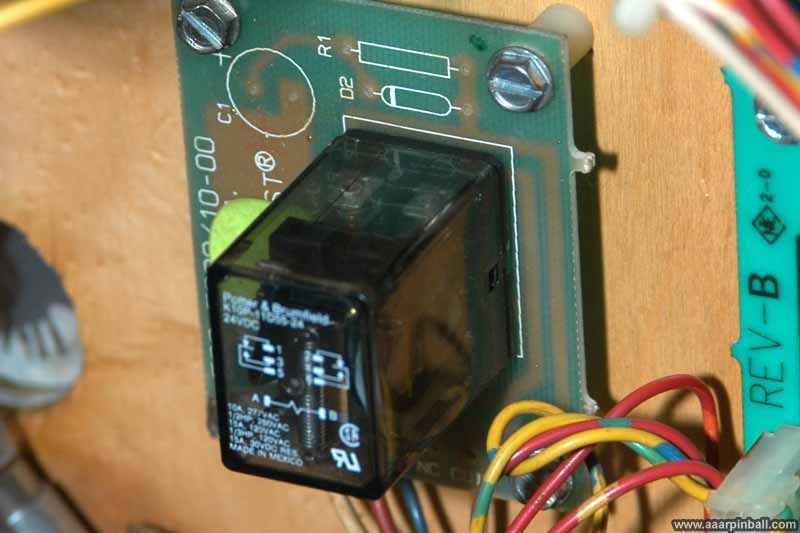
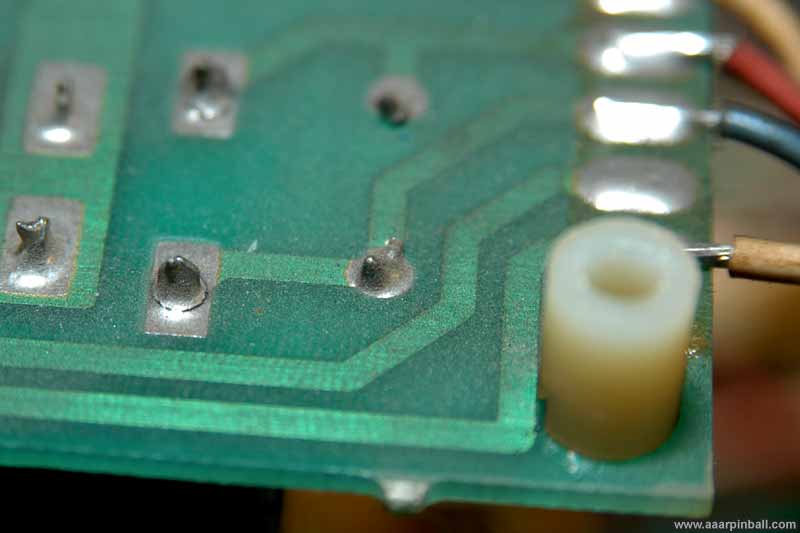
I resoldered the connection and both R2 and the Death Star no longer take breaks during game play.
Tall Pop Bumpers
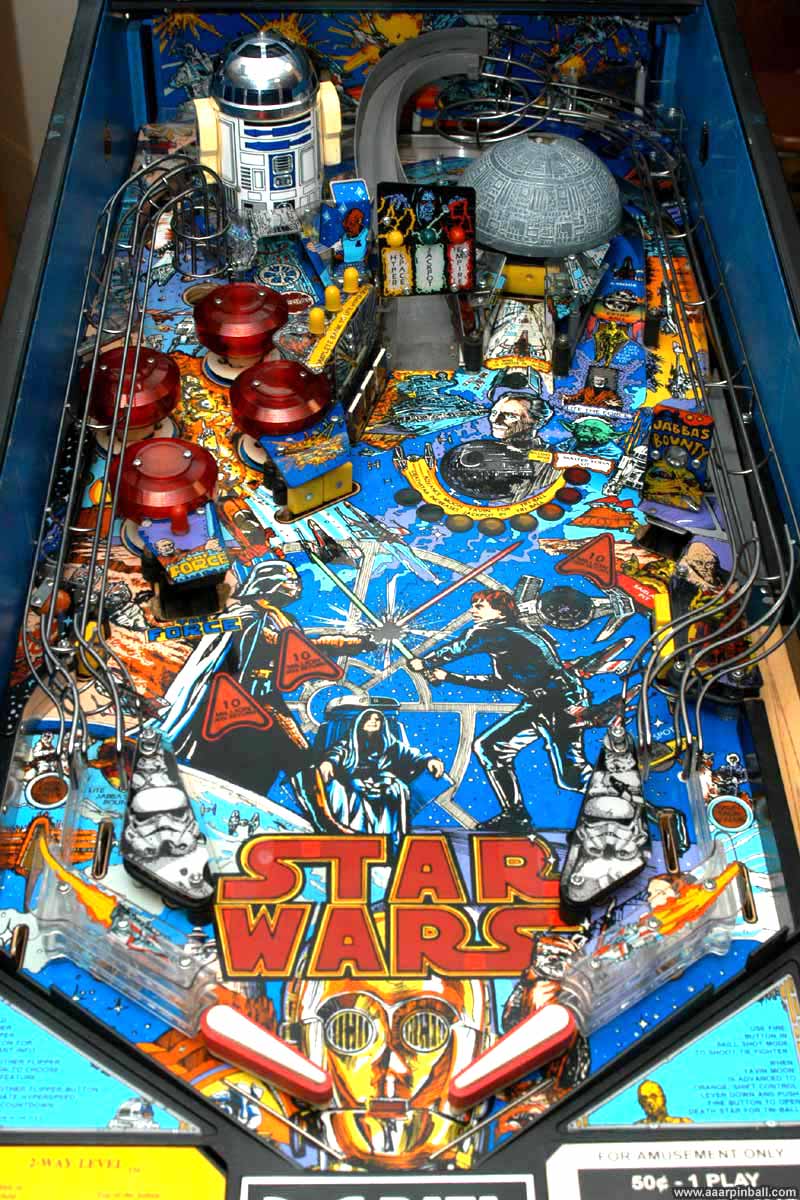
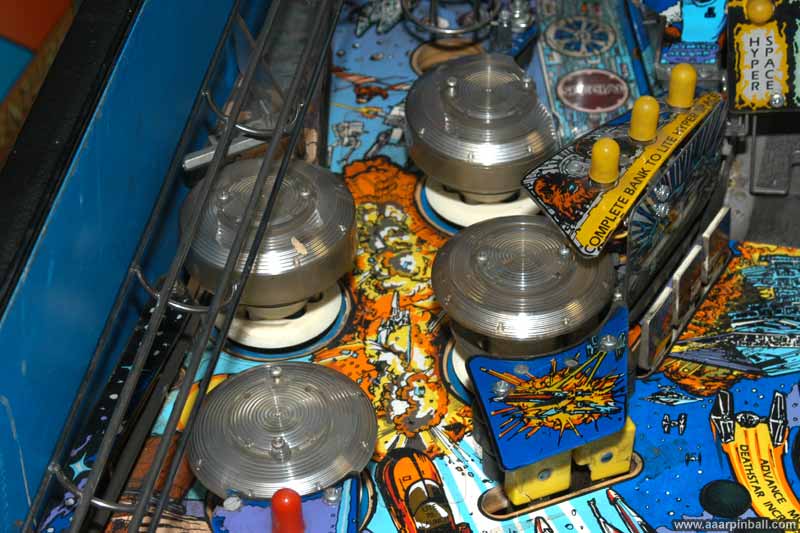
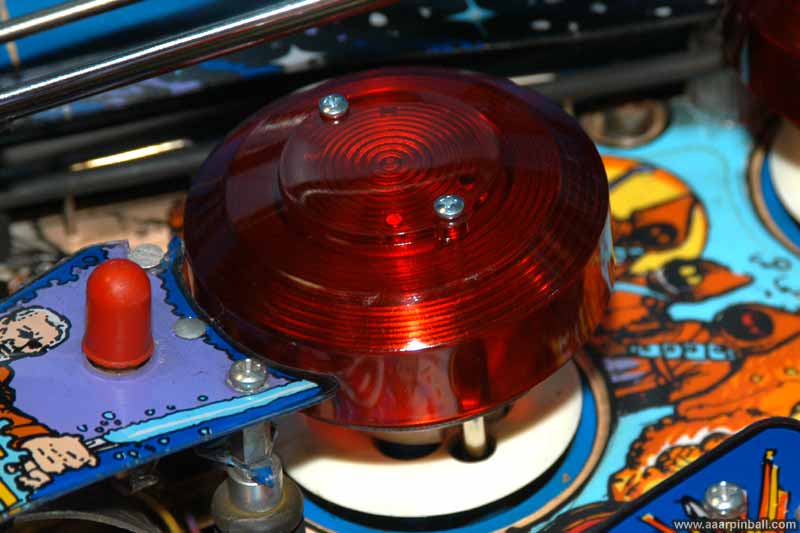
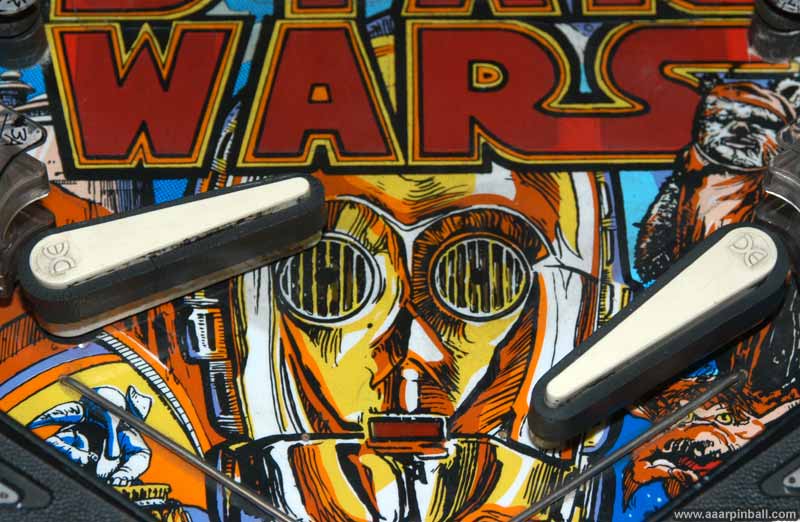
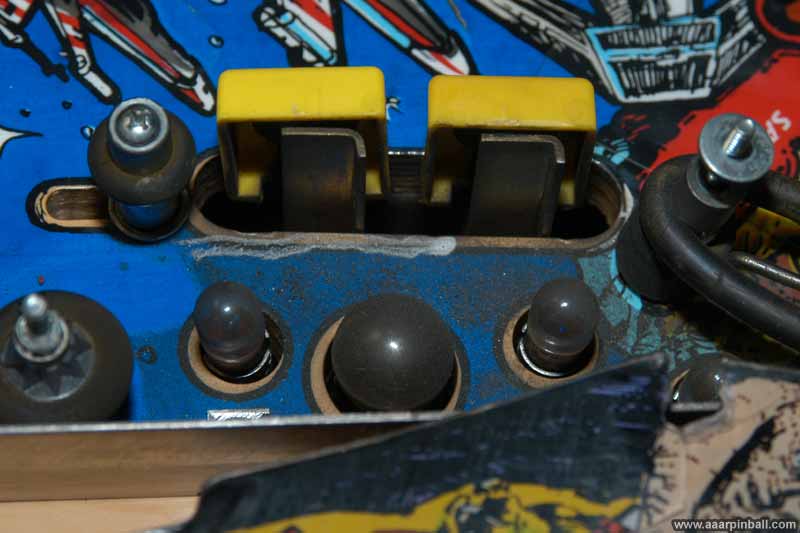
Star Wars has very cool extra tall pop pumpers. In addition to a unique look, they have a satisfying sound when they activate. While a previous owner replaced the red caps with clear, they also did something very odd. The bottom pop bumper was replaced with a standard sized part --- not the tall pop bumper cap. This isn't just a simple task of removing the cap and putting the smaller one on. Rather, the special bumper ring, rods and hex spacers were all removed. The image below shows the wrong colored caps as well as the standard sized bottom cap on the bottom. You may also notice the top cap is missing about 1/3 of the right side.
Below is an image of the wrong parts for the bottom bumper. Notice that the bumper ring does not have a place to attached an extending hex spacer. Also, the bumper rod is permanently attached to the ring.
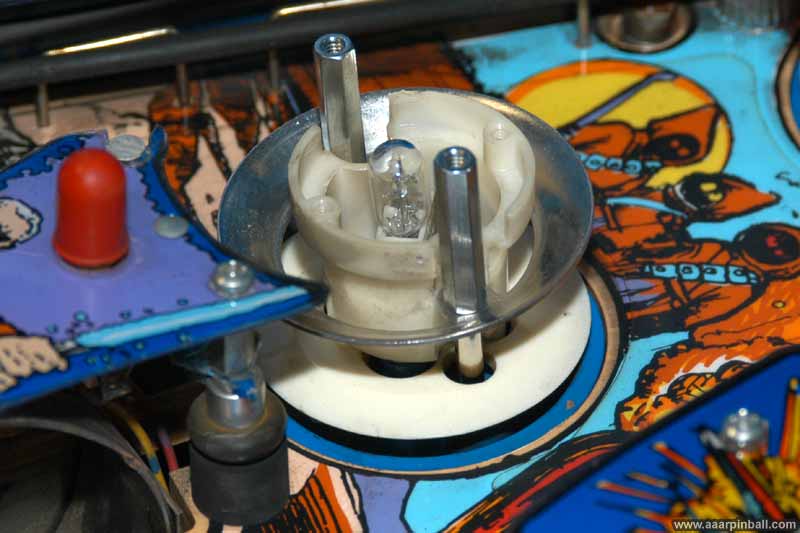
When the correct parts are used, the ring sits on top of the two rods. The rods have a male screw that extends through the ring, allowing the hex spacer to be attached. The image below shows the correct ring and rods, as well as the hex spacers.
The final result is shown below.
Pop Bumper Optimization
After rebuilding the bottom pop bumper to have the correct "large" cap, I was disappointed during test play because the bumper didn't activate very well. I first checked the leaf switch to see if the spacing between the two connectors was correct. After a little more investigation, I found two issues.
-
The height of the pop pumper can be adjusted a bit by loosening two screws below the playfield. Because the ring was a little too low, the ball wasn't able to move onto the bumper skirt as far as it should.
-
The leaf switch had some corrosion on it. It used a file and cleaned it up a bit.
After these two adjustments, the bottom pop bumper worked perfectly.
Death Star Plastic
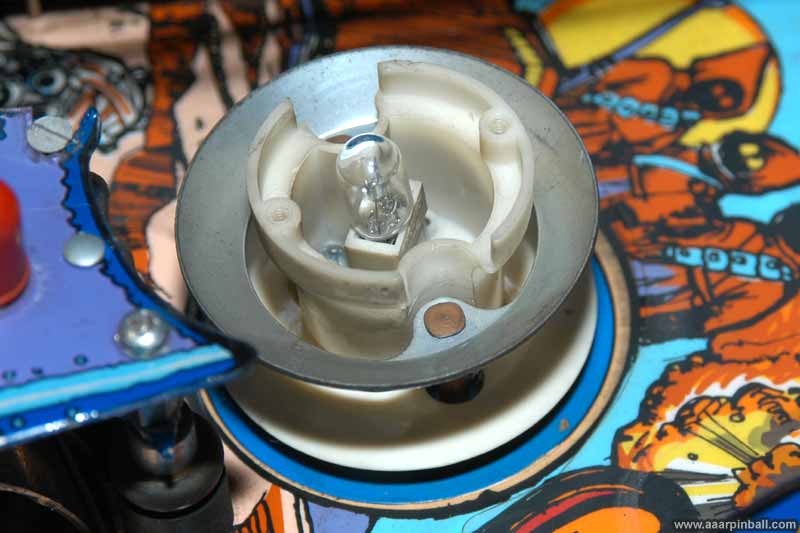
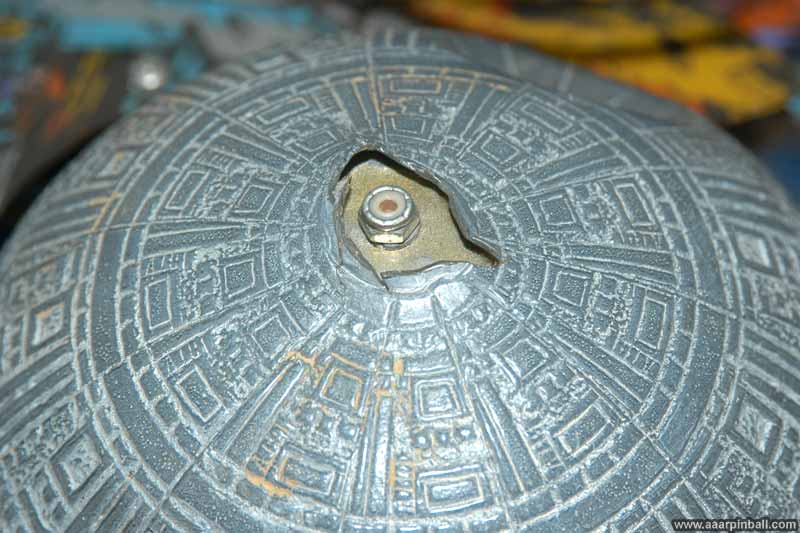
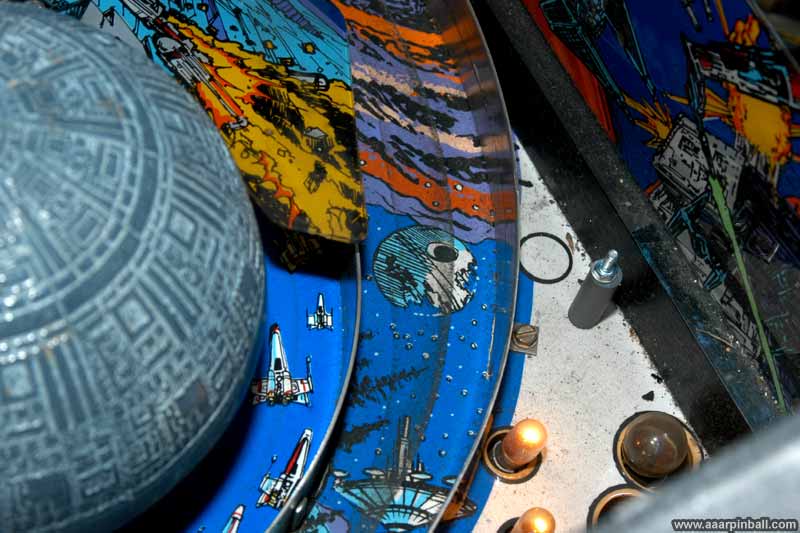
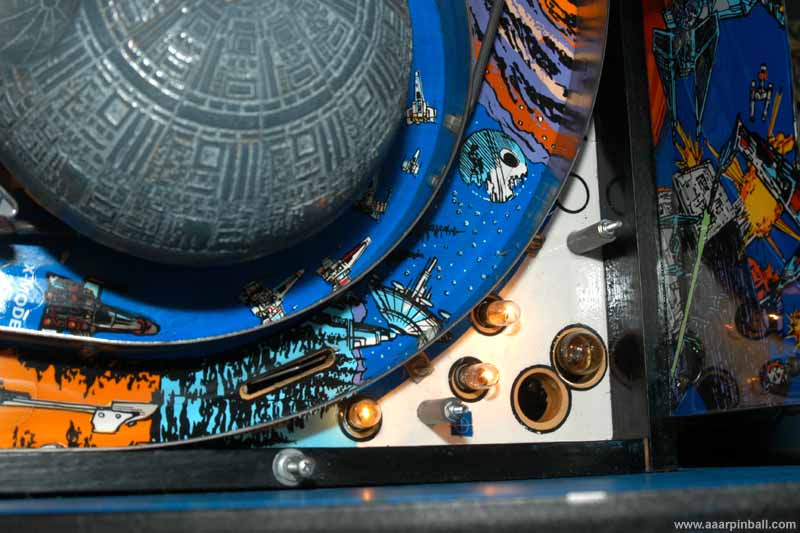
Unfortunately, the Death Star had a tough life. I'm not sure how it happened, but the top where the rod and nut attach has been destroyed. These things cost about $50 and I'm not motivated to purchase a replacement. Below is a picture of the Death Star.
Yellow X-Wing Targets
The two center X-Wing targets were in pretty bad shaped. See for yourself below.
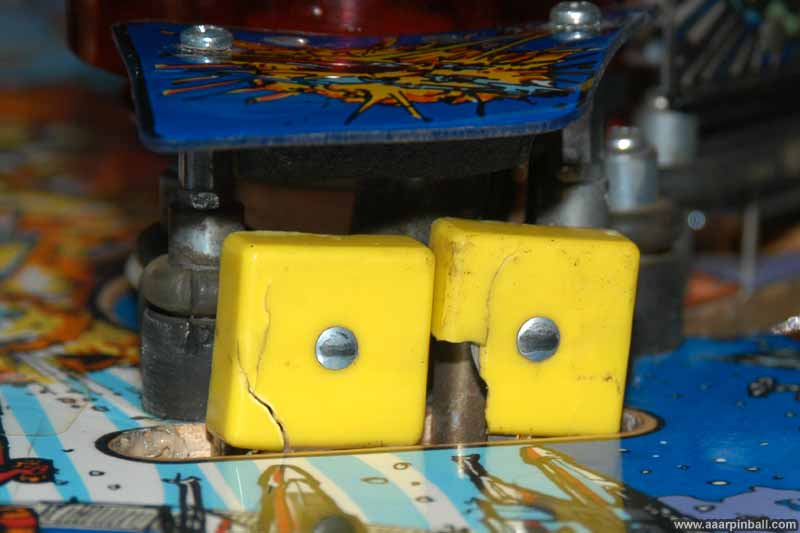
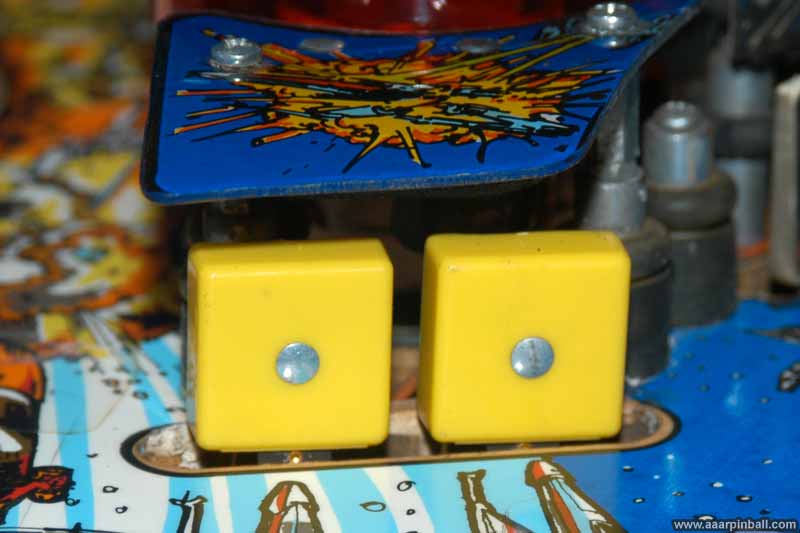
These targets are not cheap! They are $10 to $12 depending on where you look. Star Wars has 5 of these targets, so replacement can add up quickly. I was lucky that my Star Wars came with a few new targets. At first I wasn't sure whether the extra targets were new or used because they were incredibly dirty. Closer inspection showed they had never been soldered, so that was a pretty good sign they were new. After cleaning up the extra targets, they looked new. The z
Burnt G.I. Connector
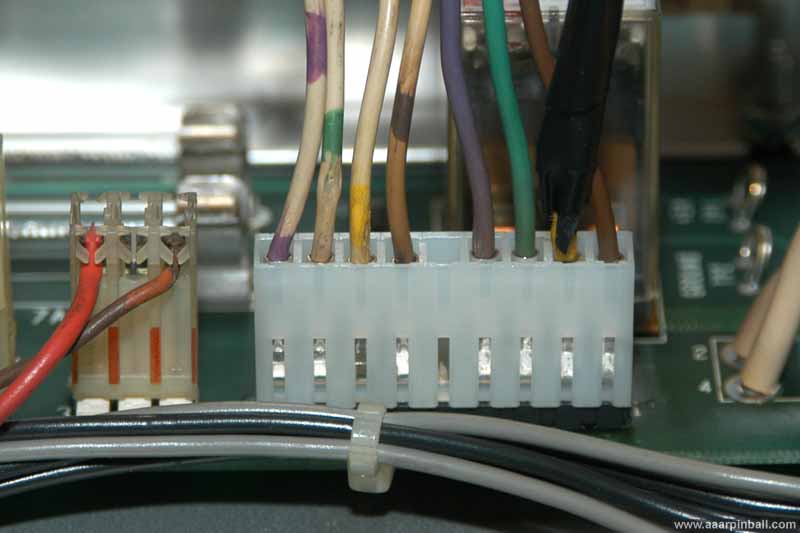
As is so often the case, the GI connector was burnt. A previous owner had connected a few of the pins directly to the board. You can see this repair below.
After rebuilding the GI connector (both male and female), I was happy to have GI stands on the playfield as well as on the backbox work. The repaired connector is below.
Sticky Left Flipper
The left flipper would almost always stick in the up position. At first I thought this was an electronic problem. However, I quickly determine it wasn't electronic by turning off the game while the flipper was stuck. Since it stayed in the up (stuck) position with the game powered off, I determined it must be a mechanical problem.
Stuck flipper? See image below.
This was a straightforward repair. The flipper link had come deformed over time. After cleaning up the mechanism, I replaced the link and plunger. Problem solved.
Shopping / Cleaning
I took apart the playfield and gave it a good cleaning. Some before and after pictures are below.
Grubby upper left playfield followed by clean upper left playfield.
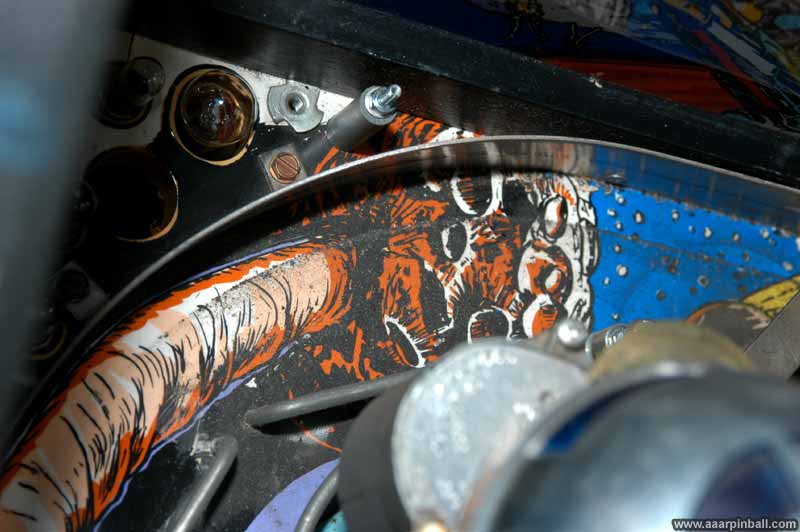
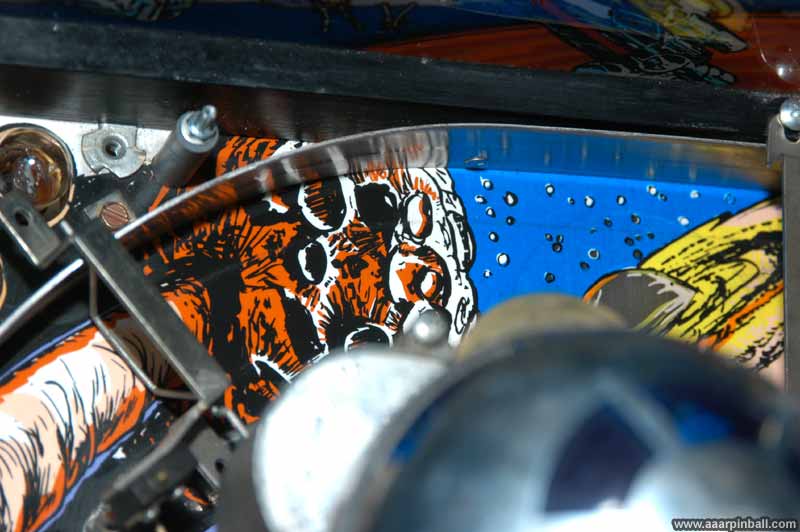
Working on the center right playfield shown below.
Close up of the dirty playfield on the center right.
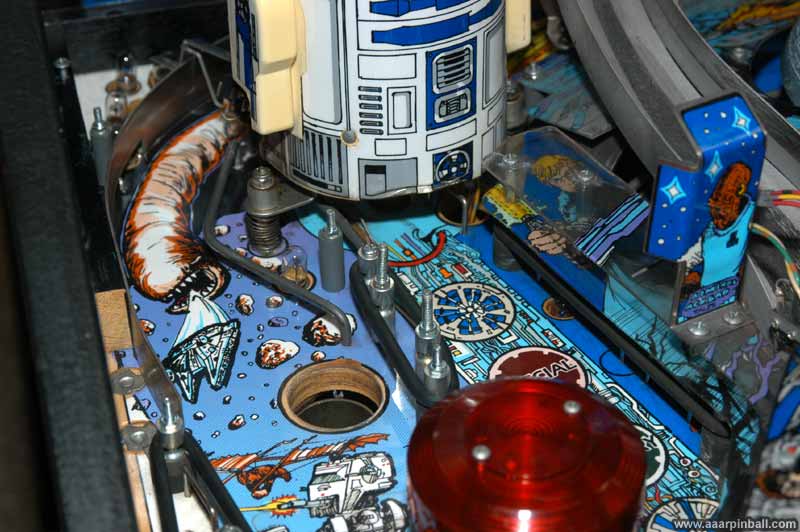
Working on the area in front of R2D2 shown below.
Grubby back left playfield followed by clean back left playfield.
Working on the bottom of the playfield shown below.
The before and after pictures below show how dirty the lane dividers were!
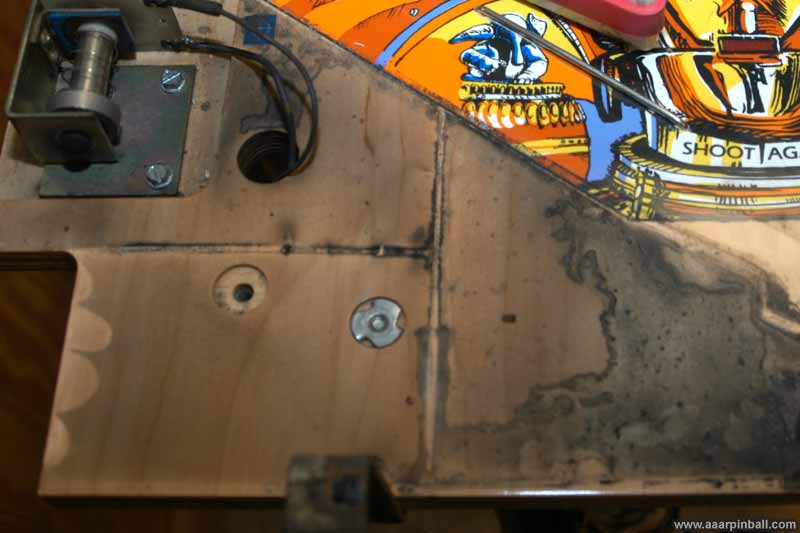
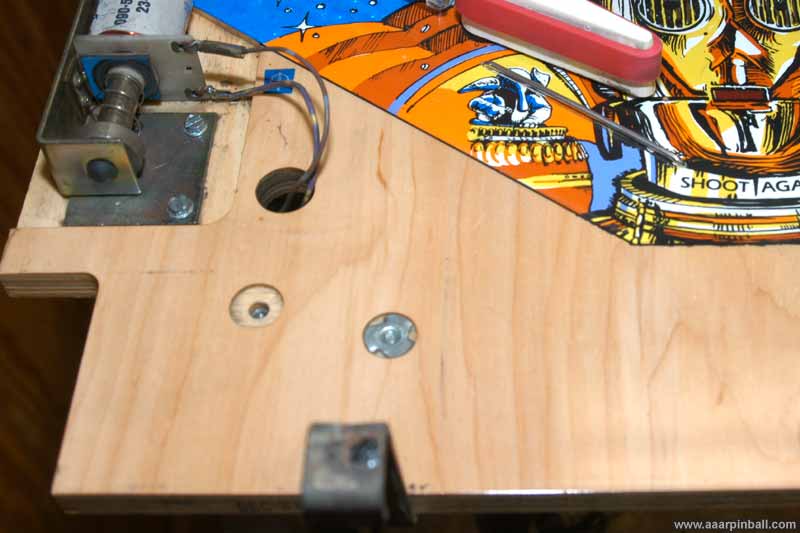
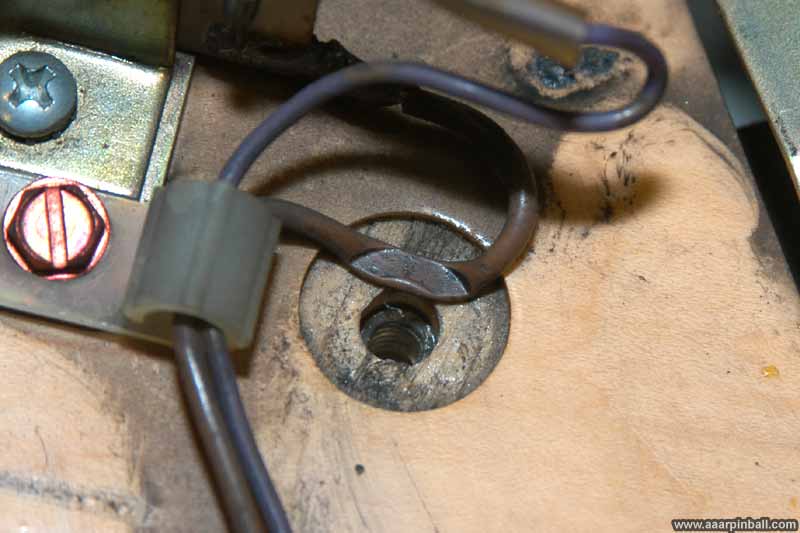
Crushed Wire
Here is a little surprise I found when removing the apron. It seems a previous owner (or even the factory?) got a wire stuck underneath the round support connector and tightened it down. Since it was working fine, I didn't do a repair. I did, however, ensure the wire was out of the way when reattaching the apron
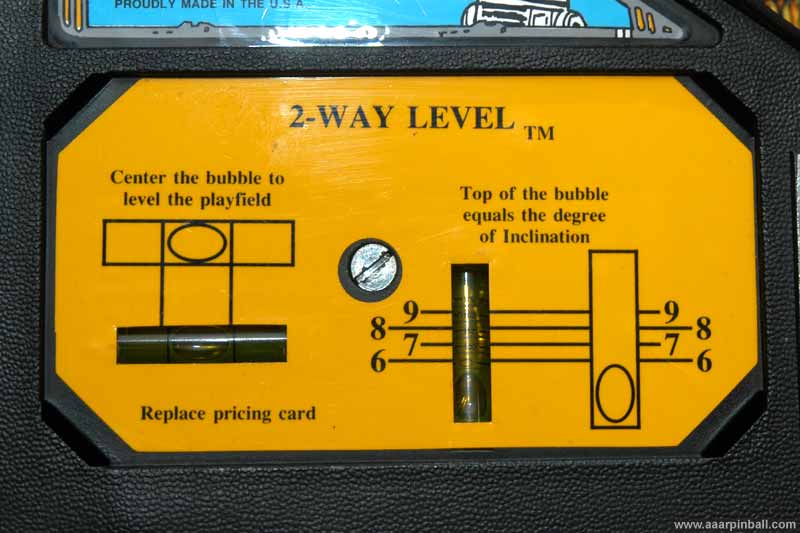
Leveling
I was surprised to find this below the instruction card. This is a feature item that some Data East pins have.
Main Ramp
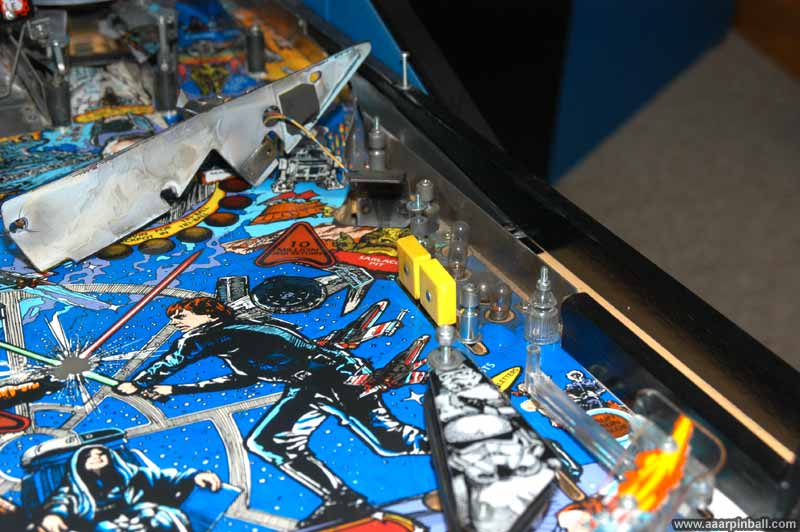
The main ramp isn't in great shape. It is common for these ramps to break their welds. It looks like the welds broke on mine and a previous owner did a questionable welding job to "repair" it.
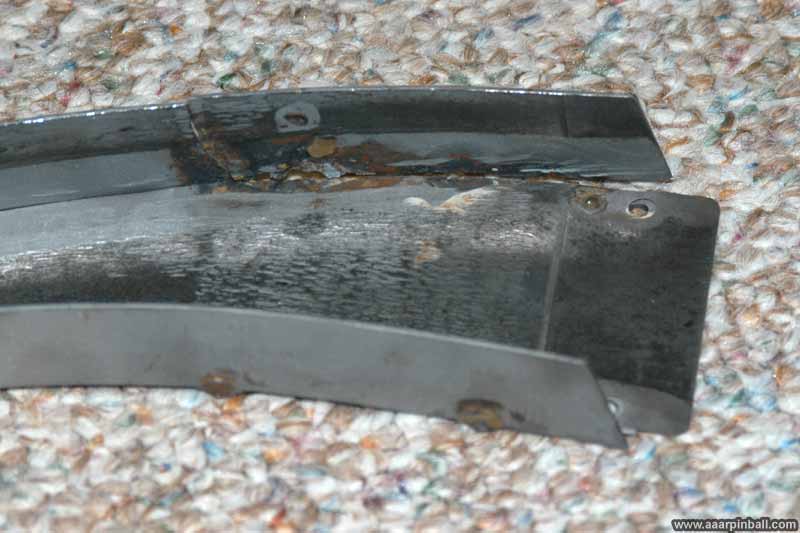
The right hand side (which is the top in this picture) isn't attached anymore. I guess the "repair" didn't even hold. I need to either replace this ramp or get it TIG welded.
Broken Wires
Several broken items turned out to be caused by broken wires. The picture below show a broken wire on the left side X-wing target.
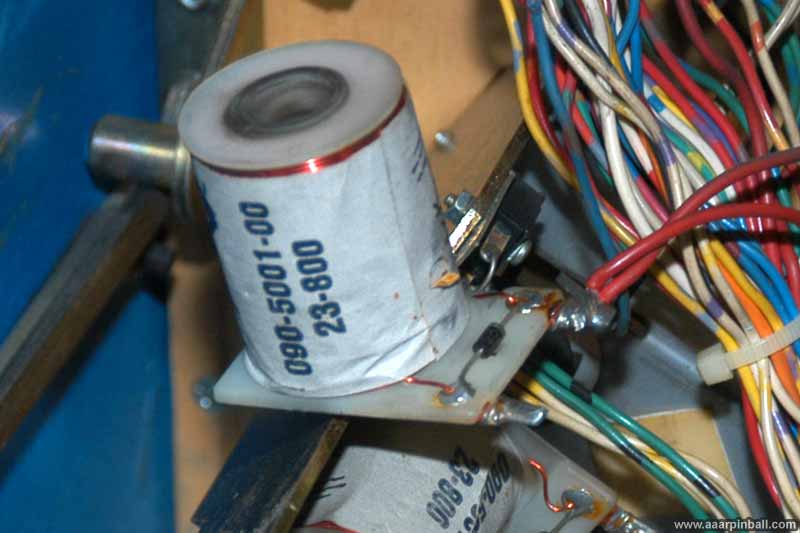
The picture below shows a broken wire on the topmost pop bumper. Note that I've removed the solenoid from the pop bumper mechanism. It was too crowed to solder while attached.
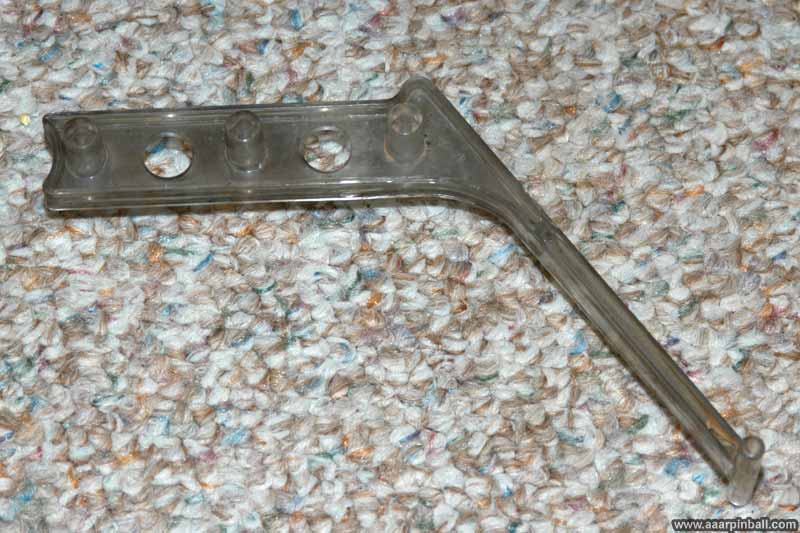
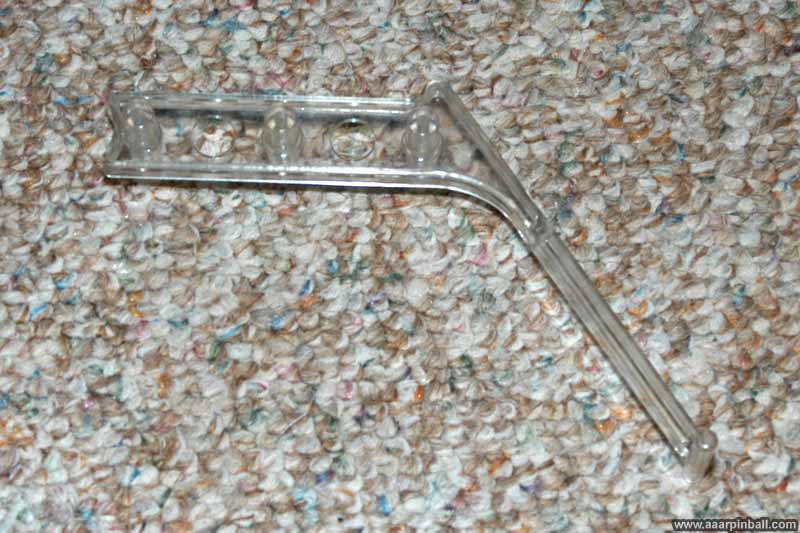
Playfield "Pivot Triangle"
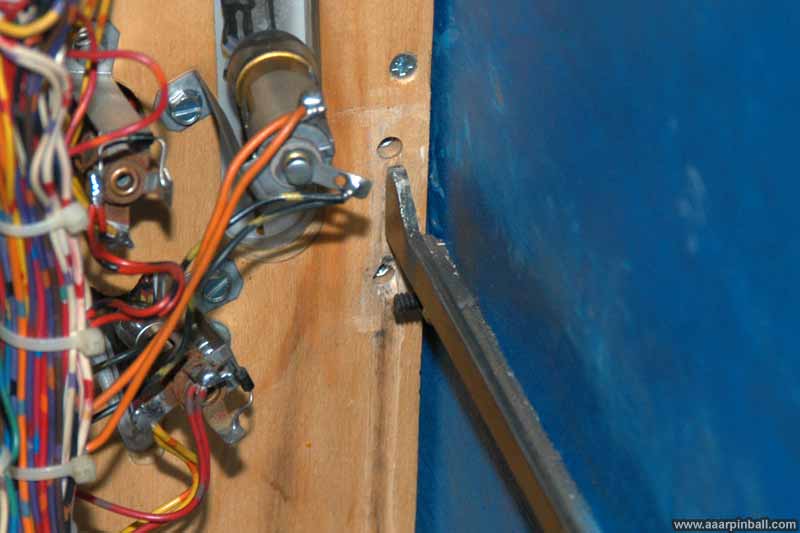
I don't know what the proper name for this part is, but I know it wasn't attached. The left side of the playfield had the "pivot triangle" attached. This is the part that allows the playfield to slide as well as to pivot upward. However, the right side "pivot triangle" was missing! The first image below shows the part and the second shows the missing right side.
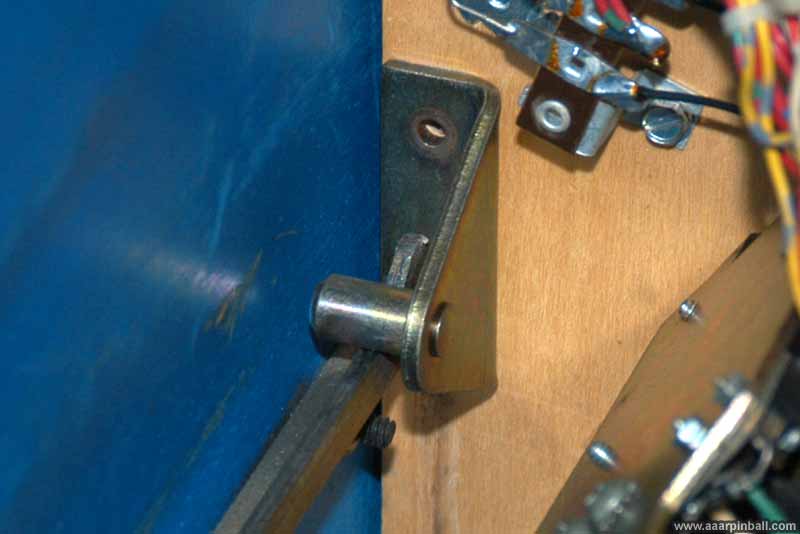
Luckily the "pivot triangle" for the right side was laying in the bottom of the cabinet. I was able to reattach it using bolts found in the cabinet also.
Missing Transistor
Before I realized that some problems were the result of broken wires below the playfield, I noticed that one transistor was missing. See below.
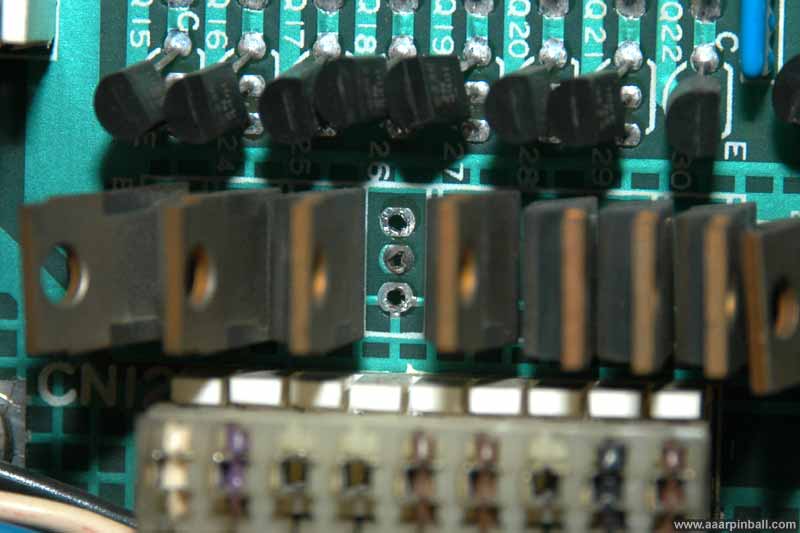
I was surprised, however, to find out that this missing transistor is not a problem! The transistor is not used in Star Wars. Apparently, a previous owner of the game was knowledgeable enough to realize this and removed the transistor to use in another game (I can only assume), Since it's not used, I have not bothered to replace it.
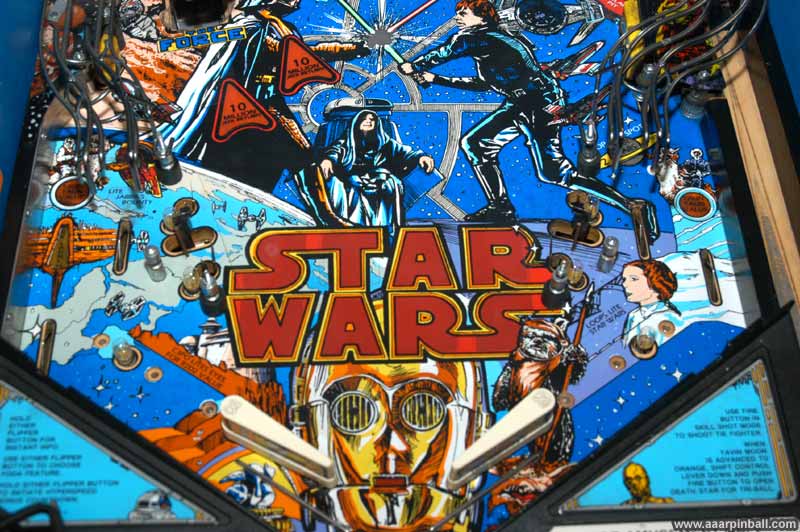
So How is it Looking?
It's looking pretty good (with a few exceptions) See the images below...