Williams Terminator 2 Judgment Day Pinball
Repairs, Restorations, Tweaks and Insights
![]()
Introduction

Terminator 2 was the first pinball machine I purchased that had several known problems. Not surprisingly, several additional problems were discovered while working on the machine.
Terminator Drop Target would not Stay Up
Original 8/14/2016
Terminator 2 has been a very reliable machine. I've owned it for over 10+ years and have needed to do very little to keep it working. This includes bringing it to Southern Fried Gameroom Expo 2015.
While checking out Terminator 2 before having some friends over, I noticed the drop target (this is the one that is somewhat hidden below the Terminator skull) would not stay up. After a little investigation I determine the stop piece had broken off the drop target mechanism (not the plastic target) and was nowhere to be found.
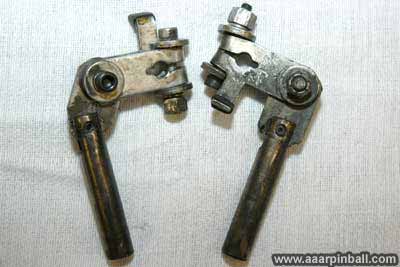
The stop piece creates a little notch that the plastic drop target hooks onto, allowing it to "stay up". Without the stop piece, the drop target doesn't hook onto anything and simply springs back into the playfield. Below is a picture showing the stop piece that is needed for correct operation.

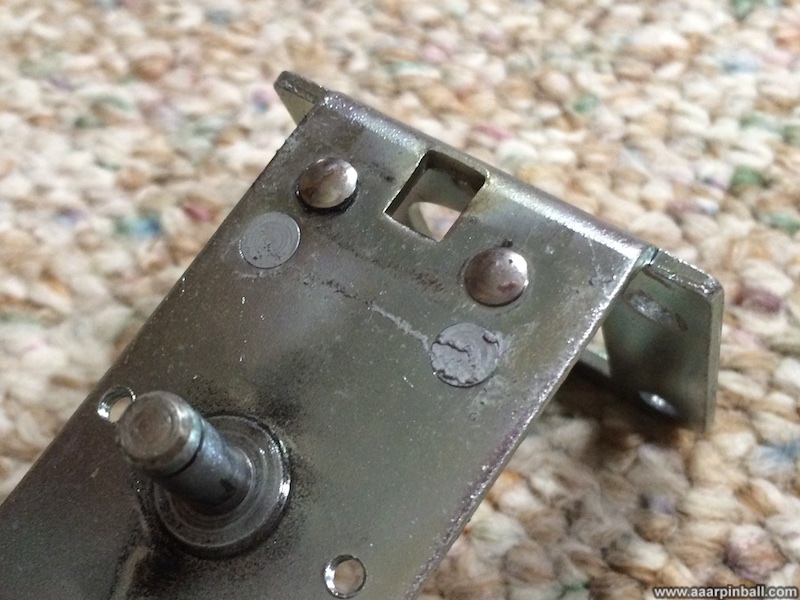
The picture below shows the broken drop target mechanism, with all parts removed, from my Terminator 2. The stop piece should be connected to the two rivets on the top --- but it has broken off!
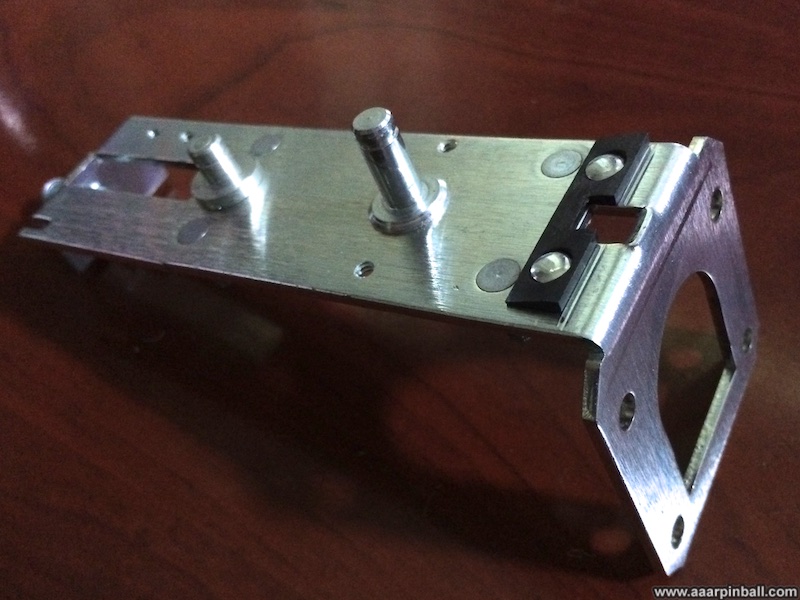
The individual stop pieces can be purchased for a few dollars. However, installing one requires having the ability to rivet. Unfortunately, I don't have that ability to works with rivets. Another solution, which is the one I chose, was to purchase an unpopulated drop target mechanism. While unpopulated, it does have the stop riveted to the metal base. The new mechanism is shown below.
I removed the parts from the original mechanism (solenoid, micro switch, drop target, spring, etc.) and relocated them to the new mechanism. The drop target worked perfectly.
8x Bonus Light was Intermittent
Original 8/14/2016
In addition to the drop target issue described above, I found that the 8x bonus light wasn't working. I figured it was just a bad #555 bulb. I swapped it out, but it still didn't light. I then swapped the #555 base with the base from the 6x bonus, which was working, and it didn't work! Clearly the problem was with the PCB side, not the base or bulb. the
After a little bit of debugging, I discovered the diode associated with the 8x light was failing. While it was soldered well (I tried re-flowing the solder) and the legs were not broken at the point they enter the diode, I found the diode would work correctly (or not) depending on the pressure I applied. Using my DMM in diode test mode, I could get it to show 0V, 0.6V or around 1.2V depending on the pressure I applied. It was time to replace the diode. Here is a picture of the PCB with the diode removed.
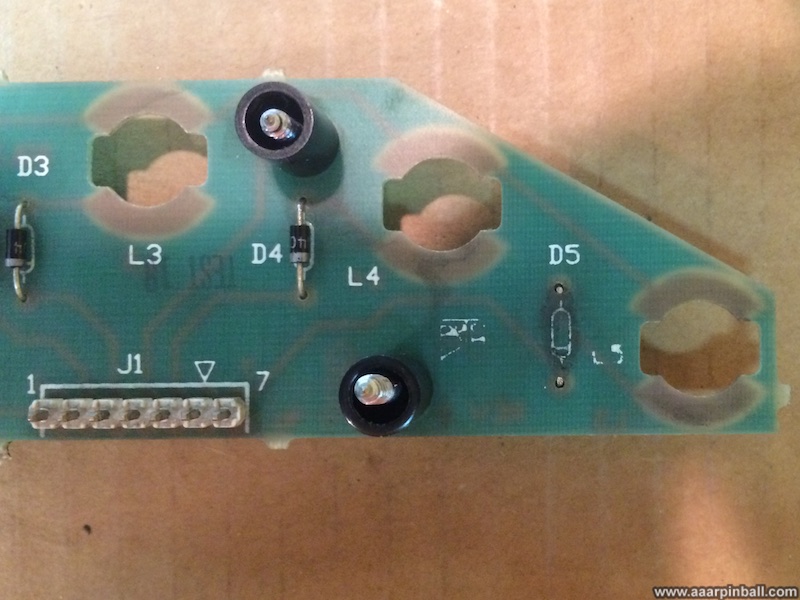
After replacing the diode, the 8x light worked correctly.
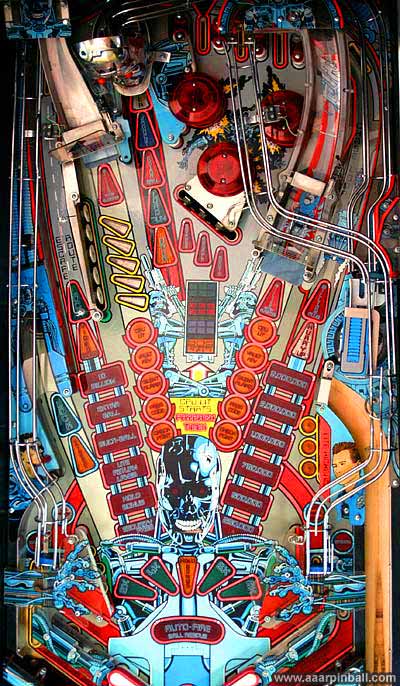
Playfield Picture
The game would not start
See next problem
Vertical Up Kicker (VUK) was not working
This problem and the previous turned out to be the same. One of the wires to the coil that drives to up kicker had broken off. A little solder (and a lot of body contortions) resolved this problem.
The game apparently would not start because there was a ball inside the VUK and it would not come out (since the coil was not getting power). T2 did not perform the "ball hunt" that it typically does in this case. I imagine this is because a switch was telling the machine the ball was in the VUK and the machine kept trying to kick it out. However, it didn't know the kicking mechanism was not operational.
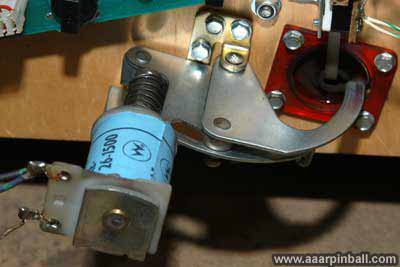
Test report indicated that the cannon could not find home
This was an adjustment to the micro switch at the bottom center of the image. The activator had become bent and did not depress completely when the extruding rod on the wheel pressed against it. This was an easy fix.
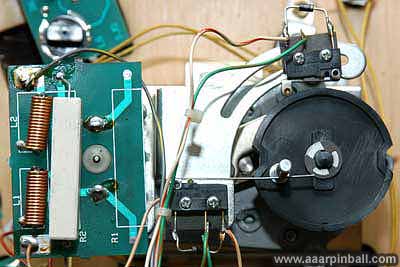
Cannon speed went from fast to almost no movement at all
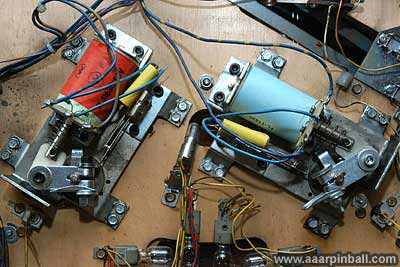
I wish I had taken a picture of this before it was fixed! The big ceramic resistor (on the left of the picture just to the right of the two wrapped coils) was missing. It its place, however, was a #44 bulb! This bulb would get very bright right around the same time the cannon would basically stop moving. After discussing this with a very knowledgeable ASIC guy I know (thanks Charles!), I learned that light bulbs are very peculiar resistors. Specifically, the resistance will change as the bulb heats up. The bulb was very quickly heating up and the resistance was becoming very high. The end result was that the motor was turning very slowly because the resistance was so high.
With the help of rec.games.pinball I was able to determine the appropriate resistor. Strangely enough this information is not included in the T2 service manual. In case you are wondering, the board with the ceramic resistor and the two coils is called the EMI board. It should have an 11 Ohm, 5 watt, 10% sandohm (power) resistor installed at R2. Also, R1 and W1 are not populated.
I was unable to find a 11 Ohm resistor quickly, so I replaced it with a 10 Ohm resistor. Given the 10% tolerance, I doubt there is any noticeable difference.
Skull drop target was not registering
This turned out to be two problems with the microswitch. First, the actuator was missing so there was no way the switch would ever be activated. Secondly, the diode was missing. After getting the appropriate actuator and replacing the diode, it was nice to hear Arnold tell me the target was hit.
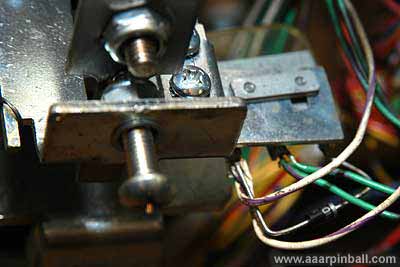
I could not get the camera behind the drop target mechanism to take a good picture. However, you can see the diode on the bottom right as well as the three leads for the micro switch. The big screw on the left adjusts how far down the drop target goes. This allows you to make it level with the playfield when it is down.
Right flipper was extremely week
The coil was wearing out and the rods were quite dirty with black goop. See the image below.
The flippers were also sparking most of the time they were activated. I realized that neither of them had a capacitor installed!
I rebuilt both flippers. I ordered the parts of Macro and received two different coils both claiming to be FL11630. As the image below shows, one is red and the other is light blue. After my initial repair, the left flipper worked worse than it originally did! This wasn't something I was happy with at 11:45PM at night on a Sunday. Luckily, the following Monday I realized one of my solder connections was quite poor. After re-soldering, it worked like a charm. As for the two different looking coils? Luckily they seem to behave about the same. The finished product is shown below.
 .
.
Mylar in front of cannon targets was torn and sticking up
When I went to purchase this T2, I was initially very disappointed because it appeared that the playfield in front of the 5 cannon targets was in bad shape. Luckily I found out it was only the Mylar that was pealing up. The Mylar was removed using the "freeze" method and followed up with Goo Gone to remove the remaining stickiness.
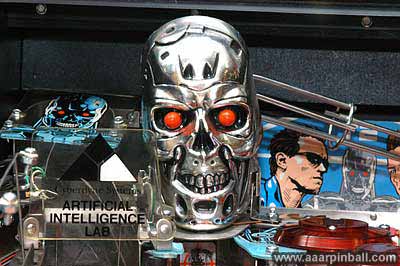
Plastic around rivets holding red eyes to skill Skull was broken
Using some higher gauge but reasonably strong wire, I rigged up a support mechanism that is screwed into the same base as the skull. This picture does not show the rig I created, but does show the end result.
Segment of wire lane on chase loop was missing
I do not have a picture of this, but I ended up using the metal from a coat hanger. This should be replaced with a lower gauge metal, but it's good enough for now.
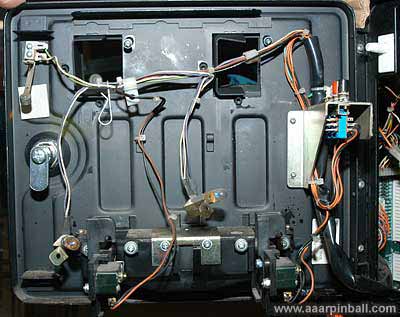
Coin door missing inserts and coin mechanism
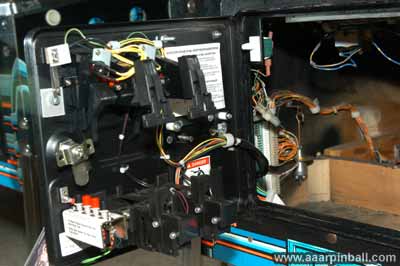
I have not replaced/repaired the coin door. Here is what it looks like from the inside. I've been told I may need to purchase a new coin door because the missing parts are not easily available.
I ended up getting a new coin door. Below is a picture of the outside of the coin door and below that is a picture of the inside.

The position of the "white coin door switch" appears to have moved from the time T2 was built. The new coin door did not have the switch on the outside frame. I ended up using the original coin door frame with the new coin door.
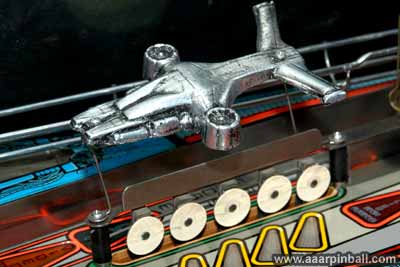
Hunter Killer ship missing
I purchased a reproduction. It's not amazing, but it's better than nothing!
General playfield disarray
I took apart about 50% of the playfield in order to replace star posts and rubbers. I used Novus #2 and Novus #1. It cleaned up and looks amazing!