Atari Tempest Cocktail Video Arcade
Repairs, Restorations, Tweaks and Insights

Introduction
Original 5/8/204 Update 5/16/2014
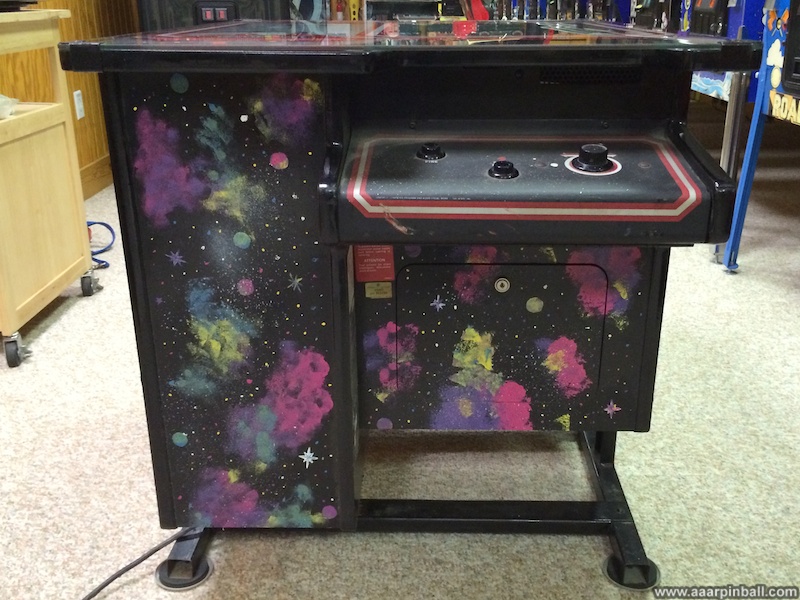
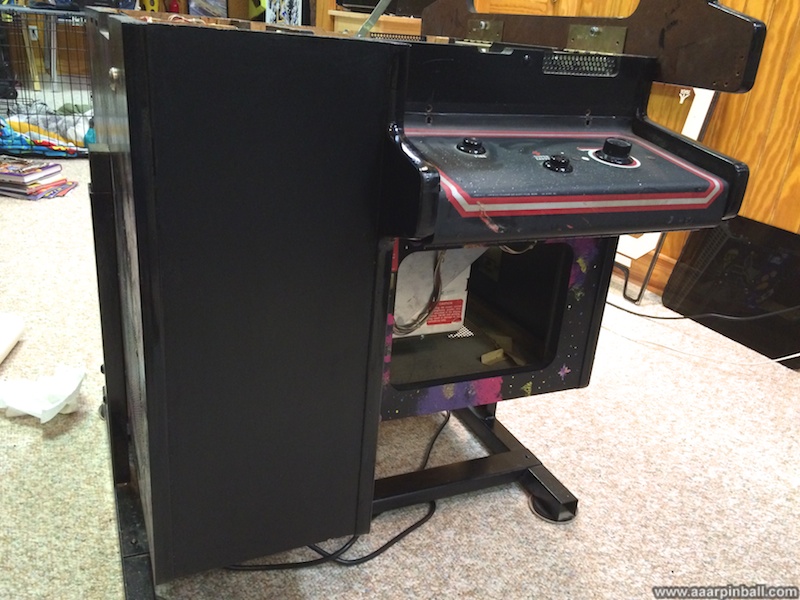
Acquiring my cocktail Atari Tempest was a lucky coincidence of good timing. I had been close to purchasing a project Atari Battlezone, but I didn't act fast enough and missed the opportunity. While I was never a big Battlezone fan, I like classic Atari games from the 1980's and was looking for a project. Just two or three days after I missed the Battlezone opportunity, a local collector posted that he was selling his Tempest cocktail. I though to myself that I was lucky I missed the Battlezone and that I'd better act quickly to grab the Tempest cocktail.
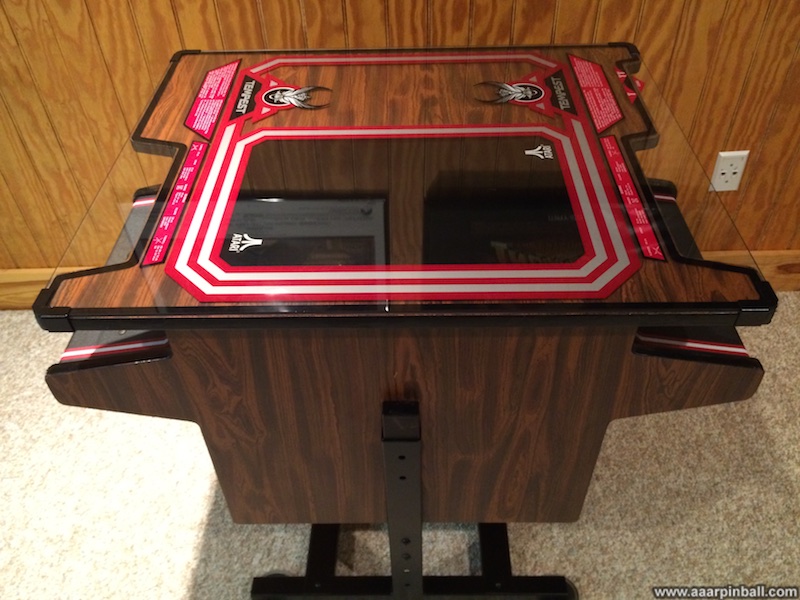
Rather than the iconic upright arcade cabinet, cocktail games look like tables with glass tops. They typically have 2 sets of controls, each on opposite sides of the table. While the gameplay is the same regardless of whether an upright or cocktail form factor is used, the game is displayed upward through the table's glass top for cocktails. The player (or players) usually sit on chairs while looking down toward the display below the glass top. The glass top can be used to place drinks. Arcade games in the cocktail form factor take up more space than the upright version, but they are more subtle in appearance which allowed them to be placed in locations that didn't want the arcade game to be the center of attention.
When the Tempest cocktail became available, it was the perfect storm. I've always been a big fan of vector games and I had been looking for a Tempest on and off over the years. Also, I had been thinking it would be a nice change to get a cocktail game instead of a more traditional upright game. Worried that I might miss the window to purchase the cocktail Tempest (having missed the Battlezone a few days earlier), I reached out to the seller almost immediately. We spoke on the phone, agreed on a general price, and setup a time the following day for me to come over and check it out. This was the earliest the seller was available.
While Tempest cocktails are fairly rare, this one is quite unique because a previous owner had given it a custom paint job. When I went to see the game, everything was as expected except for the glass top, which was much worse than I expected. While the glass top's artwork is almost pristine, the glass has significant scratches. The seller had mentioned that the game's convergence seemed to be off and, when trying out the game, I could see the display had a bit more problems than just convergence. Still, I decided to go ahead with the purchase since I figured the display problems could be resolved with a cap kit.
What's Special about Tempest?
Original 5/8/2014
Tempest is a classic Atari game that should be familiar to everyone who visited arcades in the early 1980's. In my opinion, it's one of the games that defined the arcades of this time. Below are some aspects of Tempest that I find unique.
-
It's a vector game, rather than a Raster
-
It was Atari's first color vector (aka XY) game
-
It uses a spinner for control rather than a joystick
-
The player is able to select the "starting level", which was a new idea back in 1981
-
My Tempest is a cocktail and, from what I've read, these cocktails are fairly rare. As a cocktail, it has two sets of controls and rotates the displayed image 180 degrees when alternating between player 1 and player 2.
New Control Panel Overlays
Original 1/24/2015
Both of the control panels on my Tempest cocktail had "paint splatter" from the custom artwork as well as showed old age. I decided to remove the original control panel art and install a new CPO (control panel overlay) on both the player 1 and player 2 panels. The metal panel is attached to the cocktail cabinet with 2 bolts and 2 security screws. The security screws are visible on the very top of the panel and need to be removed first Once removed, the panel swings open to reveal the two bolts. The heads of the bolts are visible within the control panel while the nuts are inside the cocktail cabinet. To remove these bolts, I decided to remove the monitor as it was getting in the way while trying to access the nuts. You may be able to reach the nuts on the inside of the cabinet with the monitor still installed. YMMV.
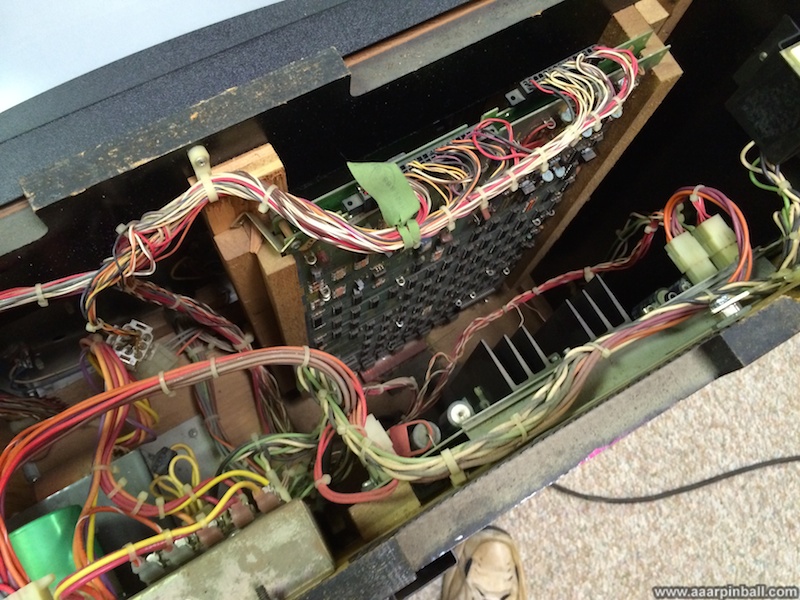
The picture below shows in the inside of the Tempest cocktail control panel. There are two leaf switches (fire and super zapper), the spinner mechanism, and a ground connection. All of these are connected to a molex connector, making it easy to disconnect. After disconnecting the molex and removing the 2 screws and 2 bolts, the control panel will come right off.
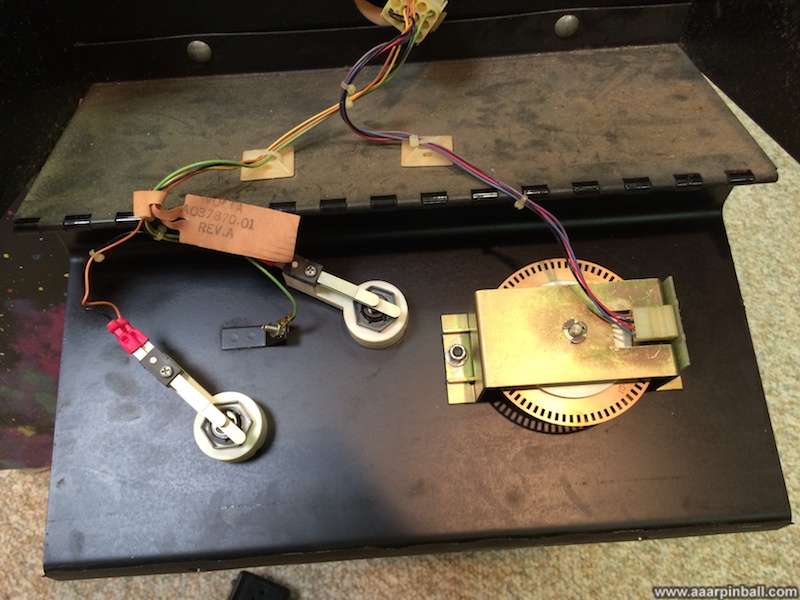
The leaf switches are easily removed by turning the large locking nut on each. The spinner mechanism requires only removing the 2 nuts on the left and right hand sides. Note that the spinner "knob" (not shown) has 2 "set" screws that must be loosened in order to pull the knob off, allowing the spinner mechanism to be removed.
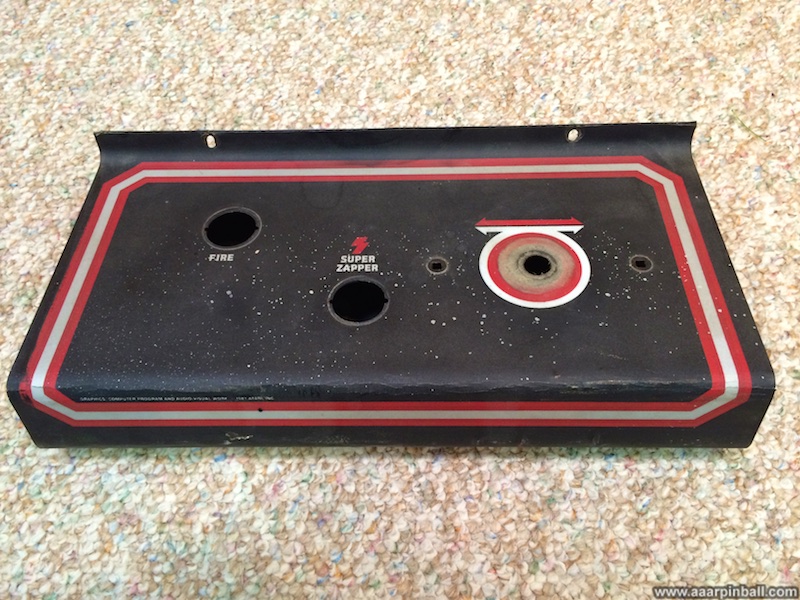
The picture below shows one of the Tempest cocktail control panels with all the controls removed. The "custom" paint splatter is clearly visible as well as the faded and stained artwork. The overlay is also cracked on the bend near the bottom.
Removing the original overlay is simple but takes some elbow grease. Using a putty knife I attempted to remove as much as possible. I managed to get the putty knife under a corner and started prying off the artwork. Since this wouldn't remove all the material, I heated up my grill to 500 degrees and placed the control panel on the grill for 5 or so minutes. Wearing thick gloves, I used the putty knife and removed the remaining artwork. It came off fairly easily at this point. However, while the artwork did come off, a sticky reside was remained.
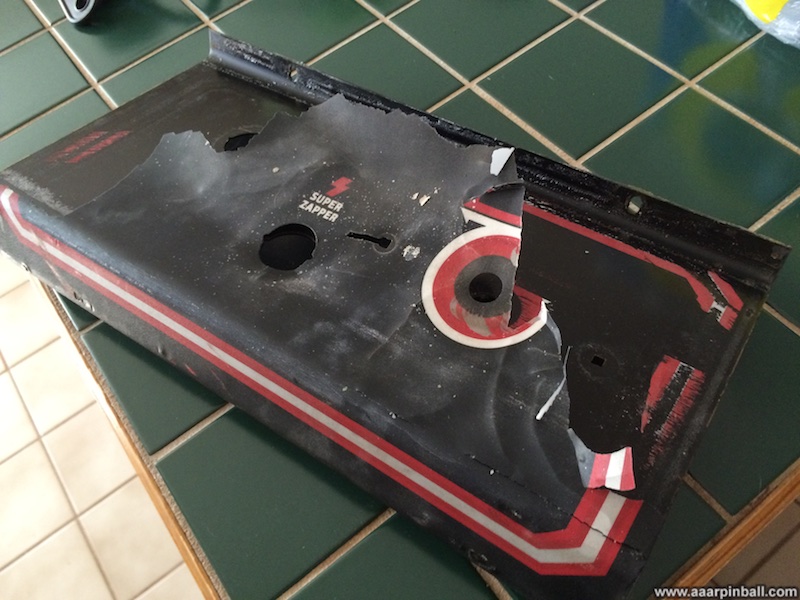
The picture below shows the control panel before I put it on the grill. It was interesting that this control panel allowed me to take off much of the artwork with just the putty knife while the 2nd control panel required heating (grilling) to get most of the artwork off.
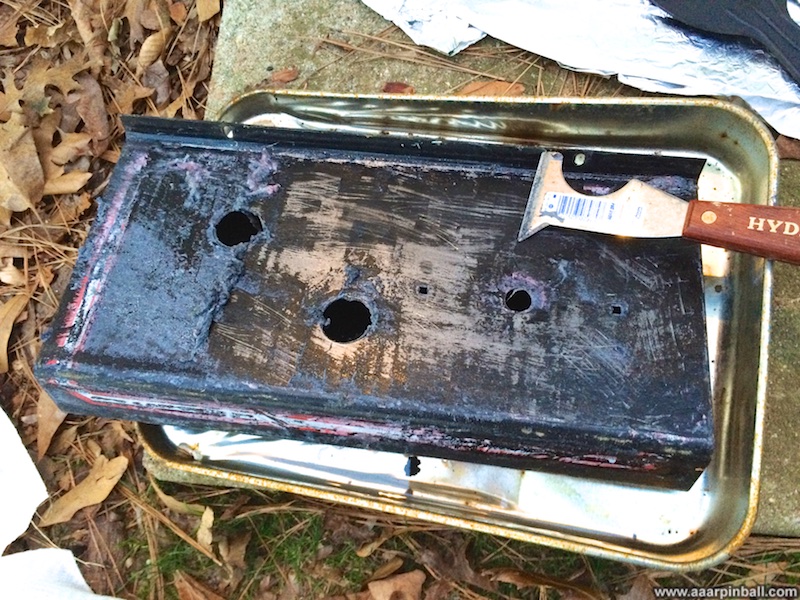
With the artwork removed, it was time to remove the sticky residue. I ended up using acetone, gloves and the putty knife. This had the side effect of removing much of the original paint, which was fine. The picture below shows progress on this step.
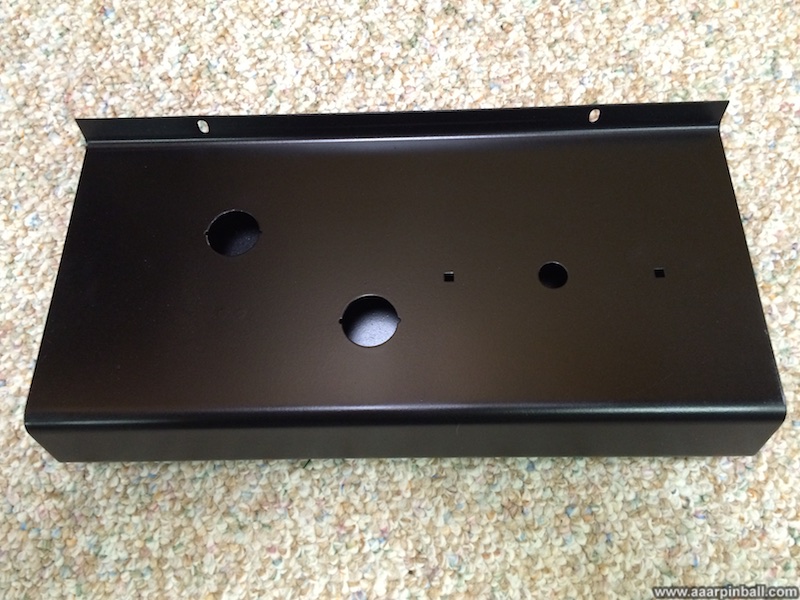
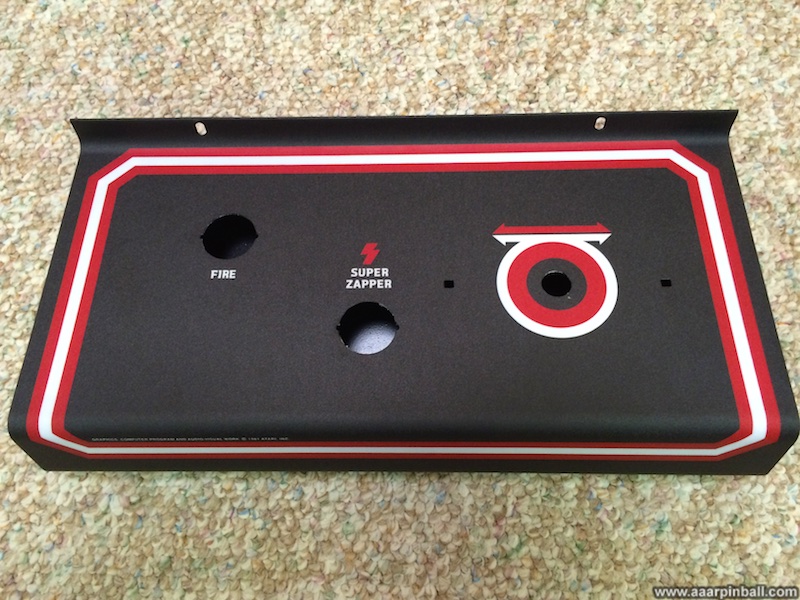
After the control panel was cleaned and no sticky residue remained, I painted it with a coat of primer followed by a coat of semi-gloss black. I let it dry for 48 hours, resulting in the smooth looking control panel shown below.
Now it was time to install the CPO. A picture of the uninstalled CPO is below. Note that the back of the CPO has an adhesive which is exposed by pulling off a film.
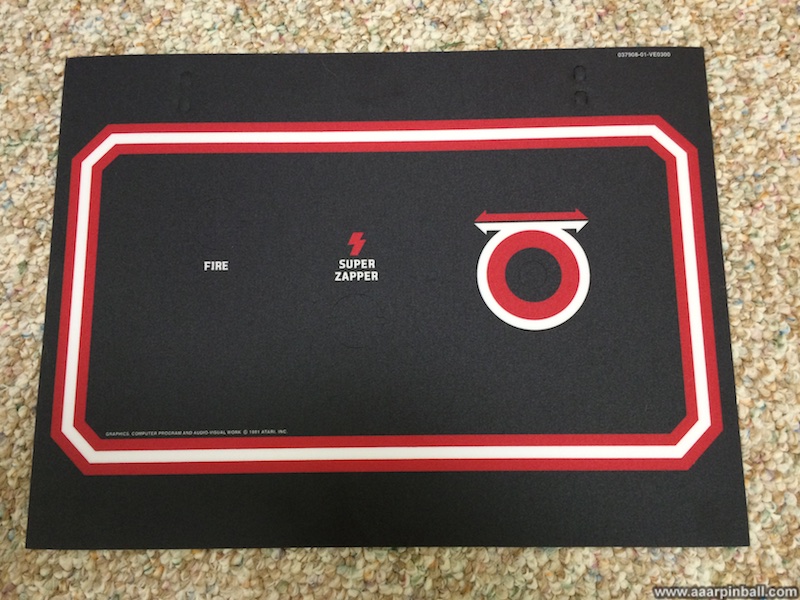
Perhaps the easiest method to install a CPO involves mounting the CPO onto the control panel using the buttons. This ensures the CPO is lined up correctly with the control panel. With the buttons tightened, this approach ensures the CPO will not slide around. The CPO mounted in place by the buttons is shown below. It is not attached by the adhesive at this point. I have also "popped out" the die cut holes.
The following may be easier to understand with additional pictures. Unfortunately, additional pictures would have required a helper to take pictures while I was performing this the following steps. I did not have a helper.
Attaching the CPO to the control panel with the adhesive can be broken down into two parts. The first part is attaching the lower portion ("bottom") of the CPO and the second part involves attaching the "top". The "bottom" is roughly defined as starting an inch below the super zapper and extends all the way to the bottom of the CPO. The "top" covers everything else.
With the buttons still holding the CPO in place, start pealing off the adhesive film from the bottom of the CPO and expose 4 inches or so, right up until about an inch below the super zapper button. Taking care to not allow the exposed adhesive to attach to anything, make a straight horizontal cut to the film (not the CPO!) at the location where it is still attached. Now the adhesive film should be covering just the "top" and there should be no film on the "bottom". Pull the CPO taught in the downward direction and start pressing down on the CPO where the adhesive is exposed. This is right where you just cut the film about an inch below the super zapper. You are now attaching the adhesive backed CPO to the control panel. Ensure it is attached well and not leaving any air bubbles by sliding your thumb downward. Do this across the entire horizontal area that has just been attached. Once an entire horizontal section is complete, attach more of the CPO to the control panel and repeat the thumb process.
For each bend that the CPO goes over, most people recommending using heat to help the CPO adjust to the curvature. While a heat gun is probably best, I used a hair dryer that gets very hot. When the CPO covered a bend, I switched to applying heat. After getting the horizontal section covering the bend hot, I transitioned back to attaching the remainder of the CPO.
Once the "bottom" of the CPO was attached, I removed the two leaf buttons. Since the bottom is firmly attached, the leaf buttons are no longer needed to hold the CPO in place. I pulled back an inch or so of the "top" CPO adhesive film, starting from right where we cut off the adhesive before --- which is an inch or so below the super zapper, and then used upward thumb motions to securely attached the CPO to the control panel. This step works just like attaching the CPO to the "bottom" except that upward thumb motions are used. Be careful on the "inward" bend to avoid having the CPO attach too early without being connected to the CP. You don't want a big gap between the control panel and the CPO on that inward bend.
Heat should be used on the inward bend as well as the 180 degree turn.
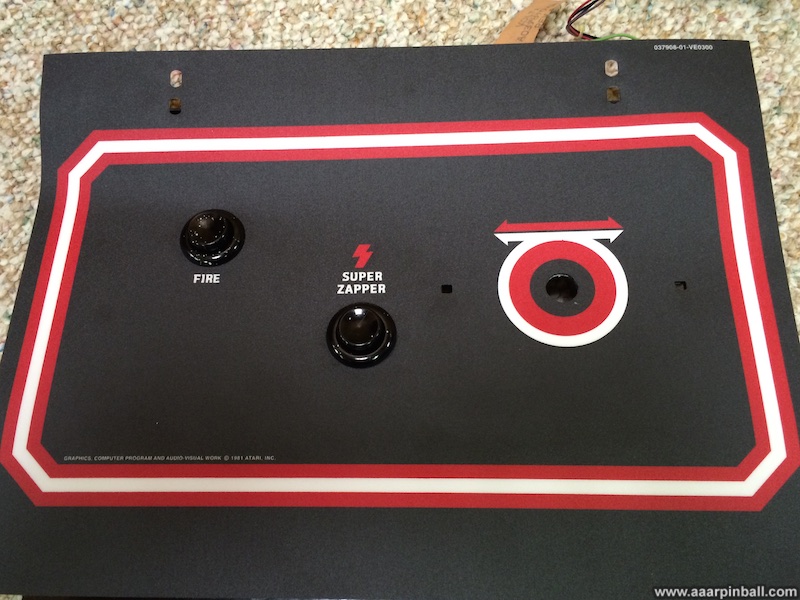
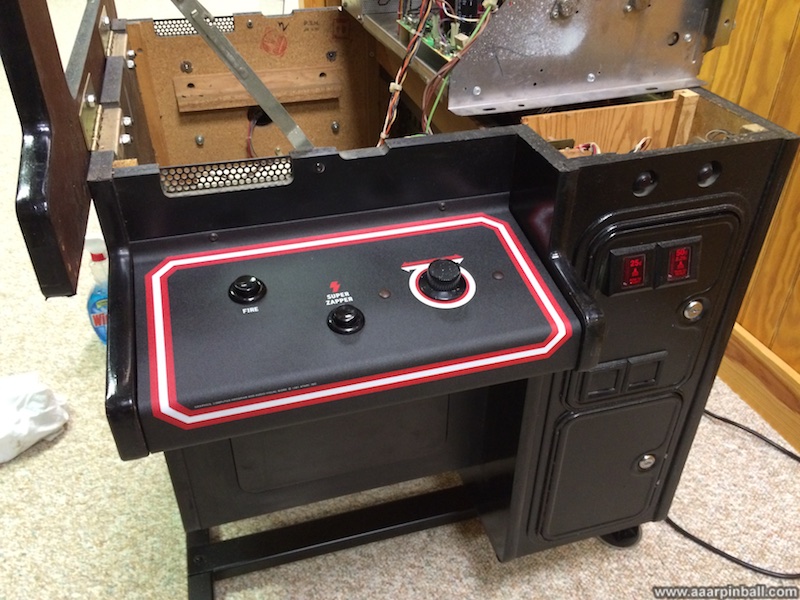
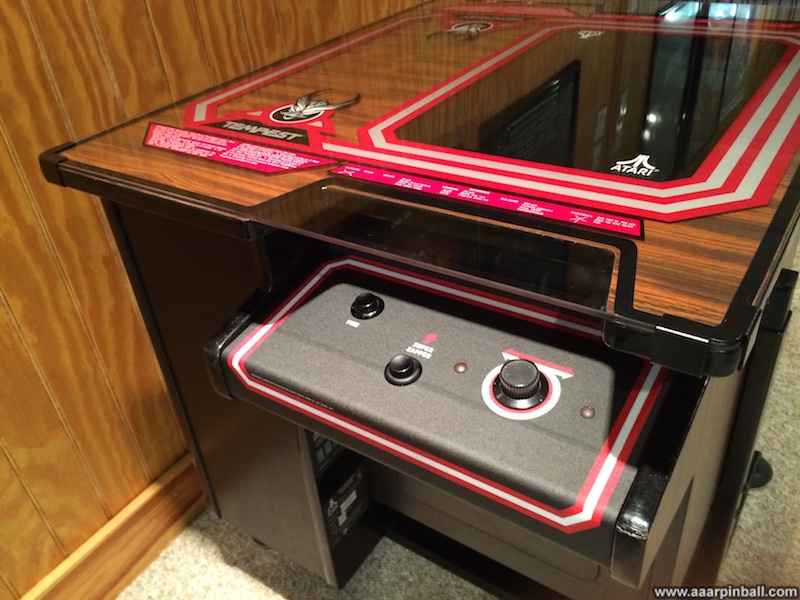
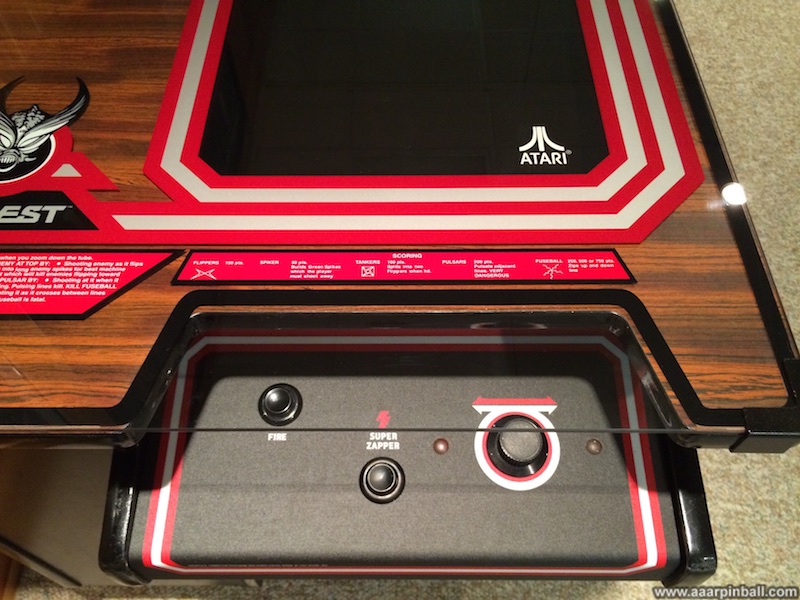
One of the completed control panels is shown below followed by a picture of the restored control panel attached to the Tempest cocktail cabinet. Both control panels were restored.
Finally! New Tempest Cocktail glass with Artwork
Original 1/24/2015
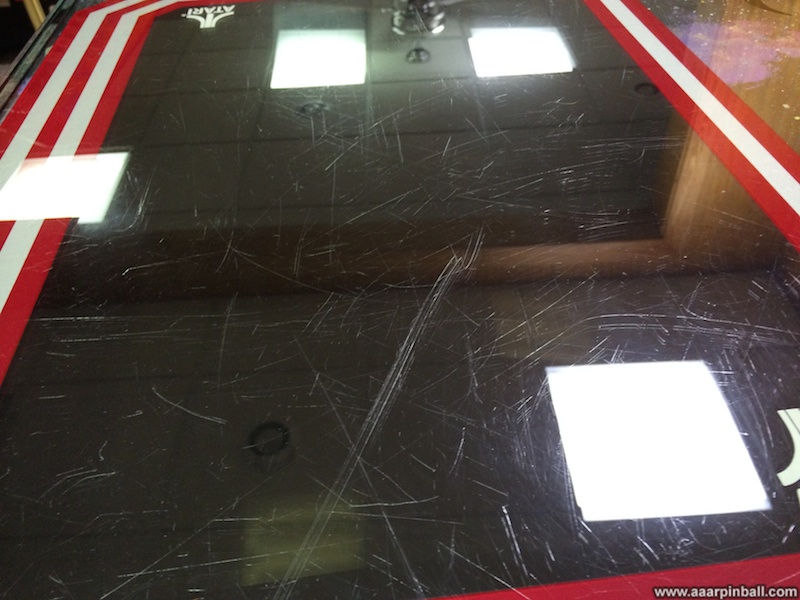
The Tempest cocktail glass was in truly sad shape when I acquired this game. While the colors and art were in generally good condition, the glass was scratched beyond repair. Close your eyes and don't look at the following picture if scratches bother you! It's hard to imagine how the glass got so significantly scratched.
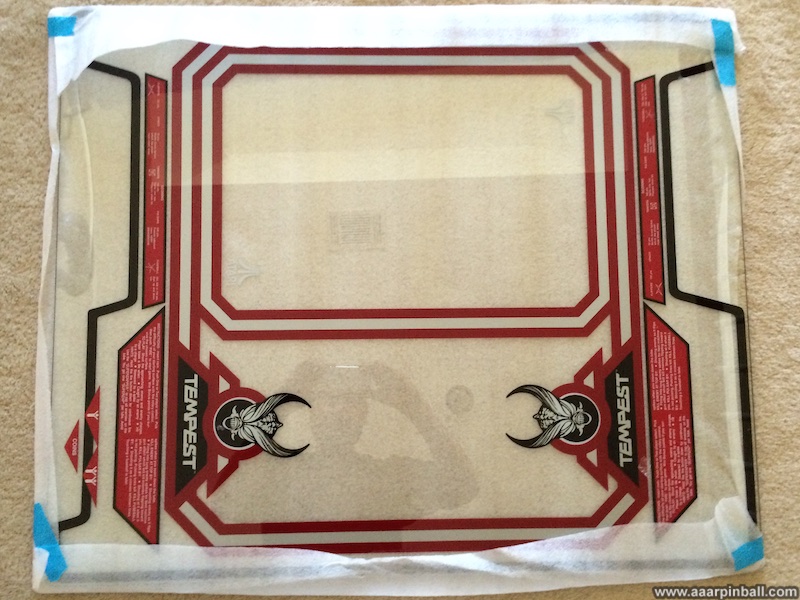
I knew this would take some effort and time to get resolved. Finding a good condition Tempest cocktail glass was nearly impossible. Patience paid off, however, and around 9 months after acquiring my Tempest cocktail a beautiful new reproduction arrived at my home. Below is a picture I took right after removing it from the shipping container.
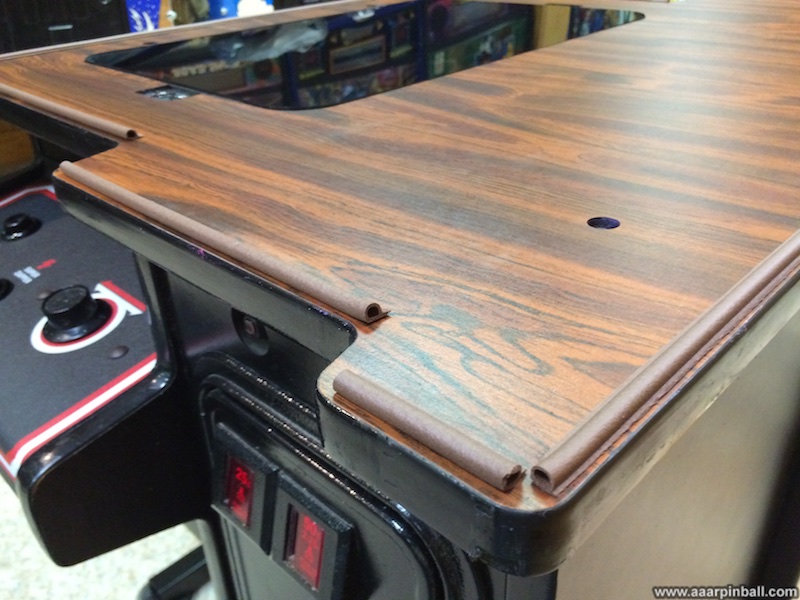
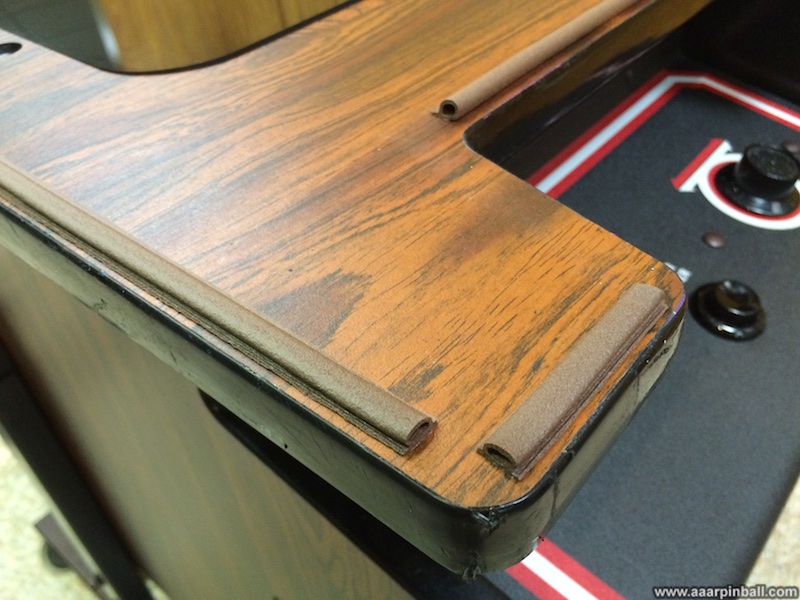
The original glass had a "beer seal" or "rope seal" between the cocktail top and the glass. I found some material at a local big box store that worked reasonably well as a modern alternative. The following two pictures show this material placed on the cocktail's top.
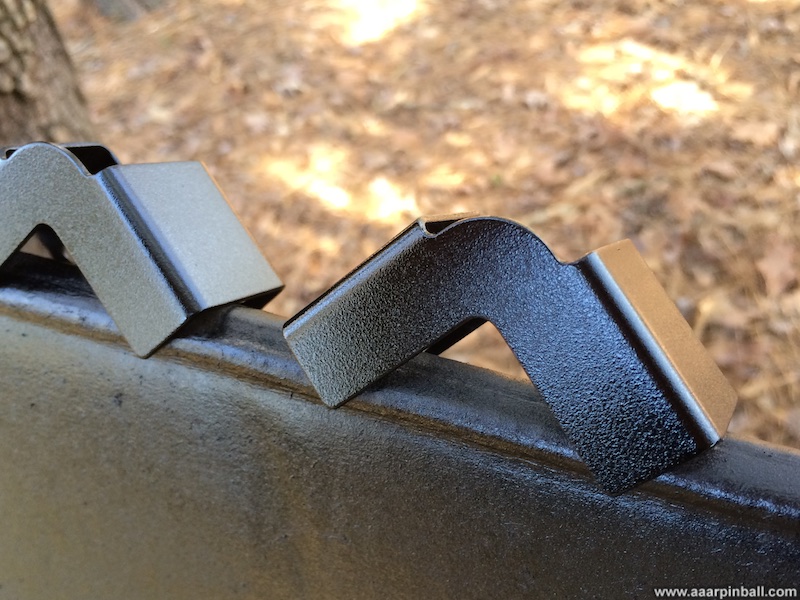
The Tempest cocktail glass is attached to the cocktail using corner clips. The original clips were a bit rusty and ugly. That wasn't acceptable with the new glass. I stripped the clips, sanded off the rust, and put a few coats of gloss paint to make them look new. Below is a picture of the clips drying in the sun.
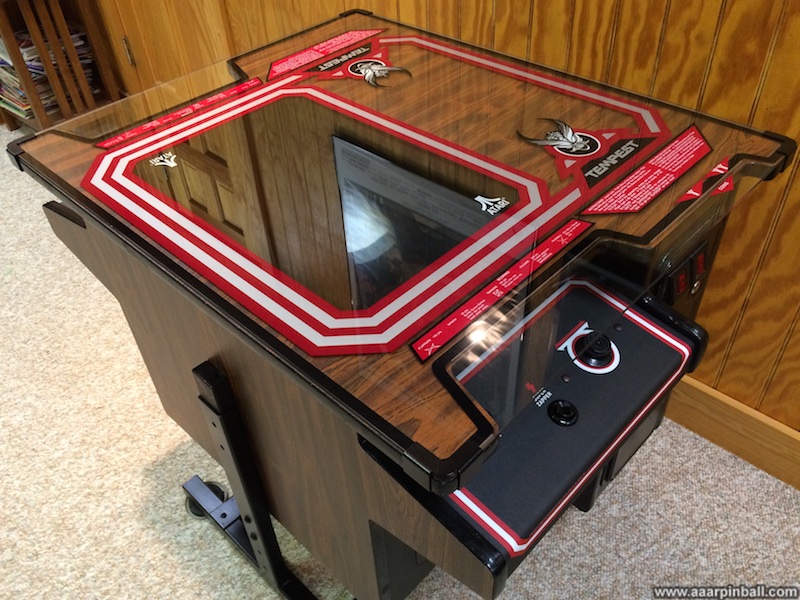
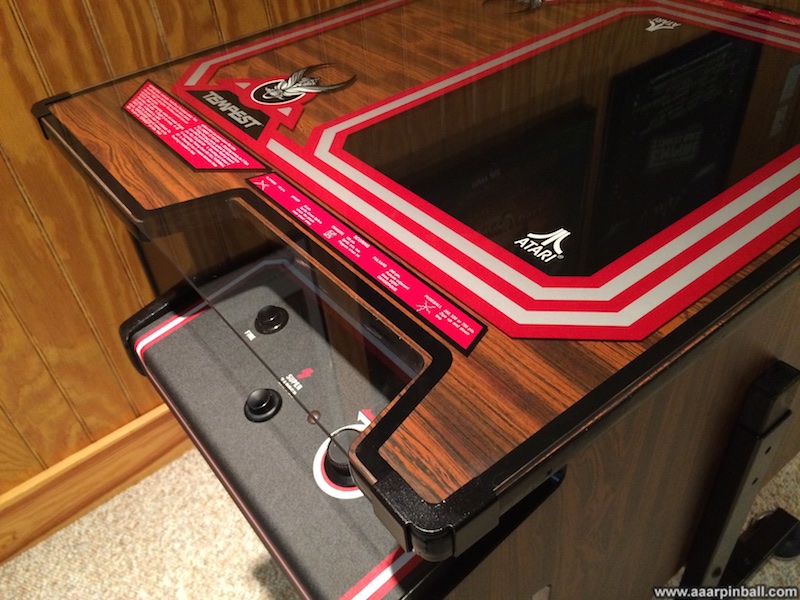
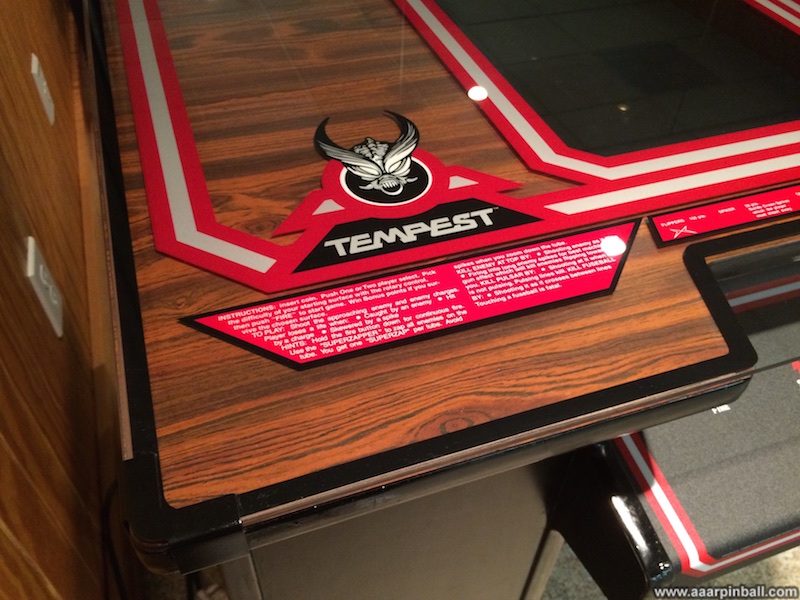
I couldn't be happier with my Tempest cocktail now that the glass is attached, sitting on top of the beer seal and connected with the clips, Several pictures of the restored Tempest cocktail are provided. These pictures were taken with the restored control panels.


Polishing the Dark Plexiglas
Original 2/3/2015
Below the glass top and above the monitor inside the cabinet, Atari placed a dark piece of Plexiglas. The piece of Plexiglas in my Tempest cocktail was in pretty good shape, but after getting the new glass artwork, some smaller scratches in the Plexiglas stood out.
I looked into ordering a new piece but quickly found the rounded edges would make it a little more difficult to replace (and with higher cost). I decided to try and polish the Plexiglas. Knowing that I might end up scuffing the plexy, I decided to try out the classic pinball polish Novus #2 and Novus #1. While this polishing did leave faint scratches across the Plexiglas, they are not visible unless one looks very closely. Ultimately the Novus #2 and Novus #1 made a huge improvement and the original Plexiglas looks almost perfect from any reasonable inspection. See for yourself in the picture below.

Custom Art? Why yes...
Original 5/8/2014
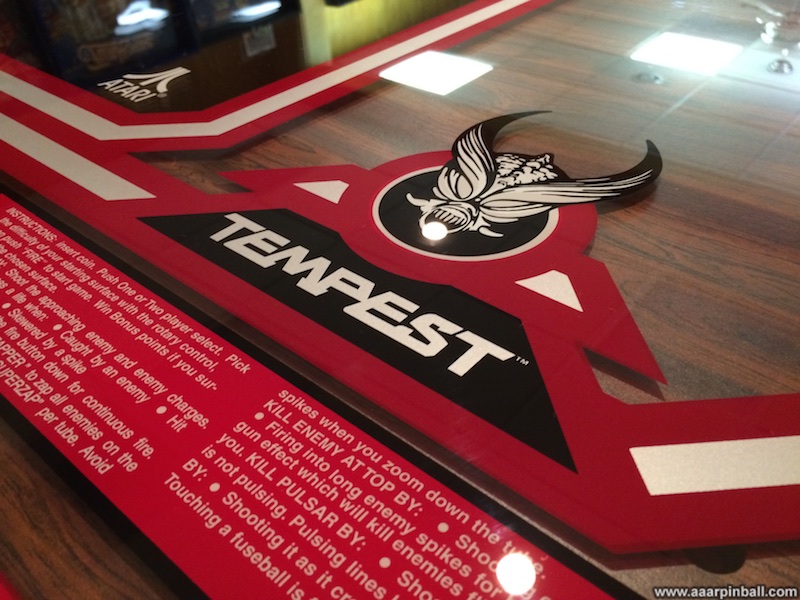
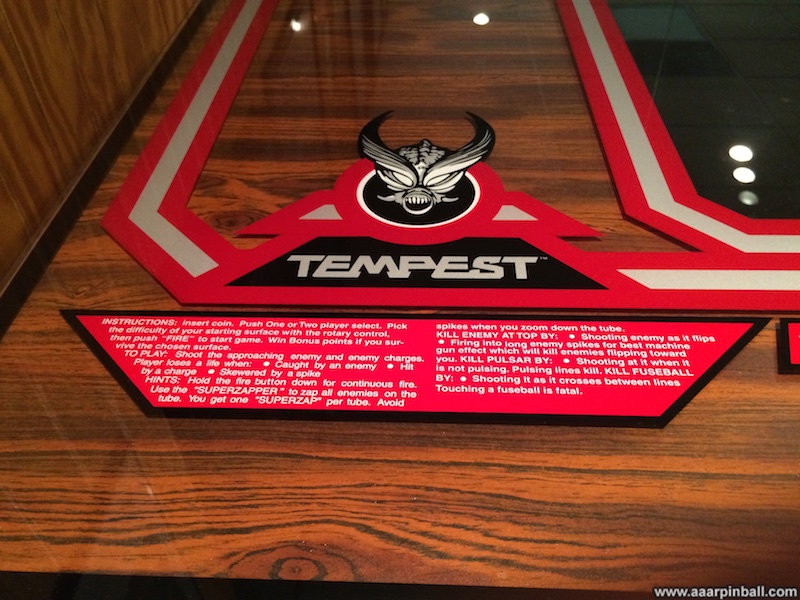
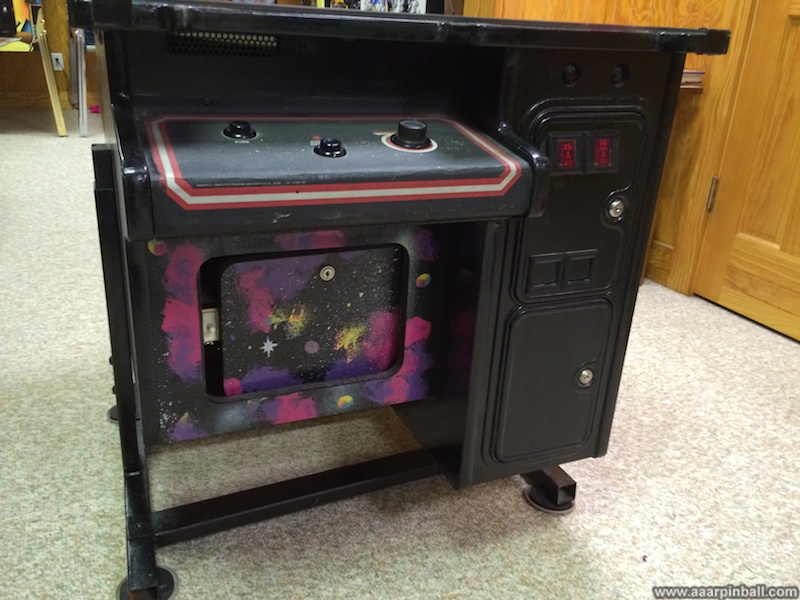
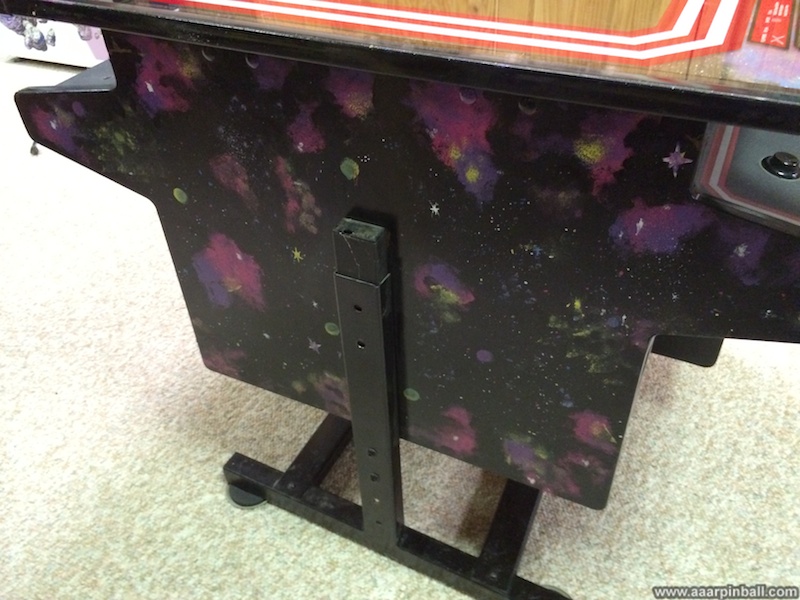
I mentioned that this Tempest cocktail had custom art. Someone with some skill did it... I'm not saying they are a wonderful artist, but (IMHO) they had some idea what they were doing. It's got a space-nebula thing going on. Kind of hard to describe, so I'll just put some pictures below.
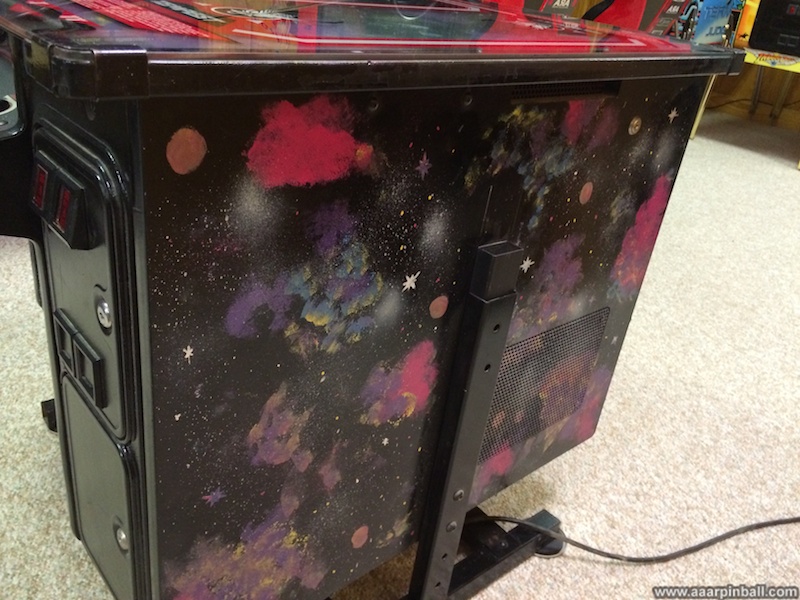
The artwork seems to be somewhat polarizing. Some people love it, some hate it. While I may change my mind, my current plan is to remove the paint. I did a quick test in the corner and it appears to come off easily. The original wood grain showed up, so I'm hopeful the paint has preserved the original wood gain very well.
Great WG6100 Vector Monitor
Original 5/8/2014
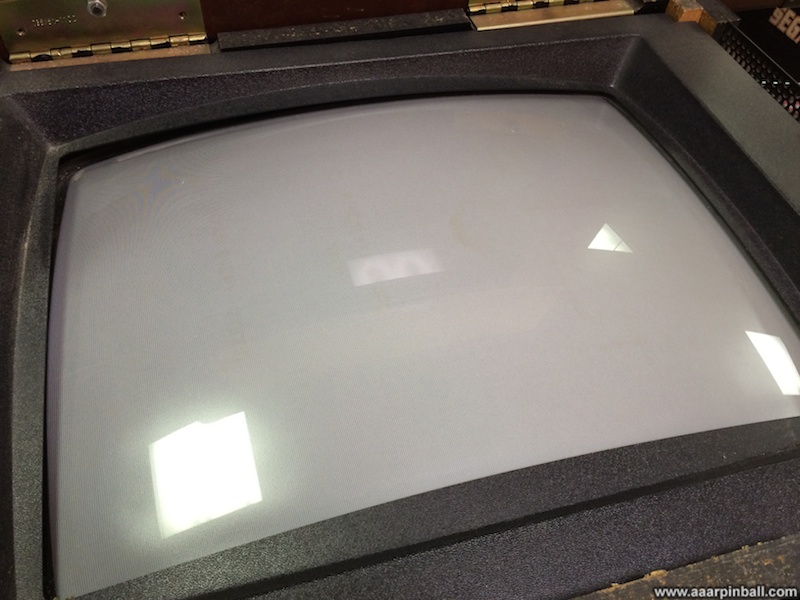
Tempest machines come with a WG6100 color XY monitor. These often have significant screen burn. The one in my Tempest cocktail is almost perfect! You need to look very closely at the monitor directly to see the slightest burn. It's not visible at all during gameplay with the tinted glass. Here is a picture of the almost burn free monitor.
Very Low Plays
Original 5/8/2014
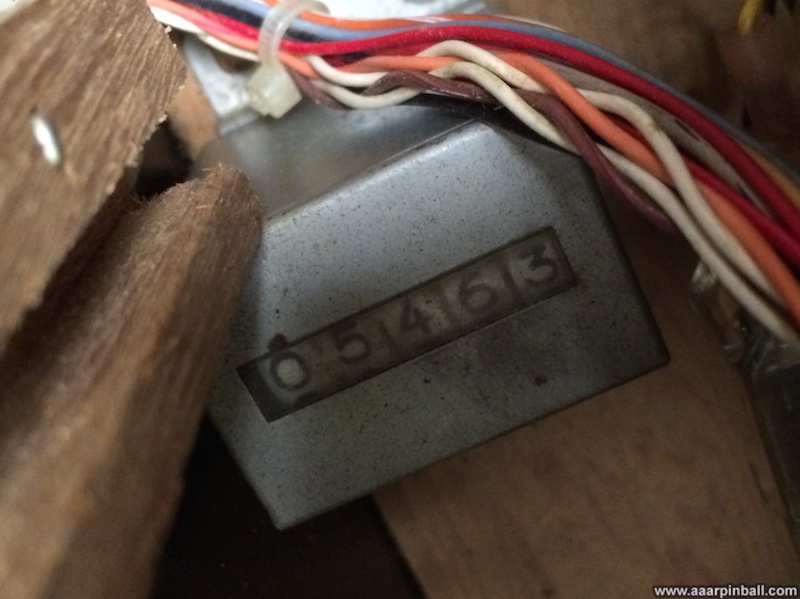
Many older arcade games have physical coin counters to track the number of games played. Think of it like a car odometer. The coin counter in my Tempest cocktail shows a very small number of plays, just 5,463!
Bent Vectors at Bottom of Screen
Original 6/4/2014
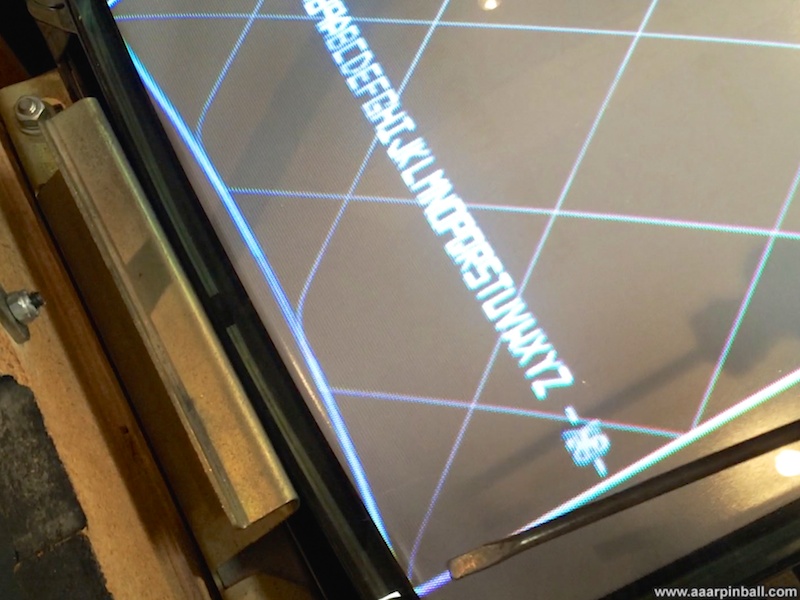
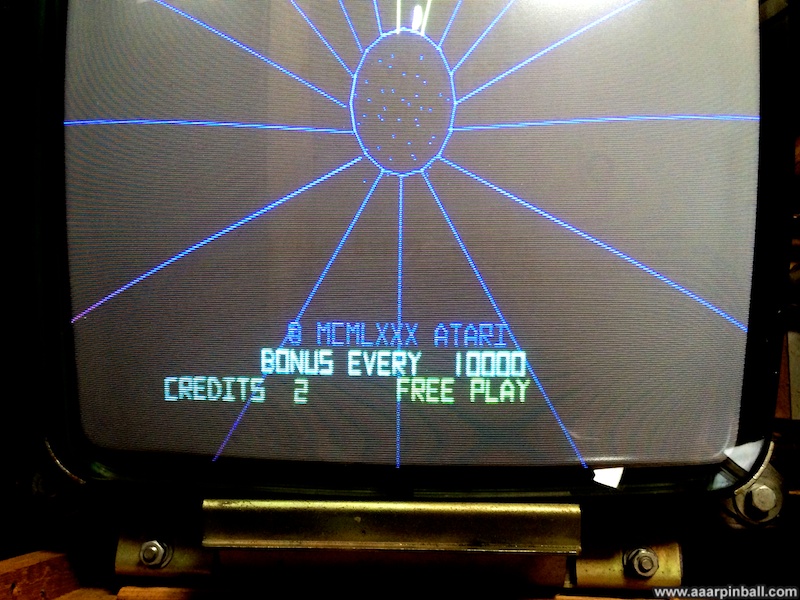
After I had Tempest for a couple of weeks, I noticed that vectors near the bottom of the screen would bend toward the left or right side, depending on whether they were on the left or right half of the screen. These were vectors that were very close to the bottom of the screen (from the player 1 position). I also noticed that, during diagnostics, what should be a horizontal line would bow inward (toward the center of the screen) if it was near the bottom edge. These were pretty minor problems, but I wanted to get them understood and resolved.
The picture below shows one of the curved vectors. Look at the vector between the "ITS" and the "2". Notice how it starts to quickly turn to the left (from the viewers perspective). The 2nd picture shows how a horizontal line becomes bowed. Also noticed that the diagonal lines show the curve problem.

Prior to noticing these issues, I had been adjusting the WG6100 monitor's purity. I wondered if I had somehow created this problem with the purity adjustment? I hadn't noticed these issues earlier, but that doesn't mean the problem didn't exist.
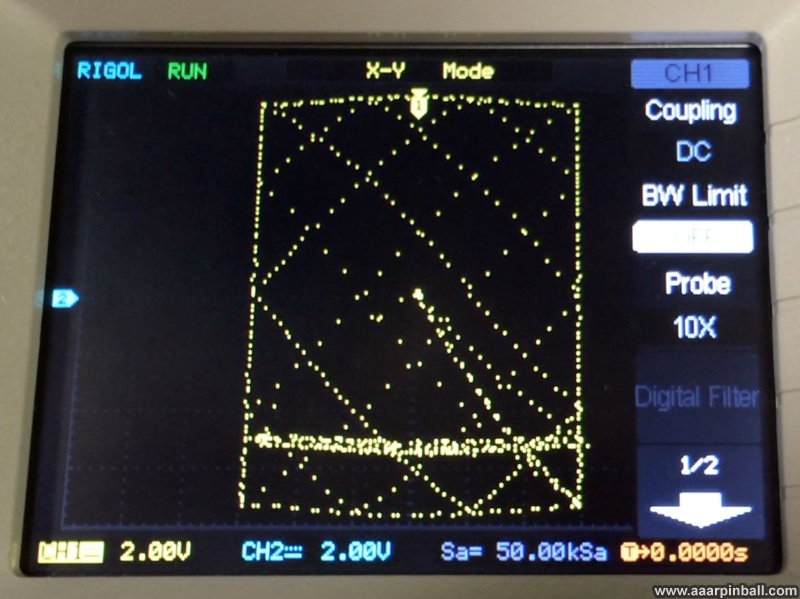
I took the approach that both of these behaviors had the same root cause. However, after some investigation, it wasn't clear to me whether the problem was with the WG6100 monitor or the Tempest PCB. It's possible that either could cause this problem. I decided to hook the Tempest AVG PCB up to my oscilloscope. The Tempest AVG PCB generates coordinates, telling the monitor where to draw. By placing the oscilloscope into "XY" mode and connected the X probe to the X output and the Y probe to the Y output, a representation of the intended image should appear on the scope's display. Luckily the Tempest AVG PCB has test connections for the X and Y outputs, so it was easy to connect to my scope.
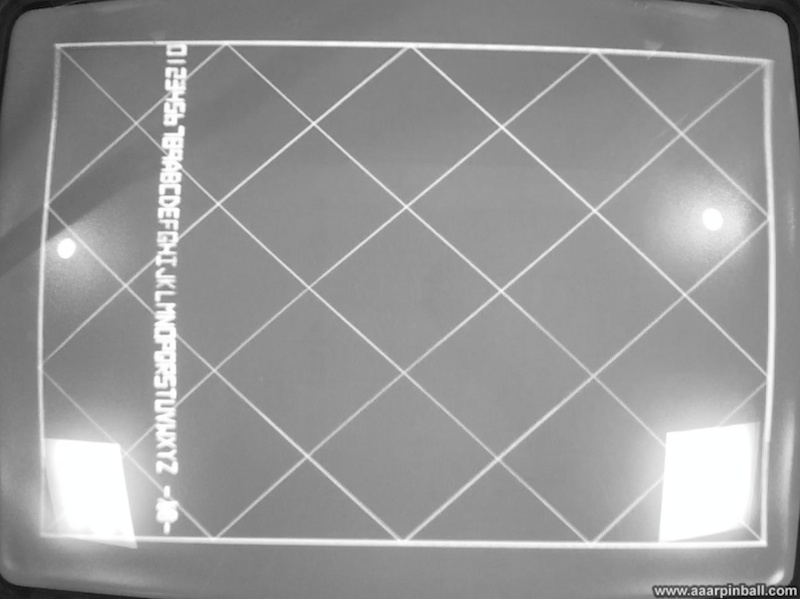
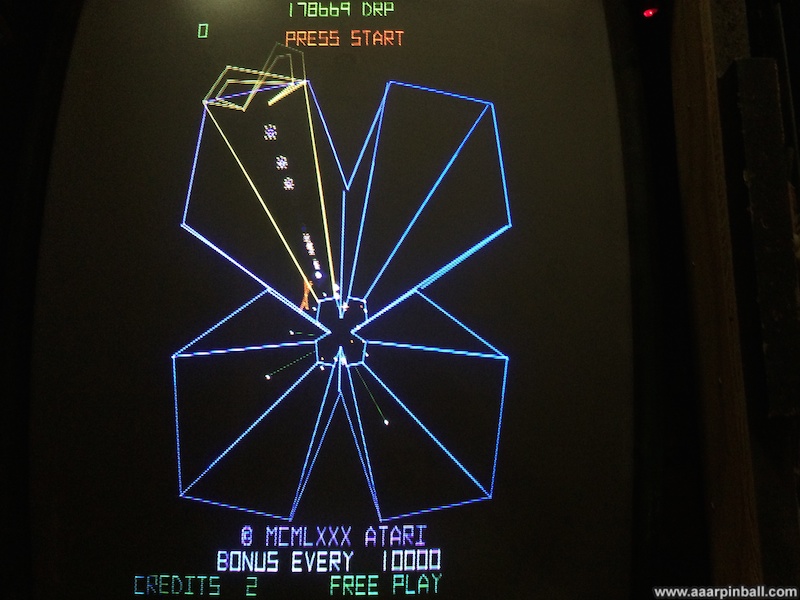
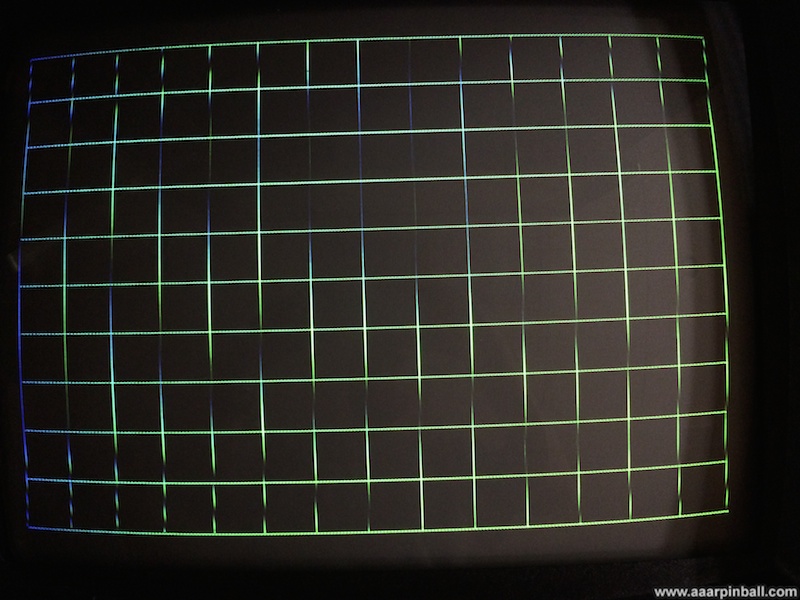
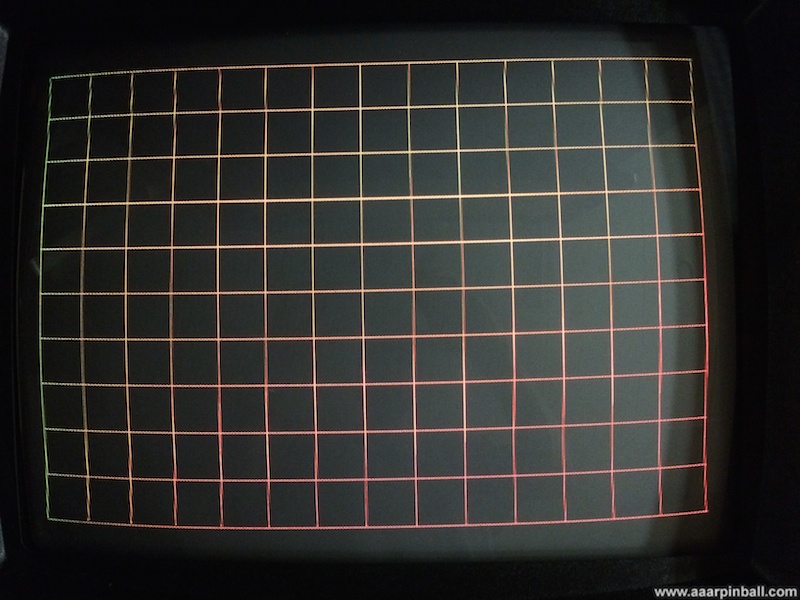
Below is an image of the Tempest game displayed on my scope. This should look somewhat familiar to those that have seen Tempest's diagnostics. This is the diagonal crosshatch pattern with text at the bottom. My scope isn't fast enough to display all the vectors, but it sampled them and the dot pattern does an adequate job of representing the original image. I've placed an example image of this diag (as shown on the monitor but NOT showing the bowing problem) below for reference.
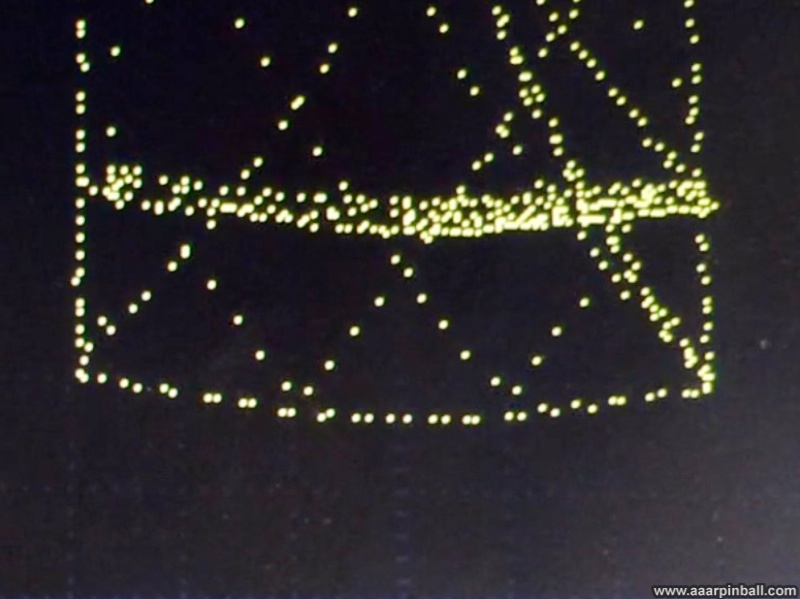
Two items were immediately obvious when looking at the XY signal generated by the Tempest AVG board. First, the inward bowing was not present. Second, the voltage actually showed an outward bowing. It appears that the WG6100 monitor doesn't map voltage to screen position linearly, so the Tempest AVG board implements "pincushion correction". This is why the voltage gets larger (either positively or negatively) toward the center of the screen. The close up image below of the scope's display shows this outward bowing.
Since the scope always showed the outward bowing and never showed any sort of inward bowing, even under the conditions where the WG6100 would show the inward bowing, I concluded the problem was with the WG6100 monitor and not the Tempest AVG PCB.
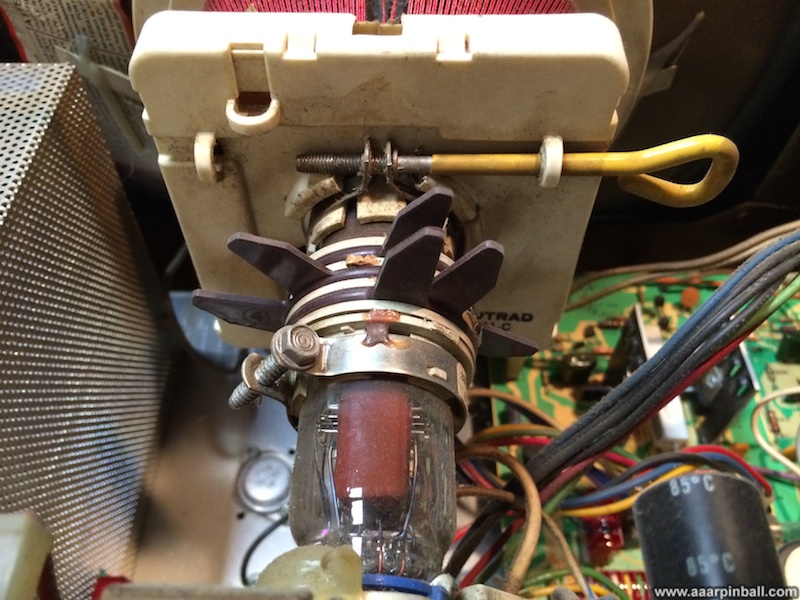
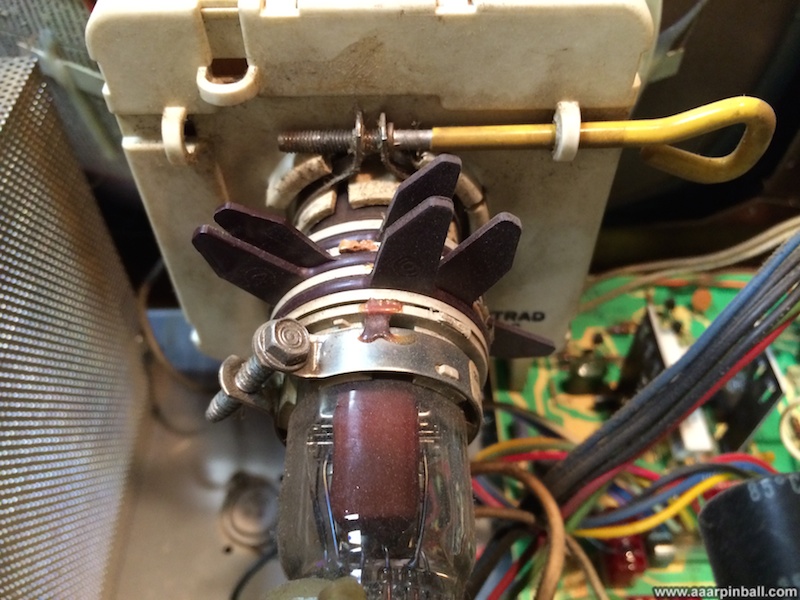
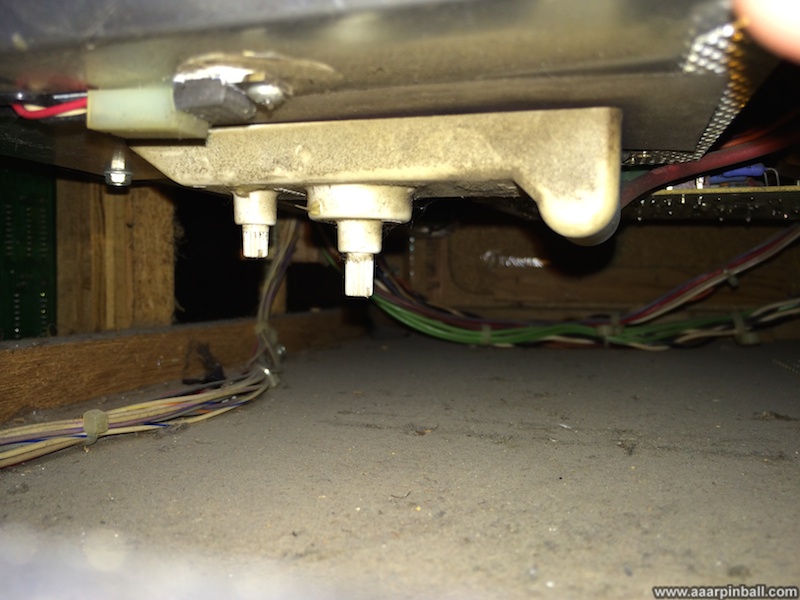
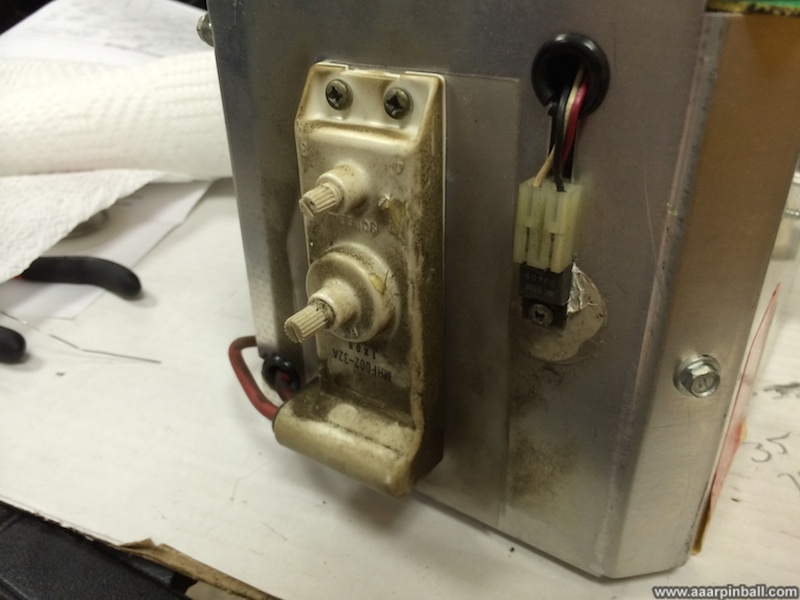
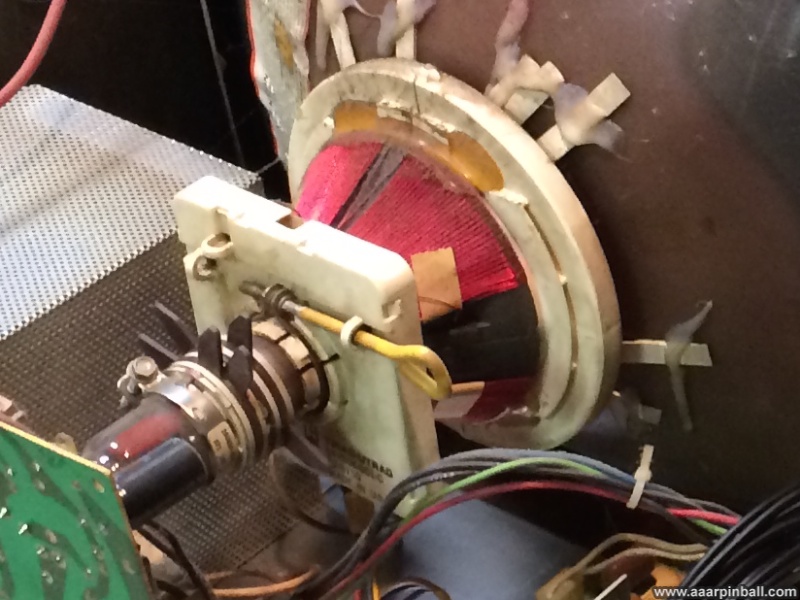
I started looking closely at the WG6100 schematic, focusing on the Y deflection circuit. I also re-reviewed the WG6100 FAQ. From these two, I quickly homed in on the Q706 transistor. This is the transistor responsible for the -Y deflection. I had some extra transistors, so I decided to replace it. This deflection transistor is mounted on the monitor's metal chassis. The transistor connects on one side of the metal chassis and a "socket-like" connector is on the opposite side. This "socket-like" connector is shown below.
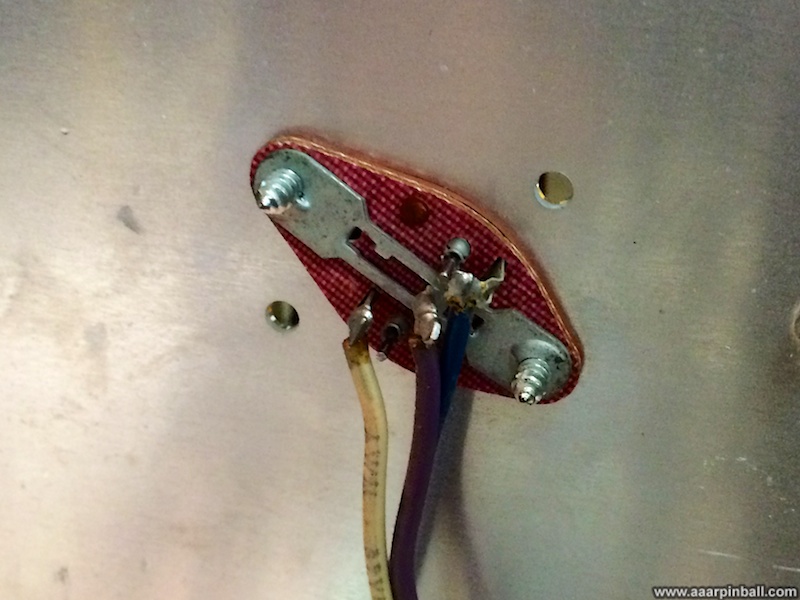
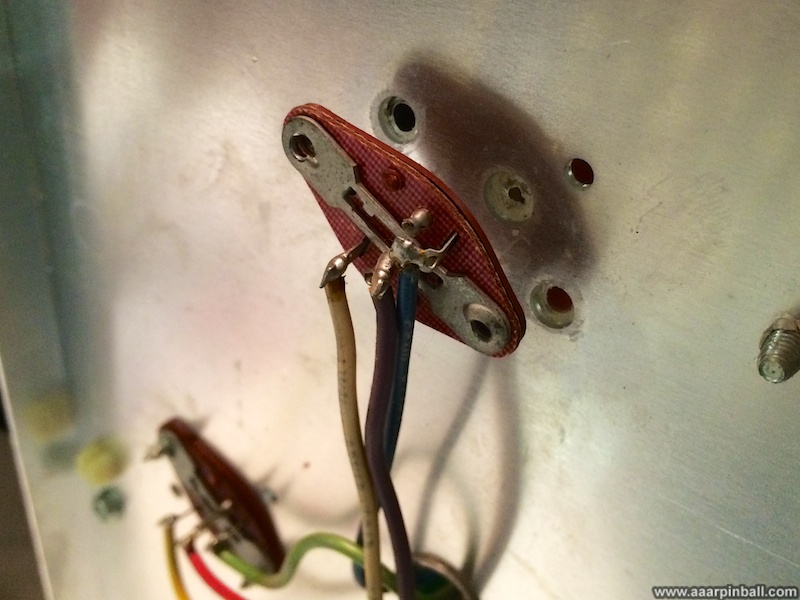
Below is the "socket-like" connector with the transistor removed.
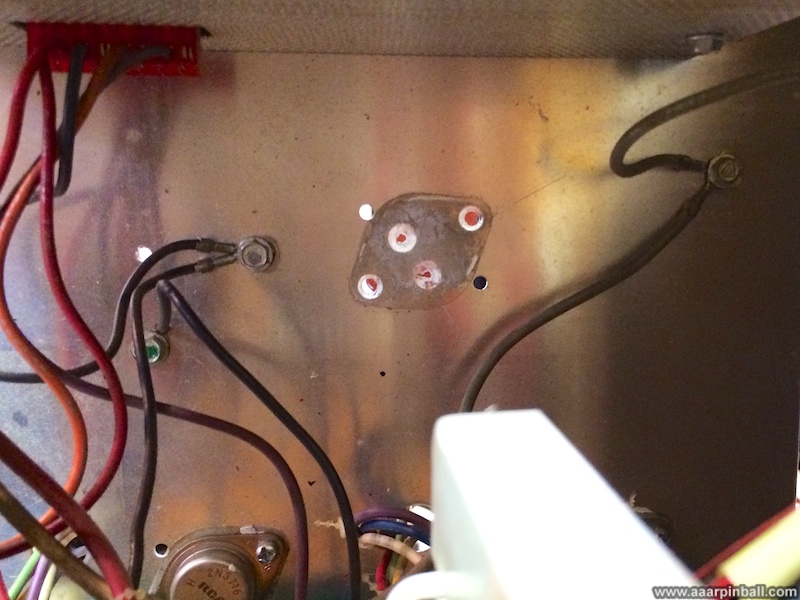
Looking from the other side, below you can see where the transistor was prior to its removal.
And a nice new transistor is installed, as pictured below.
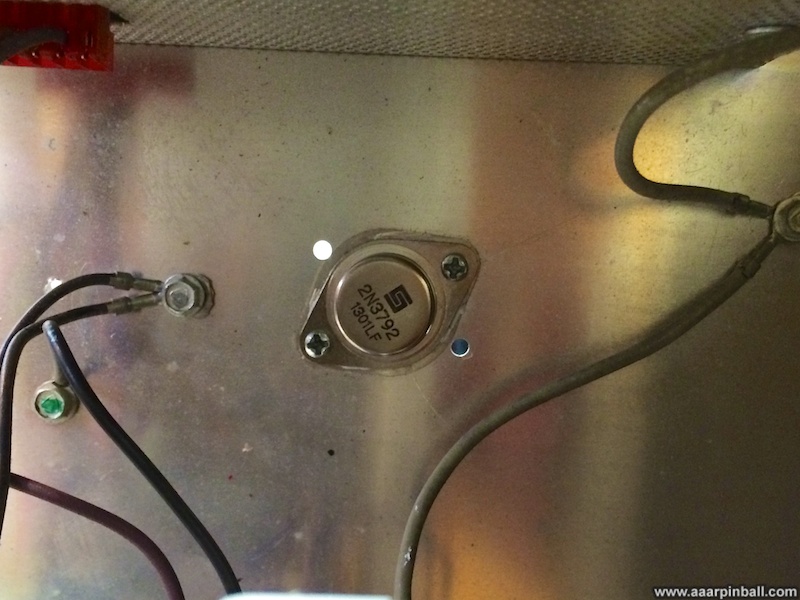
Replacing this transistor solved my problem. The lines are now straight all the way to the edge of the screen! This is shown below.
Monitor Convergence Adjustment
Original 5/8/2014 Updated 5/9/2014
Being a color XY monitor, there are 3 electron guns. One gun for red, one gun for blue, and one gun for green. Red/Green/Blue are display by having the related gun draw a line. Other colors can be draw by having the 2 or 3 of the guns draw the same line. When multiple guns are used to draw the same line, they need to draw on the exact same location on the monitor. If they are out of adjustment, they will draw near each other and not combine correctly. For example, instead of a white line you will have 3 parallel lines of different colors (red, green and blue).
The convergence of my Tempest's WG6100 monitor was off. Below is a close up picture showing the problem.

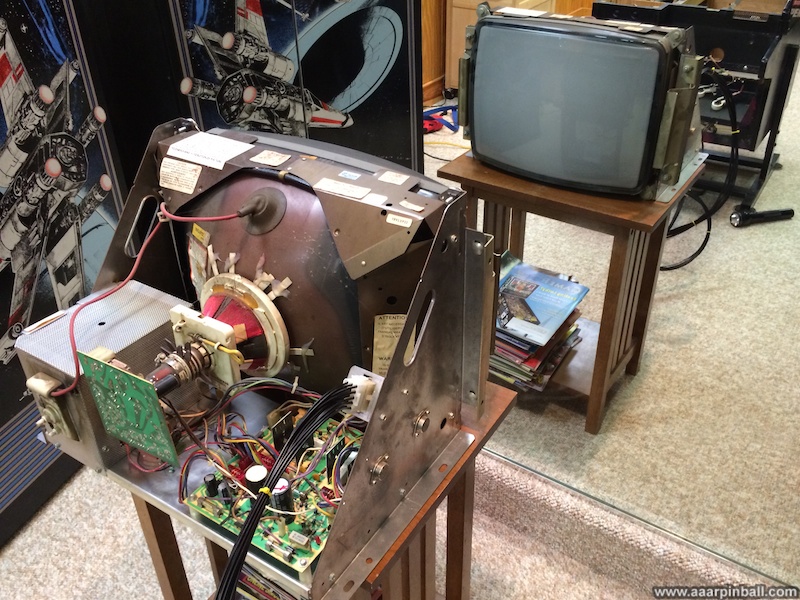
Removing the WG6100 from the cocktail cabinet isn't easy, but it involved opening up the control panels and removing several screws and so forth. Ultimately you pull the WG6100 straight up from the cabinet (it has "handles"). I moved it onto a table nearby and connected it back to the game with a WG6100 extension cable. This is what my setup looked like.
I have a large mirror on one side of my gameroom, this the mirror made it easy to watch as I made adjustments. Adjusting the convergence is fairly simple and explained well in the WG6100 manual. It involves moving tabs that are placed on the monitor's yoke. I only needed to adjust the middle set of tabs. The original tab positions are shown followed by the "converged" arrangement. Notice that the converged set are much closer together and ever so slightly moved toward the right (as viewed in this picture).
After performing the core convergence, there is a step to adjust the convergence for the outside of the image. I haven't performed that step yet as I'm going to install the cap kit first. Below shows my monitor's significantly improved convergence.
See my comments below about the wiggles appearing in the image.
Wiggles in the Vector Lines
Original 5/8/2014 Updated 5/13/2014
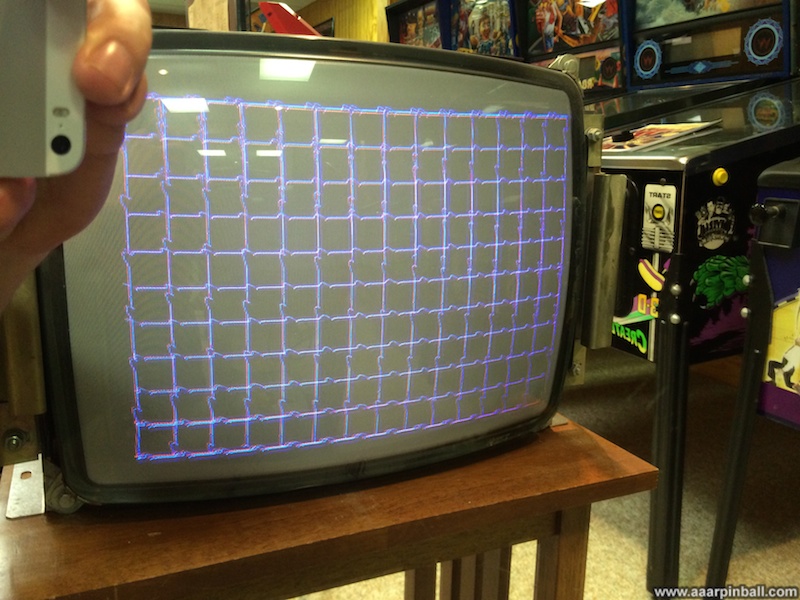
In addition to poor convergence, the WG6100 in my Tempest cocktail display "wiggles" in the lines. This is also referred to as EKG-like spikes in the lines. This is typically fixed by replacing some caps in the WG6100's high voltage section. The picture below shows the "wiggles" / EKG-like spikes. Look at the rectangle on the outside of the image.

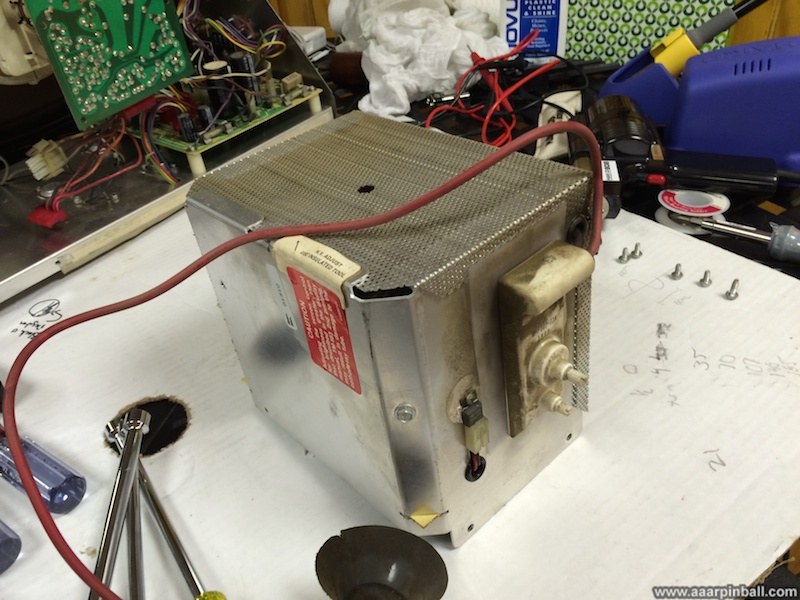
Luckily this is a well understood problem, caused by bad caps in the HV section of the WG6100 monitor. The HV section is contained within the metal cage shown in the picture below. The cage is in the bottom left.
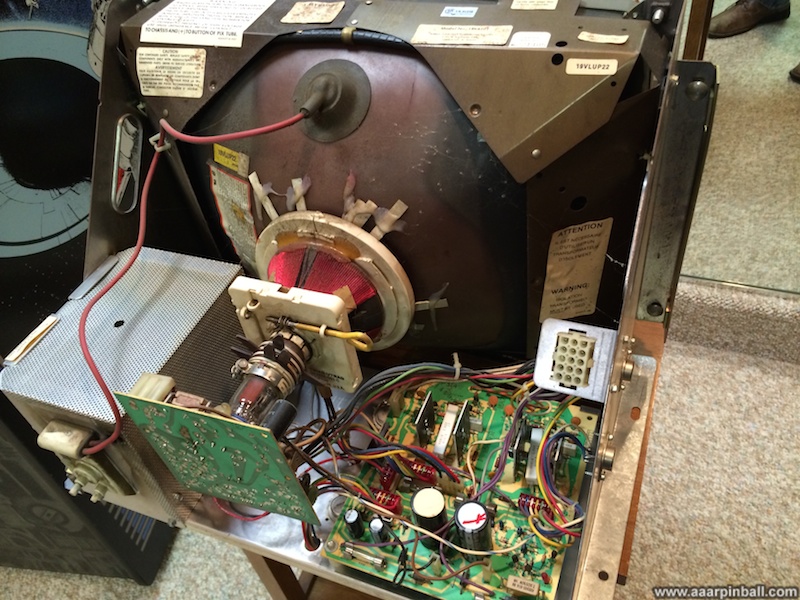
A closer picture of the HV cage is shown below. Attached to the cage is the screen (brightness) and focus controls.
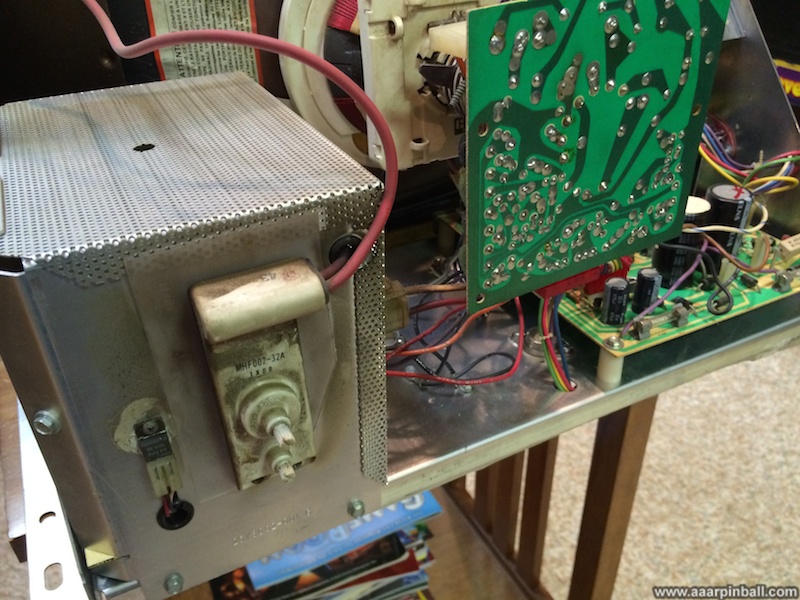
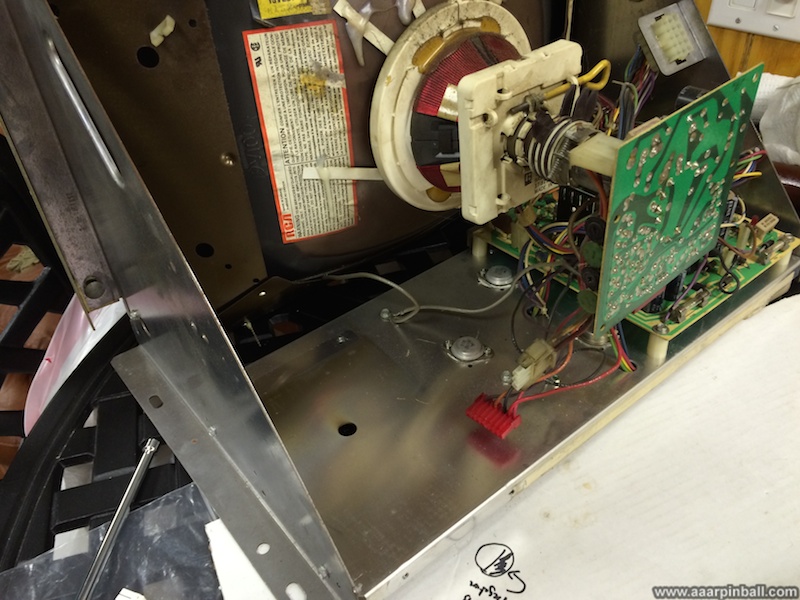
After removing several nuts, the HV cage separates from the monitor. The first picture below shows the cage removed from the monitor chassis and the second shows the cage by itself.
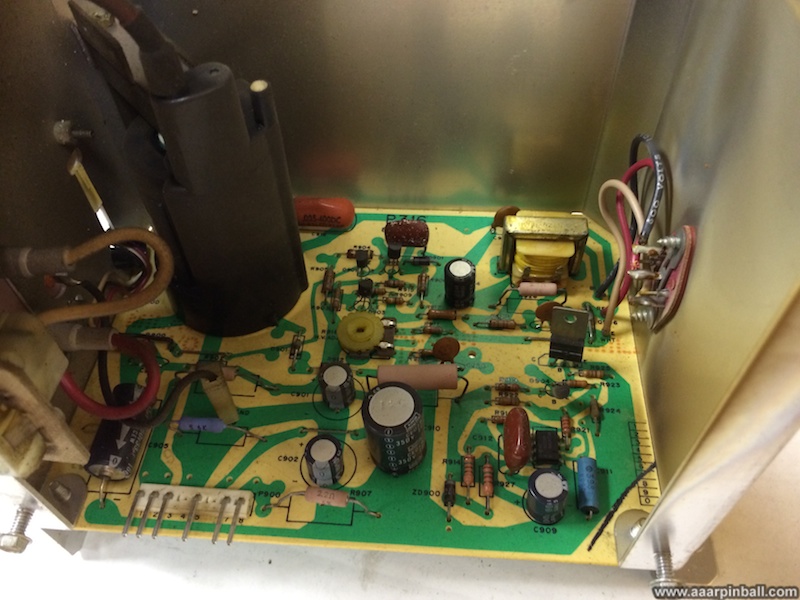
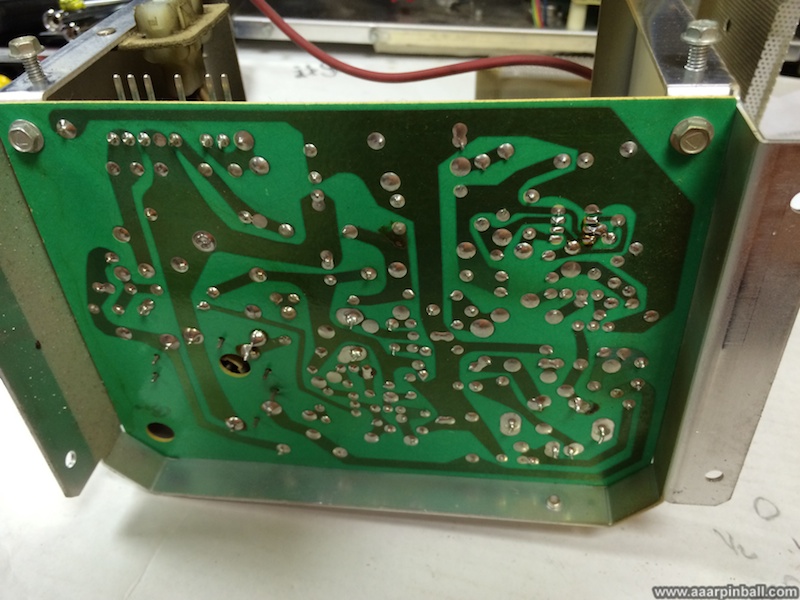
After removing a few more nuts, the HV PCB is visible. Below is a picture of the top of the PCB as well as a picture of the bottom.
I replaced the capacitors on the HV PCB and the wiggle/EKG problem was fixed. Below is a picture of the much improved display (although it hasn't been calibrated yet).
WG6100 Shutting Off / LV2000 Installation
Original 5/13/2014
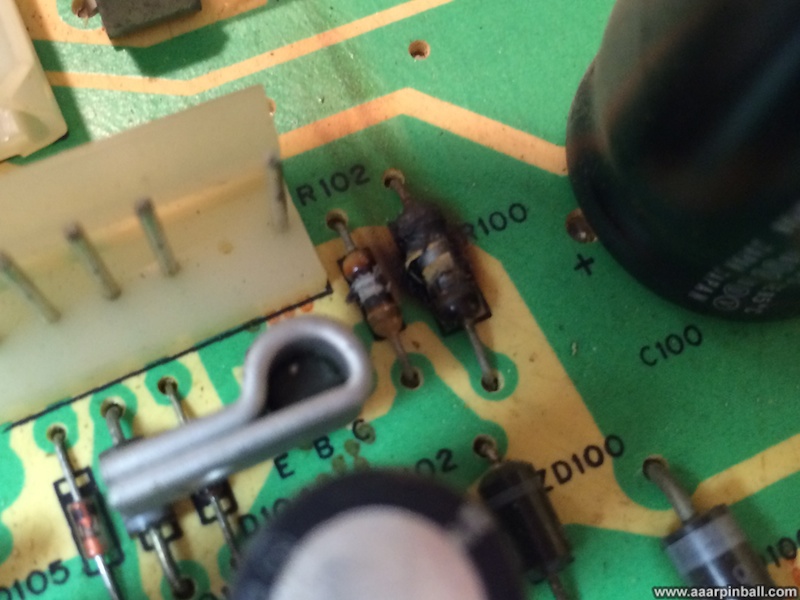
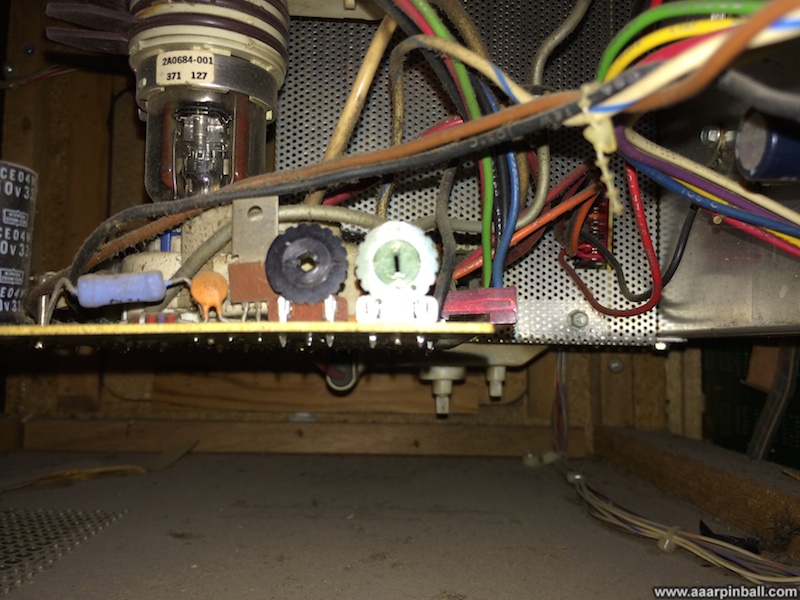
In addition to the EKG/Wiggle problem, my Tempest cocktail would frequently not display anything. It would work fine, then stop working. After several seconds or a few minutes, the monitor would start working again. I tracked this down to the low voltage section on the monitor's deflection PCB. The resistor R100 was in terrible shape (as shown below).
There is a significant amount of information regarding Tempest monitor repairs on the internet. Problems with the low voltage circuit are very common. So common, in fact, that there is an after-market solution that replaces the questionably designed low voltage section with a modern and robust version. This is called the LV2000.
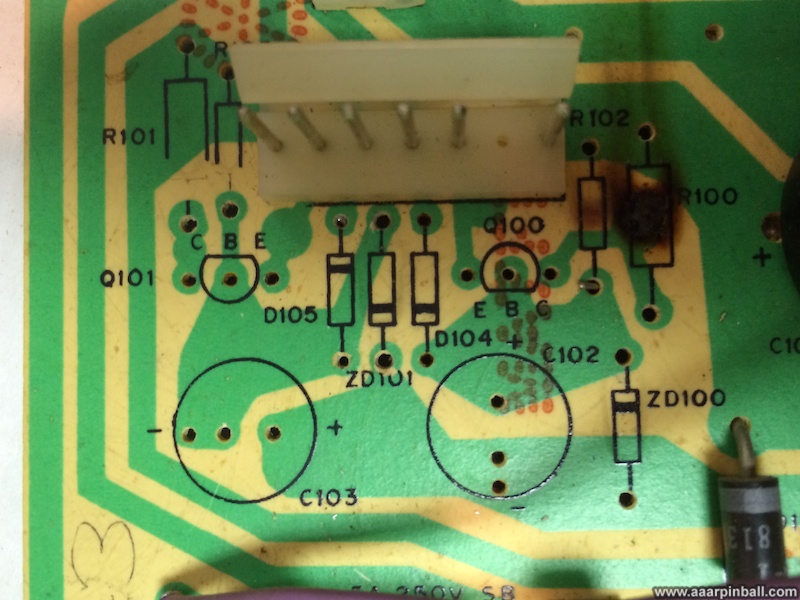
Installing the LV2000 is conceptually quite simple. It involves soldering 5 connectors in place. Oh, but there is one more thing... You need to remove all the original low voltage components. This involves desoldering many components. Below is a picture I took of the low voltage section of the deflection PCB after I removed all the components.
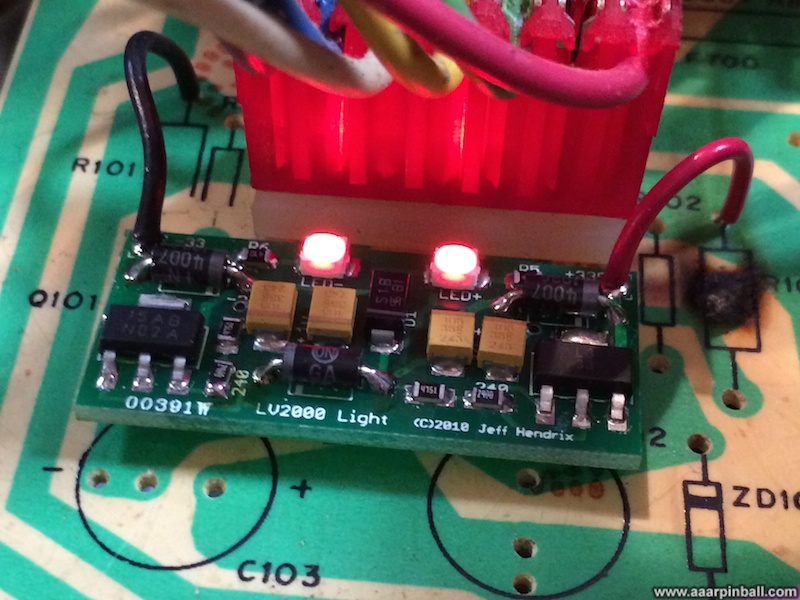
A picture of the installed LV2000 is shown below.
"Big Blue" Replacement
Original 5/13/2014
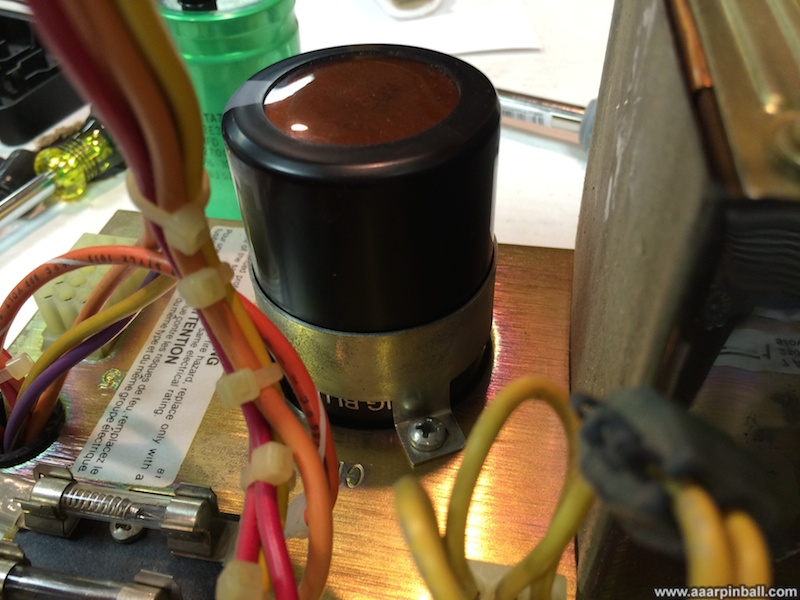
"Big Blue" is the informal name given to the big capacitor placed very early on in the AC power circuit. There is a lot written about "Big Blue". Some swear it is the root of all problems, others say it's often replaced needlessly. The "Big Blue" in my Tempest cocktail had been replaced at some time in the past because it wasn't the original blue color. I happen to have an extra one, so I decided to replace it.
Replacing big blue is very easy... A nut holds big blue in place and there are two screws that connect various wires to the capacitor's terminals. These terminals are shown below.

The newly installed "Big Blue" (which isn't blue on purpose, making it easier to tell if it has been replaced) is shown below.
Restoring the Cabinet to Original
Original 5/13/2014
When I got my Tempest cocktail, I thought the custom artwork was "interesting" but I never had any plans to keep one the cabinet. My plan was to restore the cabinet back to original. While some may find cocktail cabinets dull, I think they are very classy. I wouldn't want a whole gameroom full of them, but having one classic cocktail is a great addition.
When I brought my Tempest cocktail home, I quickly took pictures and posted them on one of the arcade forums. I was quite surprised when a good number responded that they liked the customer art and thought I should keep it. Based on this input, rather than starting the cabinet restoration right away, I decided to think about it a little more. After two weeks passed, I decided the custom artwork simply had to go. While I'll admit the custom art looks better in pictures than it does in real life, after having lived with the custom art for 2 weeks it was clear to me that the custom art was just "too much." In person there is nothing subtle about it and it doesn't have the classy original feel.
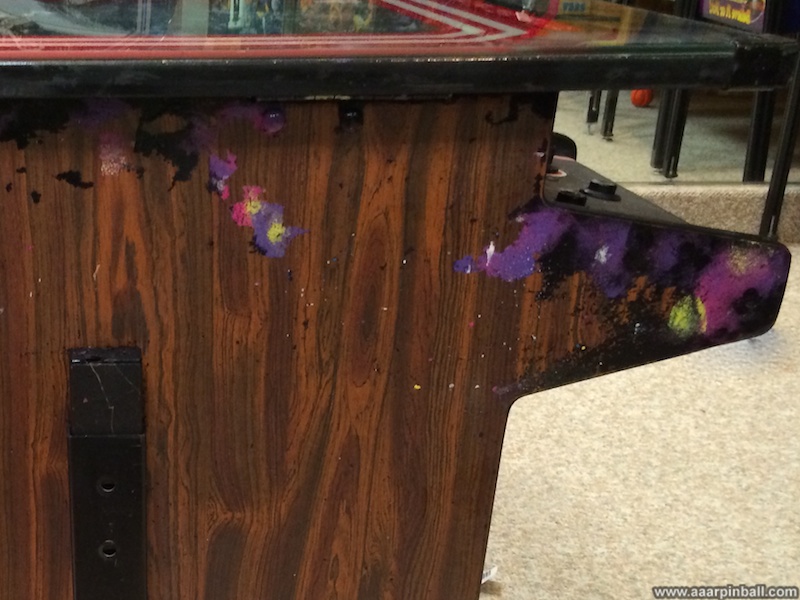
When I started removing the artwork, my first approach was straightforward. It required lots of "elbow grease" with small amounts of hot water and an old credit card. Since the paint appeared to be acrylic, I was hopeful it would be water soluble. I didn't want to use any strong chemicals for fear of damaging the original material under the paint. I found out that the hot water was effective is helping to loosen the paint.. After I put a little hot water on an area, I'd let it sit for 15 or so seconds, I would then start scraping at it with an old credit card. It took work, a lot of work, but the paint came off. The solid black areas were the easiest while the colored areas were much harder. I assume this is because the black is the base paint and other colors are on top, making them harder to remove.
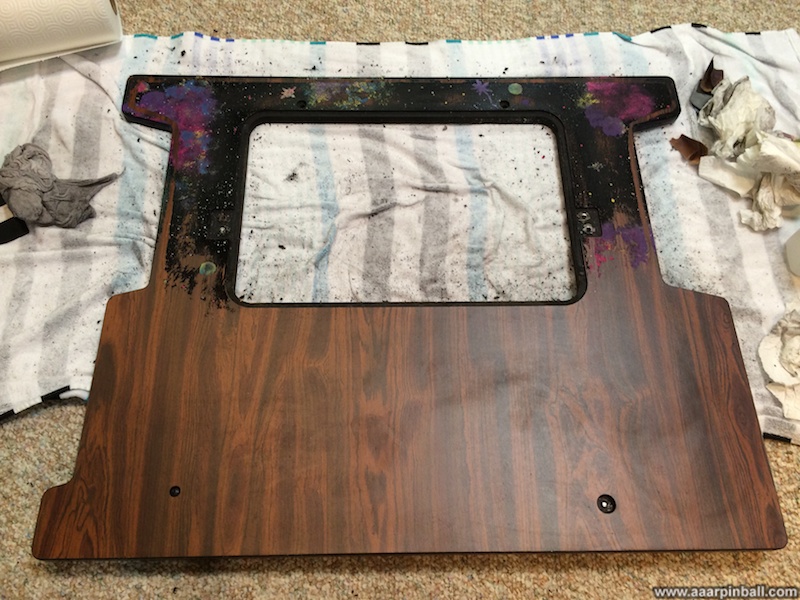
The image below shows the work about 85% done (there is some work remaining to do not pictured)..
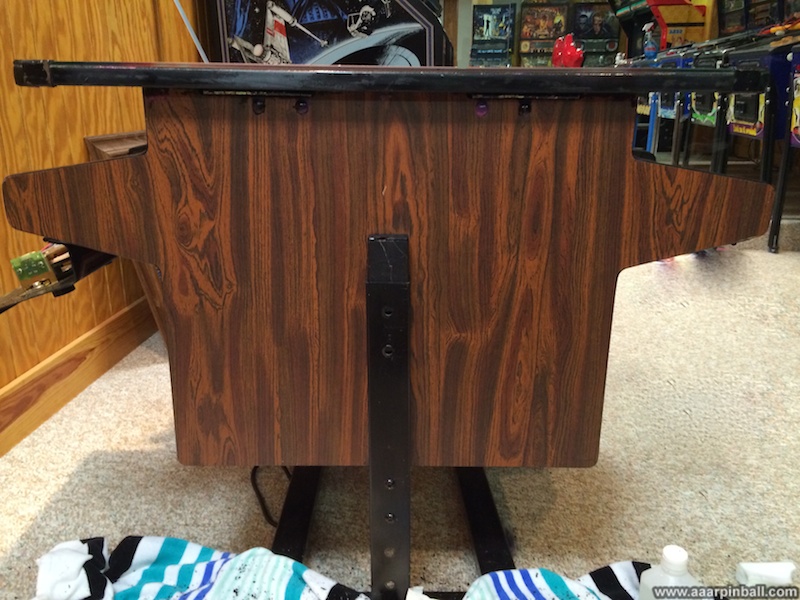
The initial results were very promising. I was hopeful the paint was protecting an original cabinet and removing the paint would reveal a like-new surface. After removing the paint, I found the original cabinet was in great shape! It was in almost perfect condition. Below is a picture of the 99% done effort.
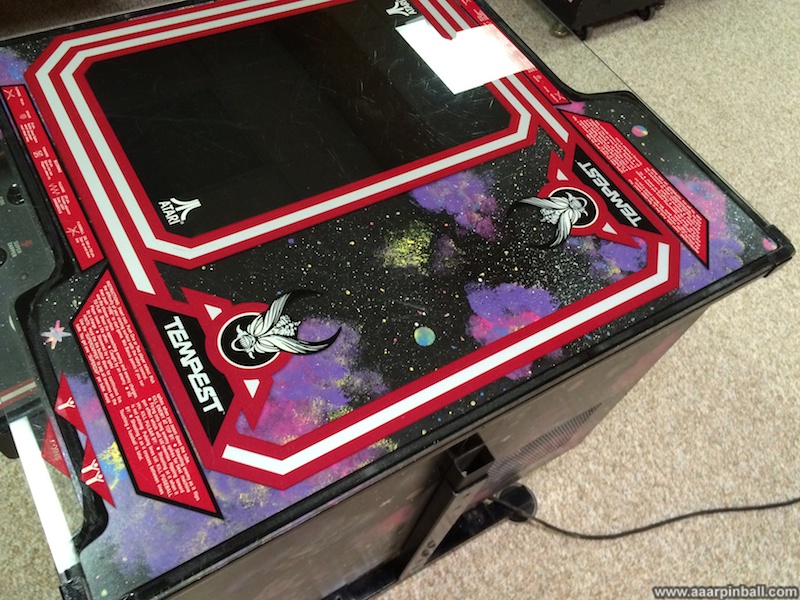
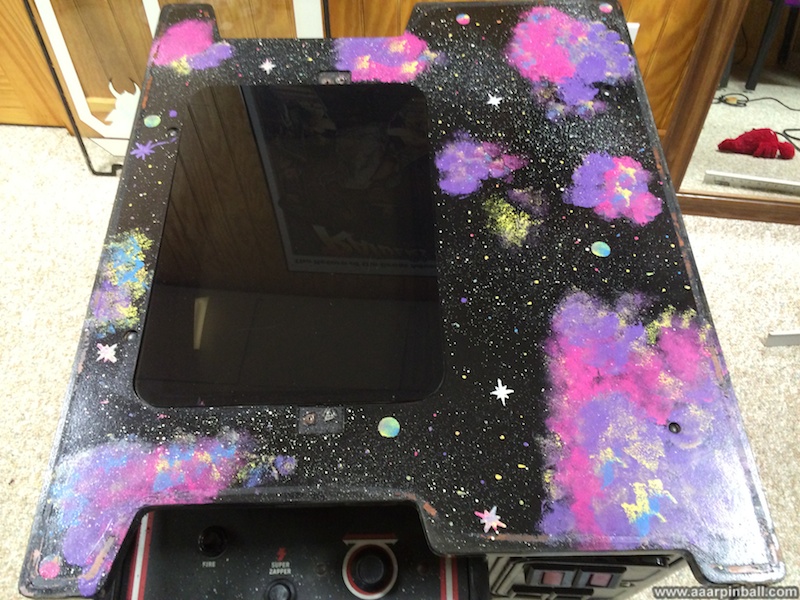
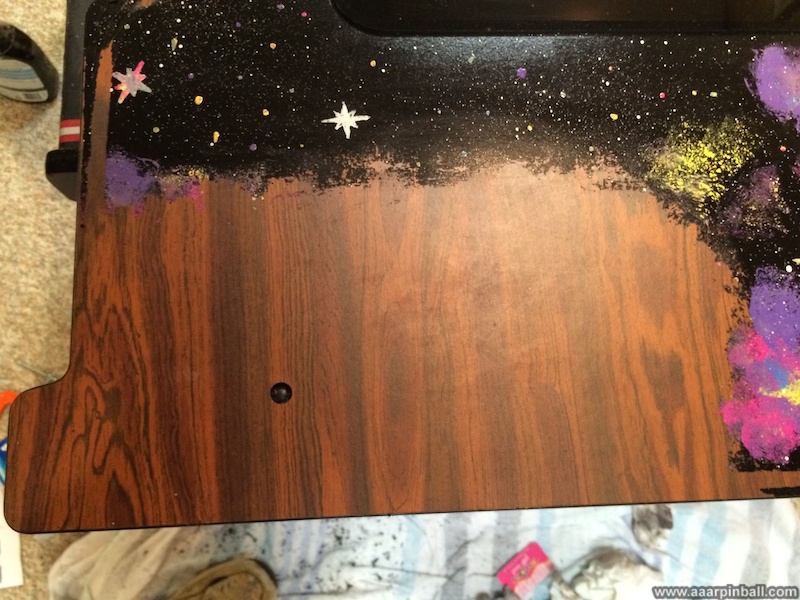
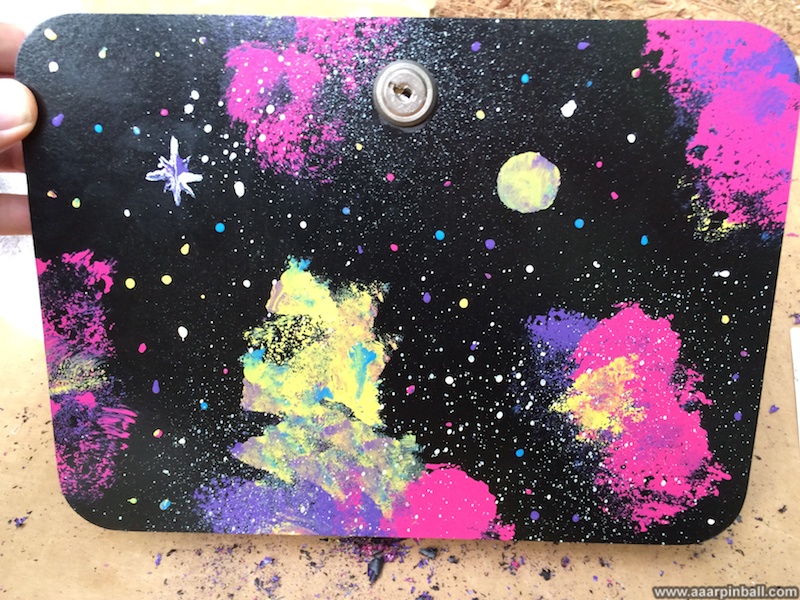
With the wood grained side restored, I decided to start work on the top. I removed the glass, which is held in place with 4 clips on each corner, to expose the surface. The blobs of nebula-like objects were much larger than I thought, as shown in the picture below.
I started removing the art using the same approach that I used for the wood grained side (discussed above). The artwork on the top was significantly harder to remove. There was, however, hope for a very nice final result. When the glass was removed, the "beer seal" around the corners pulled the artwork off the cabinet top and revealed pristine wood grain. This encouraged me to keep working, which was good, because progress was exceptionally slow.
After about an hour I had done a 2" by 2" area. The paint simply didn't want to come up. It appeared as if the paint was much ticker and, perhaps, a clear coat had been applied (perhaps to make it shine?). I decided a change in approach was needed as I'd never get it done using the current method.
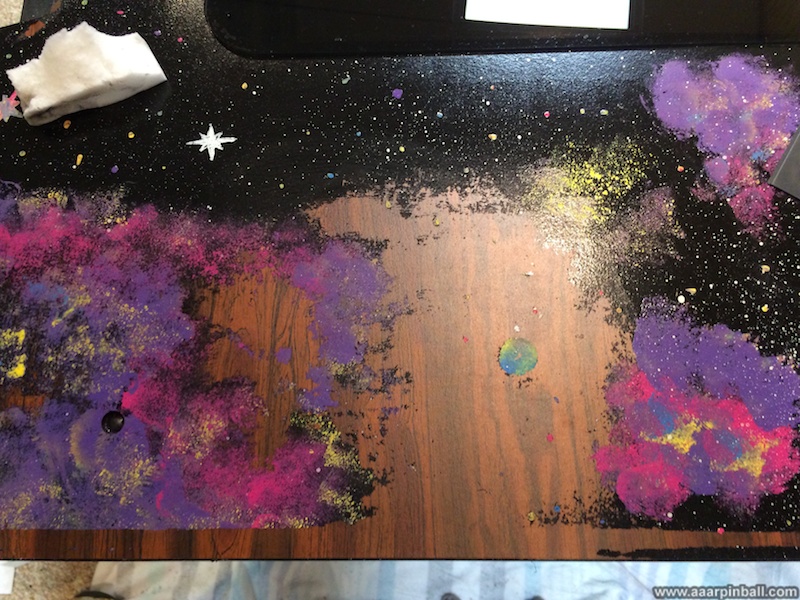
I switched to sandpaper, 91% isopropyl alcohol, and continued with my good old credit card for scrapping. I very (very!) carefully used 120 grit sandpaper to remove layers of paint. I gently sanded until the blues/yellows/pinks started showing areas of black. I then put the isopropyl alcohol on a rag and rubbed it (with force) on the art. I could see it was effective because the rag was turning black. After rubbing, I'd start scrapping the credit card. While this change in approach still wasn't easy, it started feeling about the same difficulty as removing the side art. My initial success with this revised approach is pictured below.
After about 2 hours, I had removed the custom art from much of one corner. This is shown below and in the following picture, which offers a wider angle.
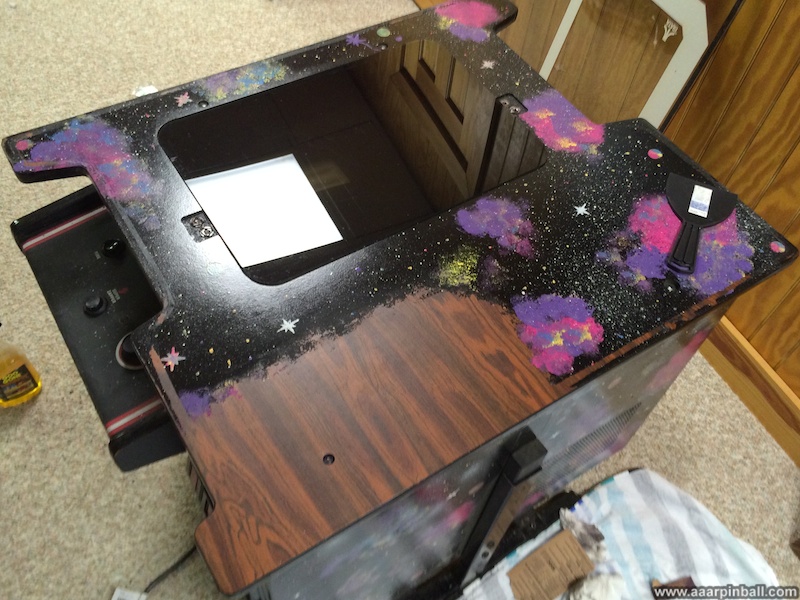
I took a break for a couple of hours and started working on the top again. I continued to use the sandpaper + alcohol approach. The picture below shows what it looked like while I was working on the other corner.
.jpg)
After that corner was finished, the top was looking great. Again, the results were very promising. The picture below shows the current progress.
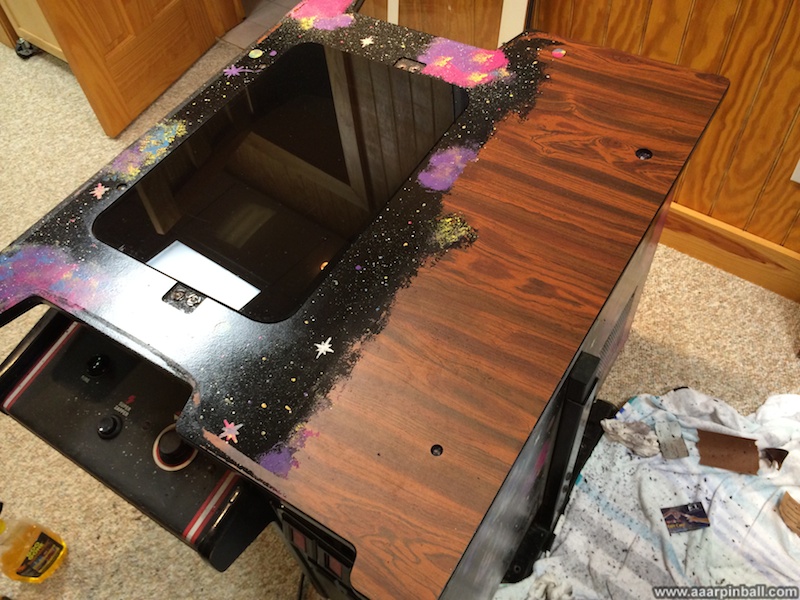
Since the remaining artwork was close to the tinted Plexiglas, I removed the Plexiglas. It is held in place with adhesive tape. This left the WG6100 monitor exposed, so I decided to remove the cabinet top from the base. The separated cabinet top is below.
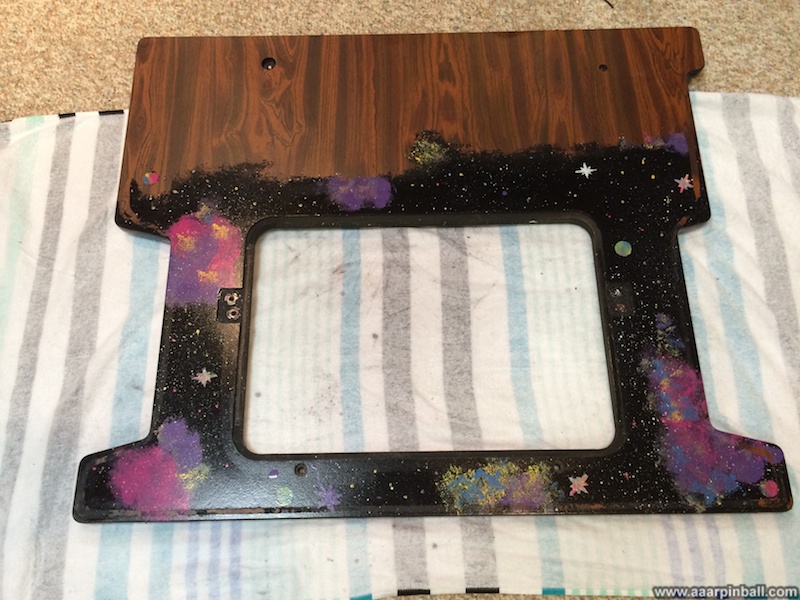
After more scrapping, a good portion of the original wood grain is visible.
Which leads up to the almost final picture below! If you look closely, there are a couple of paint speckles remaining.
.jpg)
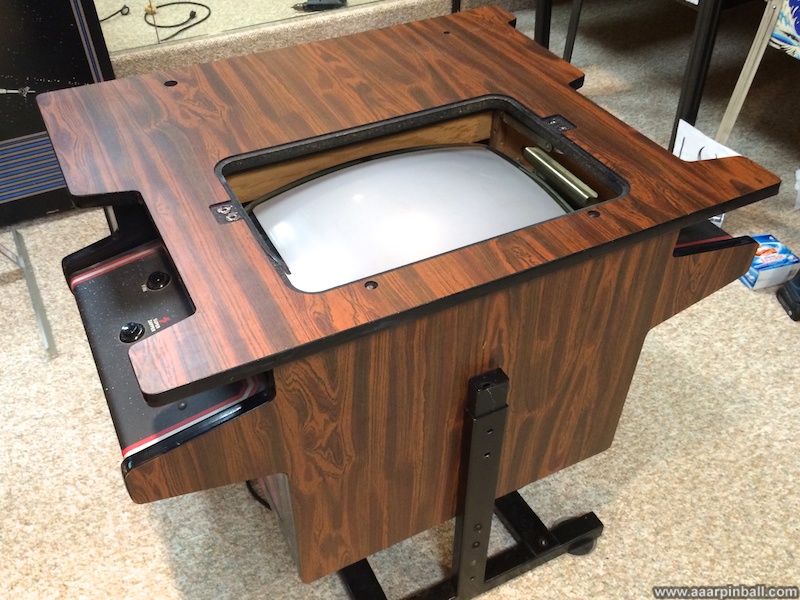
The cabinet top with the custom artwork removed looks brand new after completing the long process to remove the paint. I couldn't be happier with the results. After cleaning up some small paint speckles here and there, I put the top back on the cabinet. Looking snazzy, as you can see below!
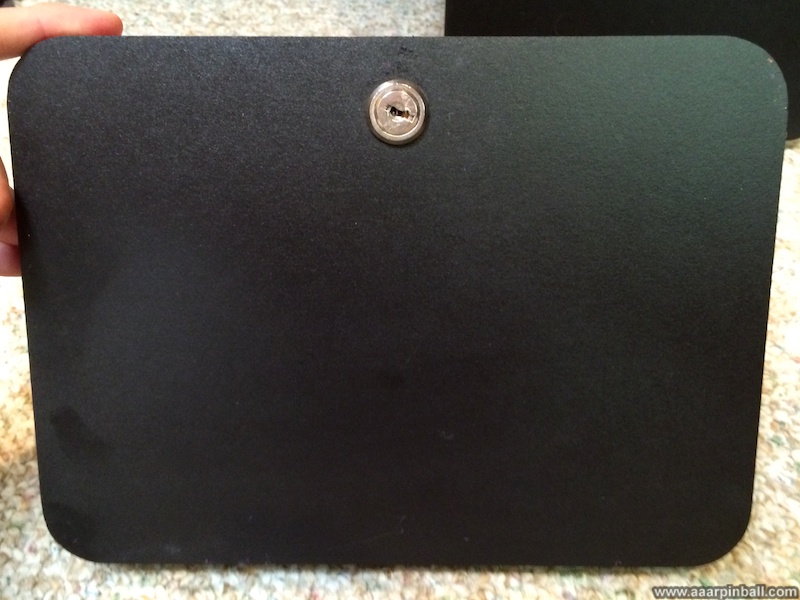
While the results couldn't have been better, I started looking for ways to speed up the process. A friendly arcade forum member that does restorations suggested that I try lacquerer thinner. I decided to test it out on the removable doors below both player 1 and player 2 sides. Using a rag, I got it wet with lacquerer thinner and placed the rag on the surface of the removable door. I let it sit for about 60 seconds. When I removed the rag, I could see much of the black areas had already started separating. I then used a credit card to scrape off the paint. Much of it came off quickly, but some stubborn areas (the non-black areas with multiple colors) took additional lacquerer thinner and scrapping. Still, this 3rd approach was easily 10x faster than my other two attempts. It also left the material looking new. The picture below shows one of the doors (with art) followed by the door with the paint removed.
I then used this approach on the player 2 side and removed the artwork from the tall section, as picture below.
Vectoring Tempest Cocktail Glass Top Artwork
Original 5/24/2014
I decided to play around with vectorizing the Tempest cocktail glass artwork. I'm no expert at this and it's a task in progress (one I may never complete). I used my scanner and scanned both player 1 and player 2 ends of the glass. I used a photo editing tool to combine all the scanned images and then cleaned up the scanned image. With a cleaned up image, I then played around with a tool to vectorize the image.
The results are very preliminary. I'm doing it simply to learn about vectorizing and to learn about the difficulty of the task. Below is a vectorized part of the Tempest's face (rasterized, of course, for this web page).

Various Pictures
Original 5/8/2014
Below are some various pictures I've taken which have no other place to go at the moment.


Miscellaneous Pictures
Original 1/19/2015